Verifying new employees during onboarding
Use PingOne Verify to automate identity proofing for new hires. By requiring a mobile-based government ID scan and biometric liveness check, PingOne Verify replaces slow, manual document reviews with a secure, digital-first workflow.
This process prevents ghost hiring, imposters, and insider threats, reducing HR risk by creating a secure audit trail before a new employee accesses company systems, business applications, or sensitive data.
|
PingOne Verify isn’t a Form I-9 U.S. Employment Eligibility Verification replacement. All employees must complete an I-9 as part of their contract signing. |
Example scenario
In this scenario, a candidate has been hired and must complete identity verification to gain access to the organization’s internal systems. To initiate onboarding:
-
After a contract is signed, the organization’s HR system initiates an automated onboarding workflow using PingOne Verify, sending a secure, one-time verification link to the new employee on their PingID application.
-
The organization orchestrates a verify transaction using PingOne DaVinci where the new employee downloads and sets up PingID on their mobile device to begin the high-assurance identity capture.
-
The employee scans their government-issued ID and performs a biometric liveness check.
-
The organization’s backend evaluates the results. Upon a successful match, the system updates the employee’s status to active.
-
The employee is redirected to a success landing page with instructions on how to access company resources and applications.
Goals
After completing this use case, you’ll know how to do the following:
-
Configure PingOne Verify policies to validate government-issued IDs and biometric liveness for secure employee onboarding.
-
Orchestrate a DaVinci workflow to automate the identity verification journey from the HR system to the employee’s mobile device.
-
Manage and audit verification results to confirm successful identity matches or manually approve employees to ensure day-one productivity.
What you’ll do
To set up the example scenario in this use case, you’ll:
-
Add or edit a PingOne Verify policy.
-
Orchestrate a DaVinci verify transaction.
-
View verification results or manually approve an employee.
Before you begin
Ensure you have the following:
-
A PingOne environment with the PingOne Verify and PingOne DaVinci services.
-
PingOne Verify Quick Start DaVinci Flow downloaded from the Ping Identity Marketplace.
Tasks
Setting up this onboarding workflow takes two main steps:
-
First, you’ll create your identity verification rules and connect them to an automated sign-up flow. Learn more in Task 1: Configuring PingOne Verify
-
Second, you’ll learn how to check a new hire’s verification status and manually approve them if they get stuck. Learn more in Task 2: Viewing verification results and manually approving an employee
Task 1: Configuring PingOne Verify
Configure PingOne Verify by creating a verification policy and orchestrating the secure transaction.
Adding a new or editing an existing PingOne Verify policy
Define the rules of identity proofing to ensure the person accessing your network is the same individual who signed the employment contract. By pairing biometric liveness with facial comparison, you anchor the digital onboarding session to a legal identity, preventing ghost hires, deepfakes, and imposters from infiltrating your organization before day one.
Steps
-
In the PingOne admin console, go to Identity Verification > Verify Policies.
-
Browse or search for the policy you want to edit, or click + to add a new policy.
For example, you could have a policy specifically for new hires that allows you to track and audit the actions taken by new hires during this initiation phase.
Result:
The Policy Details panel opens.
-
Click the Pencil icon ().
-
Enter or edit the following configurations:
Setting Recommended threshold Reasoning Government ID
Required
Prevents ghost hiring by anchoring the biometric to a legal identity.
Click the toggle in Fail Expired IDs to fail verification for expired IDs. This meets standard compliance for HR and legal right to work checks.
Facial Comparison
Medium or High
Ensures the live person is the same person on the ID.
Choose a high threshold if your policy requires a near-perfect match. Choose a medium threshold if you want to prioritize a smooth onboarding experience. A medium threshold setting is more forgiving of environmental factors, such as dim lighting or lower-quality mobile device cameras, that might otherwise cause a legitimate ID to be rejected.
Liveness
High
Requires the employee to provide a selfie for verification.
Select 2 or 3 Selfie Retry Attempts to account for poor lighting or bad angles without failing the whole onboarding process immediately.
-
Click Save.
-
(Optional) Configure one or more languages and modify the PingOne Verify text fields that are presented to the employee in notifications and agreements. Learn more in Configuring language localization.
Orchestrating a DaVinci verify transaction
You must bridge the gap between your policy and the employee’s mobile device. Orchestration is the engine that sends the verification request and handles the response.
|
This orchestration uses PingID for document capture. The employee can find downloading instructions in the PingID downloads page. |
Learn more about orchestration methods.
Steps
-
In DaVinci, on the Flows tab, click + Add Flow and select Import Flow.
-
Upload the PingOne Verify Quick Start DaVinci Flow and click Import.
-
Update the PingOne Verify Quick Start flow with your PingOne Verify policy.
-
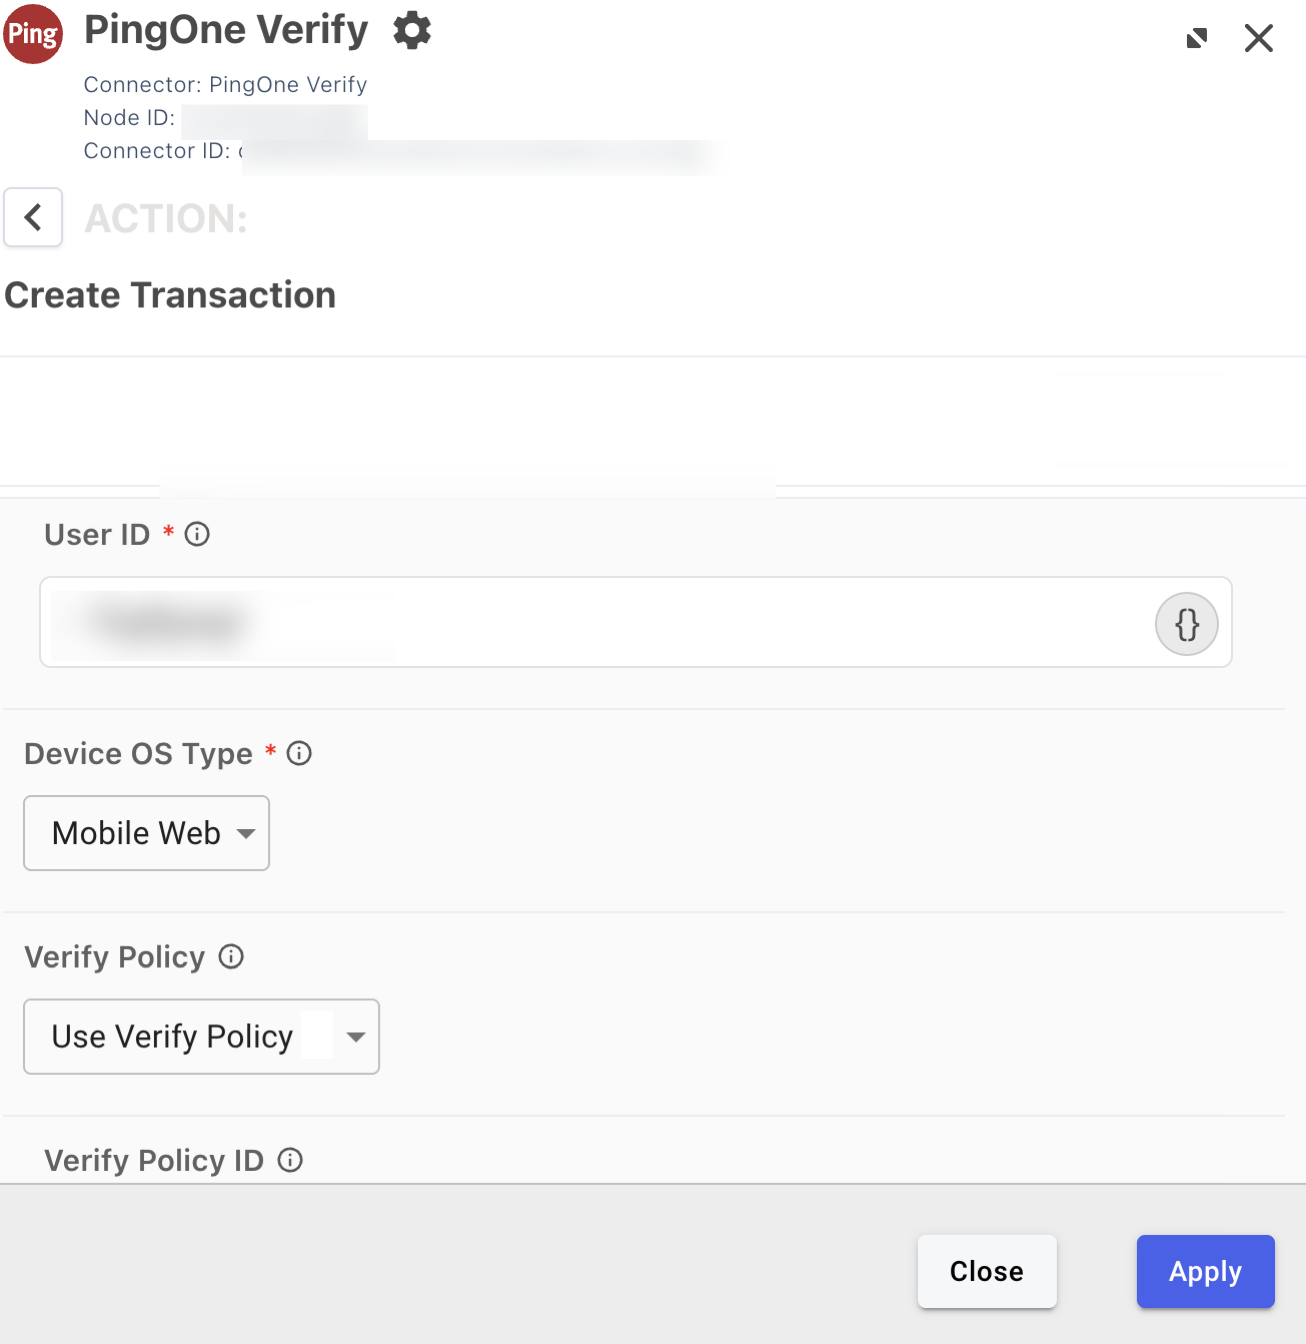
Click the PingOne Verify Create Verify transaction node in the flow.
-
In the Verify Policy list, select the policy you configured.
Locate the Determine Device Type node.
-
If the employee is using a desktop, Determine Device Type node triggers the Display QR code node. The employee scans this with their phone to open the PingID app.
-
If the employee is using their mobile device, the node provides a direct link to the Apple App Store or Google Play to ensure PingID is installed.
-
-
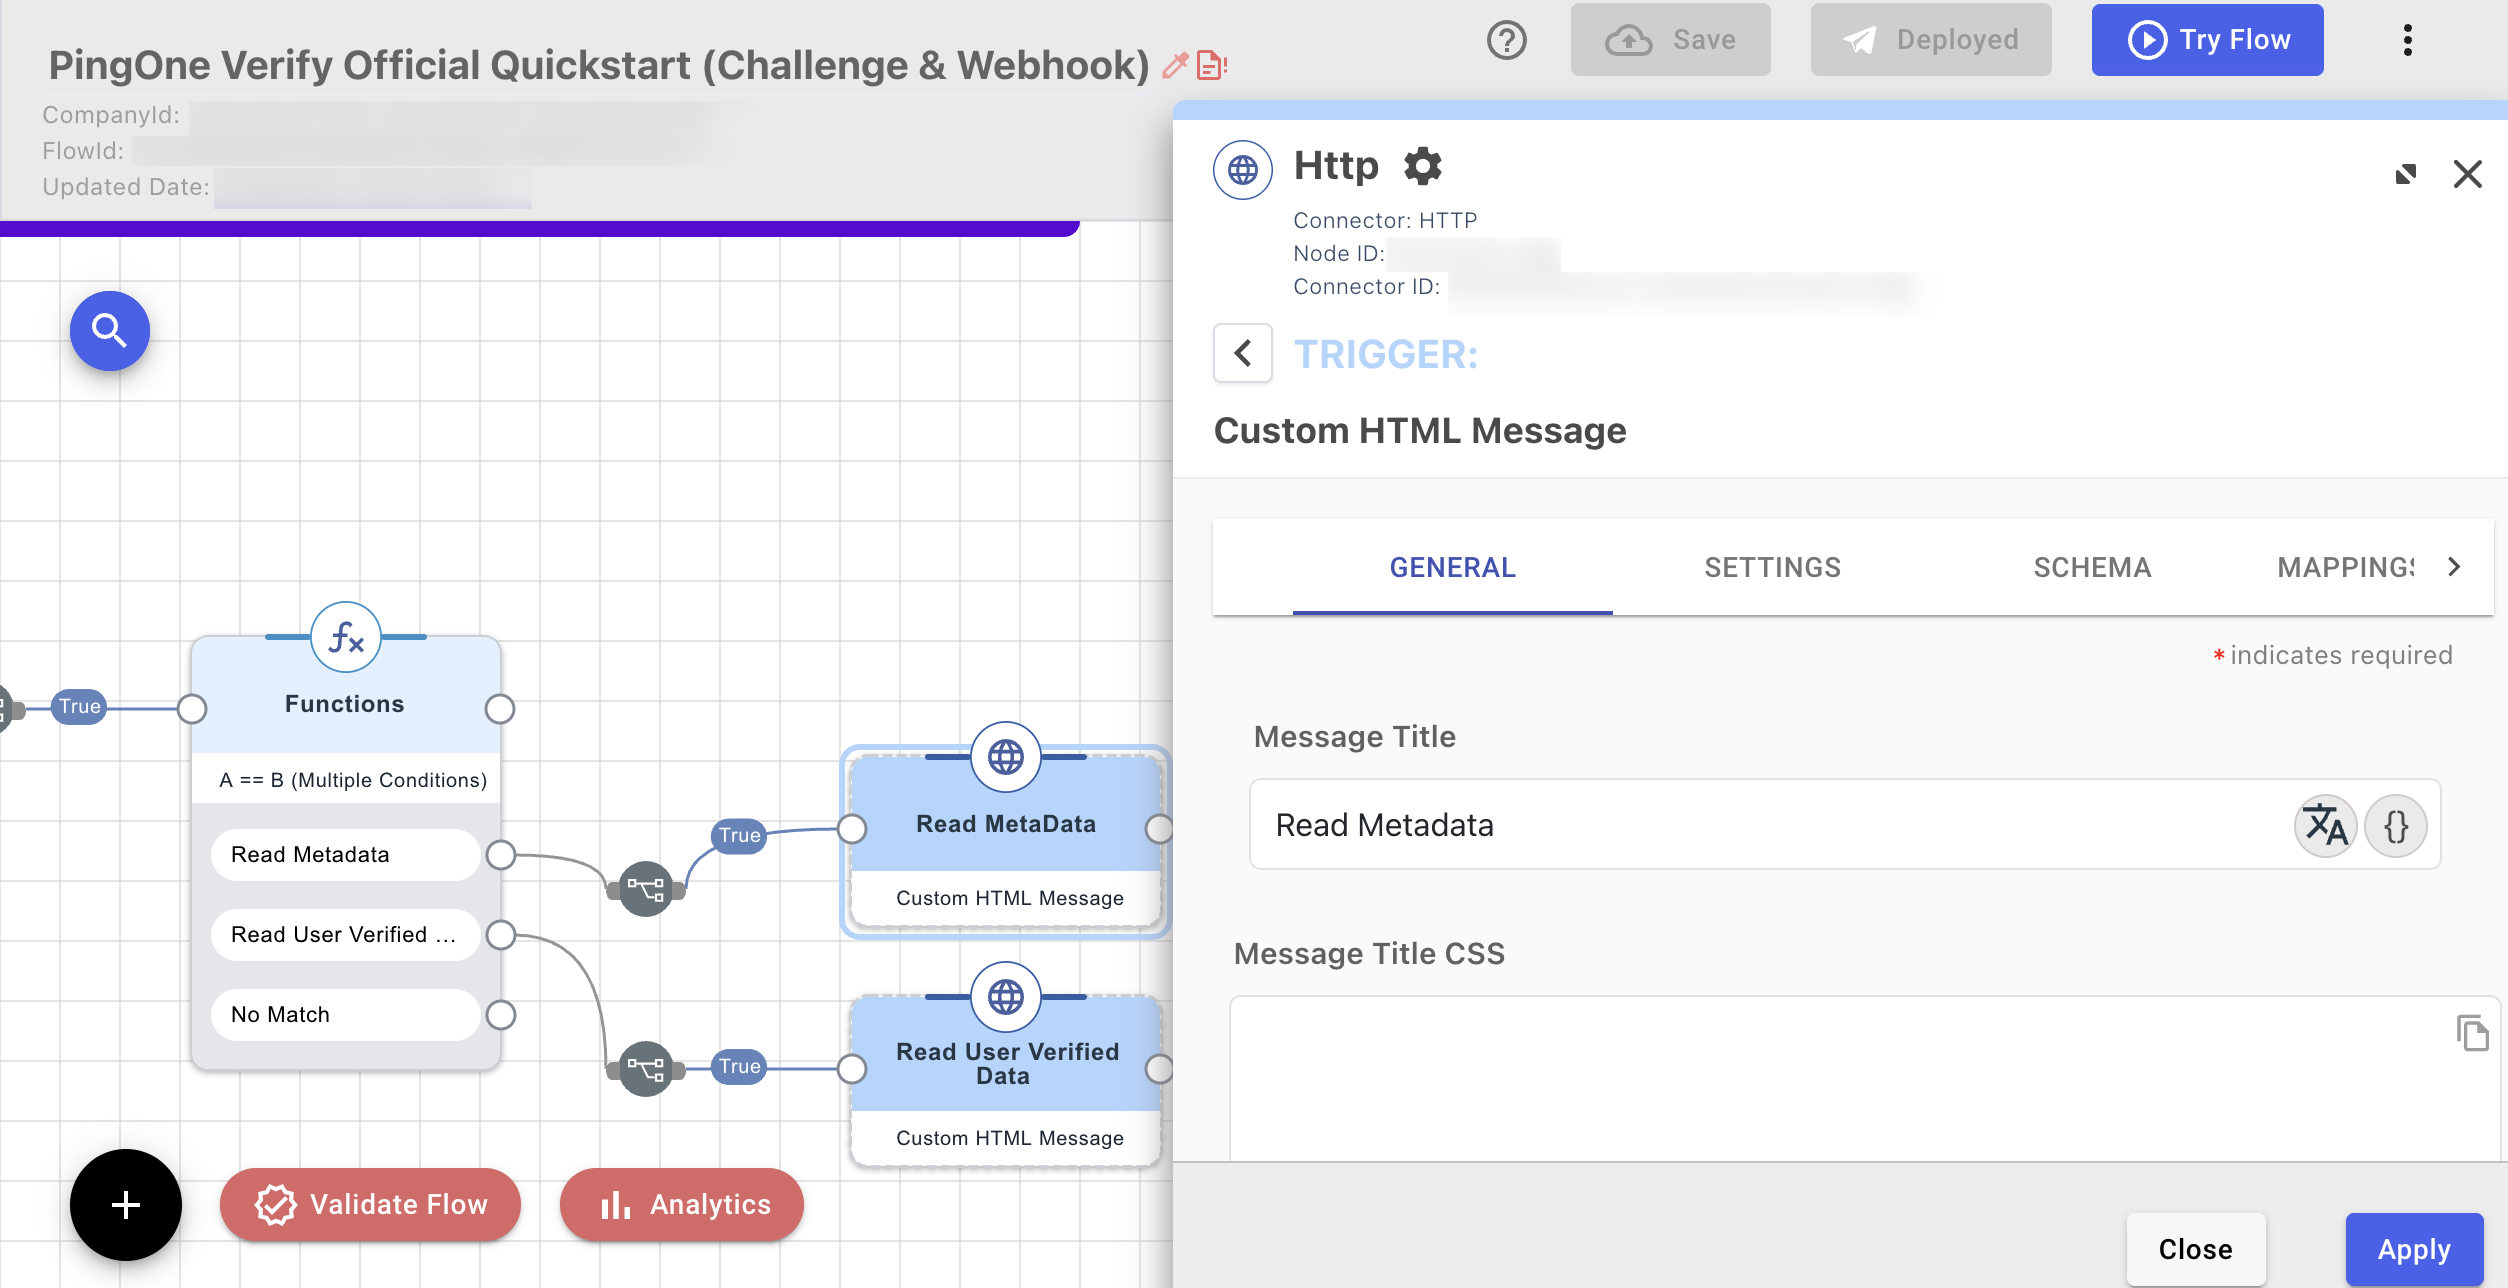
Add a custom message in the Read Metadata node at the end of the flow to point to your corporate welcome portal.
-
Click Apply.
Task 2: Viewing verification results or manually approving an employee
Monitoring verification transactions allows HR and Security teams to ensure that only identity-proven individuals move from new hire to active status. In this onboarding use case, reviewing these results is your final security gate to confirm that the person who signed the contract is the same person accessing your corporate network.
This is necessary to:
-
Create a permanent record of identity proofing for legal and HR audits.
-
Identify a fail status early and investigate potential ghost hires or deepfake attempts before system access is granted.
-
Identify partial or fail statuses caused by poor image quality and reach out to the employee to ensure they’re ready for their first day.
Viewing verification results
Accessing verification results allows you to evaluate real-time status updates, review transaction IDs, and ensure compliance before granting network access.
Steps
-
In the PingOne admin console, go to Directory > Users and browse or search for the employee you want to view.
-
Click the employee entry to open the employee details panel.
-
In the employee details panel, go to Services > ID Verification to view the verification status and results for the employee.
For each Transaction ID, the status of the employee ID verifications, including a timestamp and the result, is displayed.
-
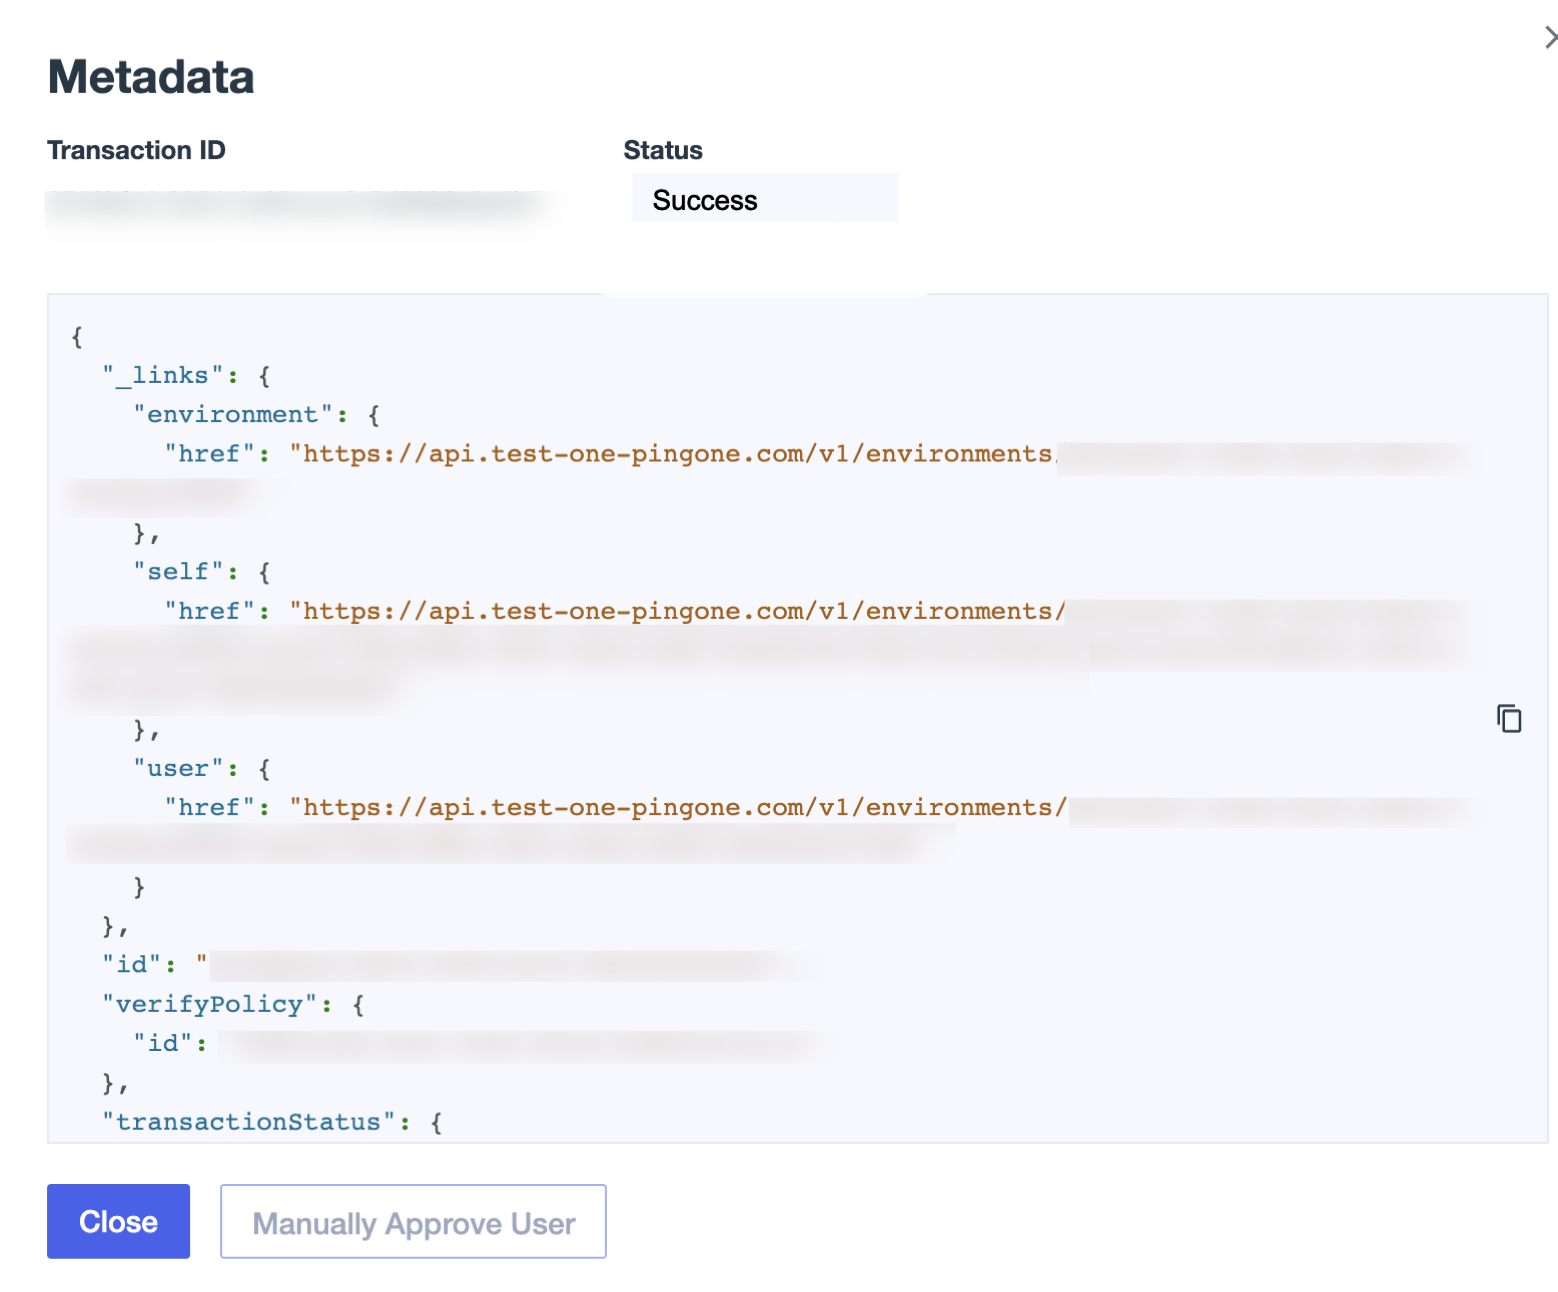
Click View to view the metadata result for a specific transaction ID.
The following table shows verification statuses and the recommended action to take.
Status Definition Action required Requested
The system has generated a verification request for the new employee.
Monitor for status change to Initiated.
Initiated
The new employee opened the link or scanned the QR code to begin the session.
None. The new employee is currently active in the session.
In progress
The new employee has submitted their ID, and the service is validating the document.
None. Awaiting service provider (SP) results.
Partial
One step is complete, but another is pending.
Send a reminder or re-trigger the link for the employee to finish the missing step, such as providing a selfie.
Success
Identity is validated. The transaction met all policy thresholds.
Proceed with provisioning or verify the Active status in the directory.
Approved manually
An administrator bypassed the automated results to verify the new employee.
Review audit logs to ensure manual verification was documented.
Approved no request
The transaction was approved by an admin before the employee started the process.
None.
Fail
Validation failed due to fraud, unsupported documents, or poor image quality.
If the failure is due to image quality, ask the new employee to retry.
If the metadata suggests document tampering or a live person mismatch, don’t proceed. Escalate to your Security team for investigation.
Verified personally identifiable information (PII) is stored temporarily for 30 minutes in the verification service before being deleted. Only the final verification status and configured verified claims are retained in the identity record.
Manually approving an employee
Automated checks could fail due to damaged ID cards, lens glare, or minor data mismatches. Manual approval allows HR administrators to intervene, bypassing policy requirements to activate the employee’s directory status and resume the DaVinci onboarding orchestration. This prevents first-day lockouts while maintaining a secure, documented audit trail of the override.
Steps
-
In the PingOne admin console, go to Directory > Users and browse or search for the employee you want to edit.
-
Click the employee entry to open the employee details panel.
-
In the employee details panel, click the Services tab > ID Verification to view the verification details for the employee.
-
Click View, then Manually Approve.
Result:
-
The employee’s directory status changes from inactive to active.
-
The DaVinci flow receives the approval signal and redirects the employee’s phone or browser to the success landing page, where they receive their corporate sign-on instructions.
-
The transaction is marked as
APPROVED_MANUALLY. This ensures that if a security audit occurs later, the organization can see exactly which administrator authorized the access and why.Because manual approval bypasses biometric security, always document the reason for the override in the employee’s HR record or the PingOne user notes to maintain a secure audit trail.
Next steps
To monitor identity verification transaction activity for your organization filtered by your choice of date and PingOne Verify policy, learn more in using the Identity Verification Dashboard.
Validation
After you’ve configured your policy and orchestrated the flow in DaVinci, you’re ready to verify the identity proofing part of your onboarding process.
Testing the employee experience
Perform this test to simulate the journey of a new hire and ensure the PingID integration is functioning as expected:
-
In DaVinci, click Try Flow to run the flow and trigger a PingOne Verify transaction.
-
Follow the prompts within PingID to scan a government-issued ID and perform the biometric liveness check.
-
Verify the browser or application redirects you to the success landing page for your corporate portal.
Verifying results
Reviewing transaction data ensures your policy thresholds, such as liveness and facial matching, are effectively blocking unauthorized access without hindering legitimate hires. This validation confirms that no ghost hires or imposters have bypassed your perimeter, providing a verified link between a digital record and a real-world person.
To confirm PingOne Verify correctly updated the employee’s permissions and directory status:
-
In the PingOne admin console, go to Directory > Users and select the employee.
-
Verify the transaction shows a status of Success on Services tab > ID Verification.
-
Click View on the latest Transaction ID and review the metadata.
-
Confirm the Liveness and Facial Comparison scores meet your high or medium thresholds.
-
Verify the Government ID was correctly validated and the transaction shows Success.
-
-
If a transaction shows a Fail status, review the metadata to determine your next steps:
-
For image quality issues, ask the new employee to retry the scan in better lighting or at a different angle.
-
For security alerts, if the metadata suggests document tampering or a biometric mismatch, stop the onboarding process immediately and escalate the case to your Security team.
-
For damaged documents, if the automated check fails but you have verified the identity through other means, use the Manually Approve option to move the employee to Active status.
-
-
Confirm the employee’s status has been updated to Active. This verifies your DaVinci orchestration successfully updated the directory after the verification match.
Troubleshooting
Delays in identity verification directly impact an employee’s first-day productivity and their first impression of the organization. If the process stalls, the employee remains inactive in the directory and is blocked from essential tools.
Use the following table to resolve common issues and ensure a smooth onboarding experience.
| Issue | Potential cause |
|---|---|
QR code doesn’t open PingID |
The employee is using their phone’s camera app to scan the QR code, which opens Web Verify in a browser. They need to open the PingID app specifically to scan the code. |
QR code isn’t displayed |
Return to the Create Verify Transaction node in DaVinci and ensure you selected your specific policy from the list. |
Policy not applied |
Return to the Create Verify Transaction node in DaVinci and ensure you selected your specific policy from the list. |
Partial status |
The employee likely completed the government ID scan but closed the PingID app before finishing the biometric liveness check. Send a reminder or re trigger the link for the employee to finish the missing step. |