Adding a custom resource
Use the Resources page to add a custom resource to PingOne.
Steps
-
In the PingOne admin console, go to Applications > Resources.
-
In the Create Resource Profile step, enter the following information:
-
Resource Name: A unique identifier for the resource.
-
Audience (optional): The intended audience for the resource. If you don’t provide a value, PingOne will default to the resource name.
-
Description (optional): A brief description of the resource.
-
Access token time to live (seconds): The maximum time that the access token will be valid for use in the application, in seconds.
-
-
Click Next.
-
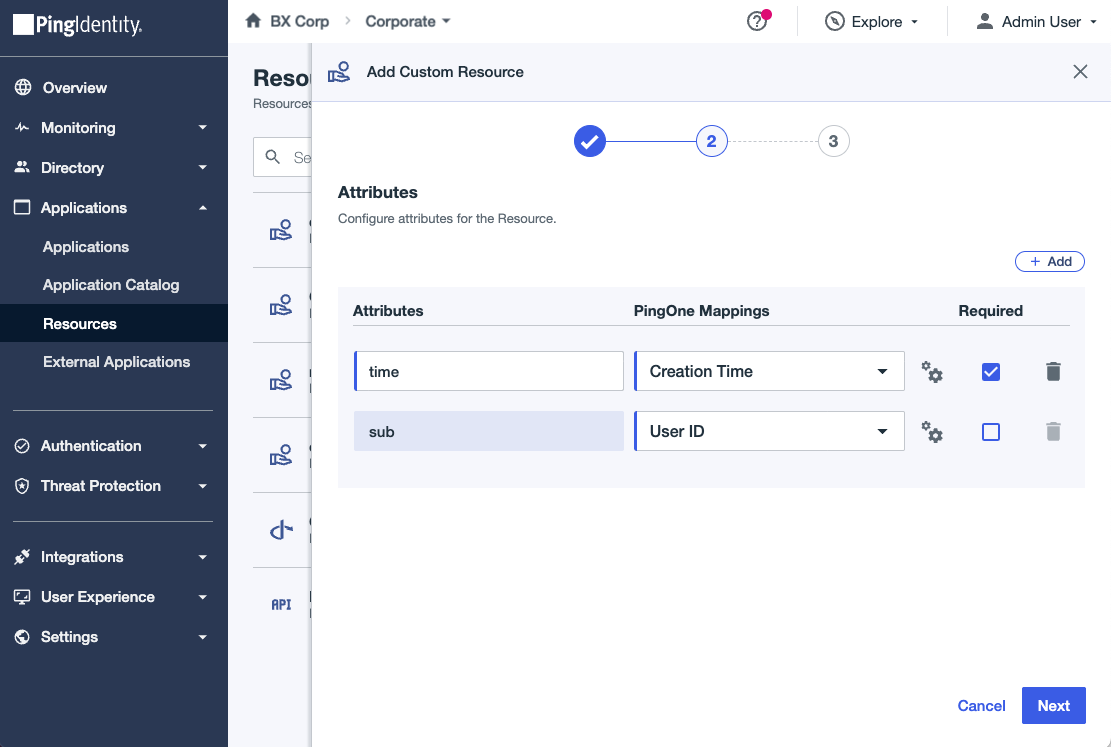
In the Attributes step, map resource attributes to user attributes in PingOne.
Resources can use JSON attributes in their attribute mappings. You can use these attributes to pass complex information to applications through an access token. Learn more in Adding user attributes.
-
Enter a resource attribute and then select the corresponding PingOne attribute in the list.
For example, you could map the
OIDC family_nameattribute to the PingOneFamily Nameattribute. -
(Optional) Click the Gear icon () to use advanced expressions. Learn more in Using the expression builder.
-
(Optional) Select the Required checkbox to make the attribute required.
- For any attributes except the
subattribute -
If it can’t find a value for an attribute set as required, PingOne doesn’t issue an access token for the resource and instead issues an error message in the token response.
- For the
subattribute -
The following table lists how PingOne handles the
subattribute based on whether it’s set as required and what grant type the application is using:subset as required?Application grant type If PingOne can’t find an attribute mapping value? Yes
Any grant type requiring user interaction, such as authorization code
PingOne doesn’t issue an access token for the resource and instead issues an error message in the token response.
Yes
Client credentials
PingOne doesn’t issue an access token for the resource and instead issues an error message in the token response.
No
Any grant type requiring user interaction
PingOne populates the
subattribute with the PingOne user ID of the authenticated user.No
Client credentials
PingOne returns an access token without including the
subattribute.
- For any attributes except the
-
To add more attributes, click Add and enter an attribute and the corresponding PingOne mapping.
-
To delete an attribute, click the Delete icon () for the appropriate attribute.
-
-
Click Next.
-
In the Scopes step, configure the appropriate scopes for the resource. Each resource can have one or more scopes.
To add a scope, click Add Scope and enter the following:
-
Scope Name: The name of the scope to be used for this resource. Scopes are defined by the resource server.
-
Description (optional): A brief description of the scope.
-
-
Click Save.
Next steps
-
You can add more scopes to the custom resource. Learn more in Editing a resource.
-
With PingOne Authorize, you can define application resources and permissions to set up role-based access control for the custom resource. Learn more in Application permissions and Editing a resource.
-
You can enable an OIDC-based application to request scopes from multiple resources in a single request. Learn more about the Request scopes to access multiple resources option in Editing an application - OIDC.