Defining your API in PingOne Authorize
Define a managed API service to represent your API so that PingOne Authorize can help your API gateway enforce access control.
An API service allows PingOne Authorize to recognize requests for your API and instruct your API gateway to block access for unauthorized clients and allow it only for authorized clients.
An API service definition specifies:
-
Pointers to the API and to specific parts of the API that you want to protect
-
Whether access tokens for the API service are issued by PingOne SSO or an external token source
-
The PingOne resource associated with the API service (this is specified only when PingOne SSO is the token source)
-
Whether custom access control policies for complex authorization scenarios are enabled for the API service
Learn more in API services.
|
You can define up to 25 API services in each environment. |
You must deploy the API service after you make configuration changes, such as updating settings, or adding or updating operations or custom policies.
Before you begin
If you’re using an external token source, add an external OAuth server to allow PingOne Authorize to validate access tokens from this issuer.
Steps
-
In the PingOne admin console, go to Authorization > API Services.
-
Click the icon next to API Services to add an API service.
-
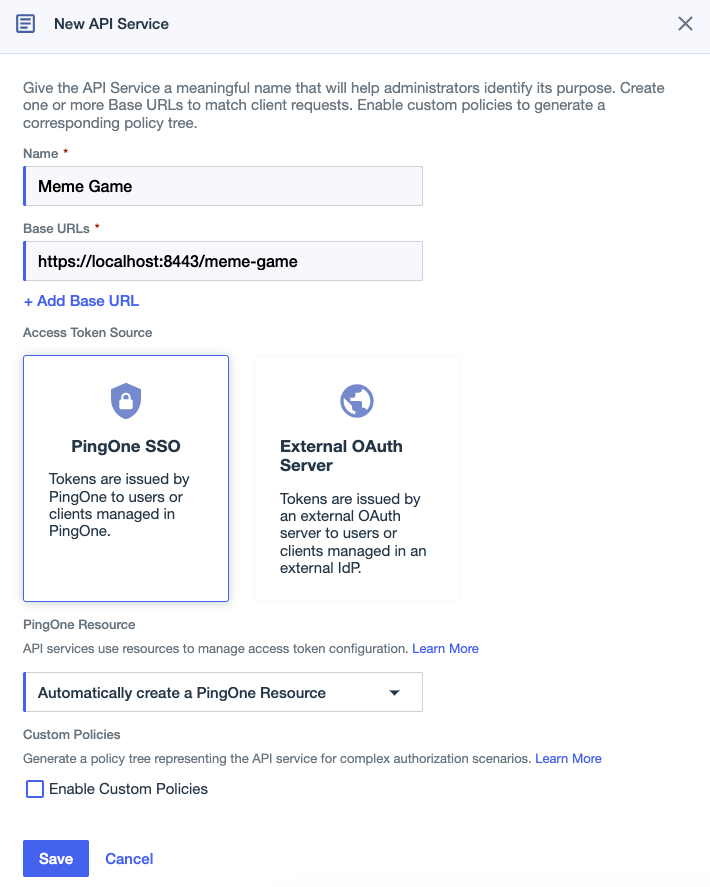
For the Name, enter a name that identifies the API service.
The name must be unique across all API services and resources.
-
Enter one or more Base URLs for the API represented by the API service.
You can enter multiple URLs to support aliases for the same service, such as a vanity URL in addition to the domain URL. To add another URL, click Add Base URL. URLs must be valid.
-
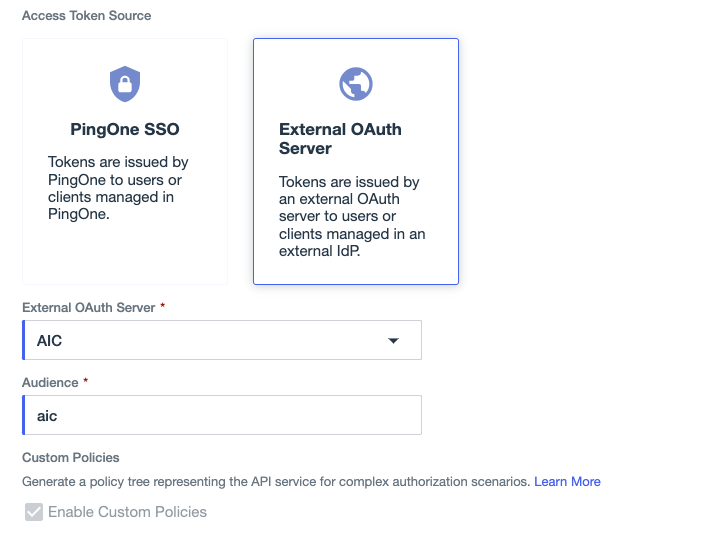
Select a token source:
Choose from:
-
PingOne SSO (default): PingOne manages user directory services and access token validation for the API service.
-
External OAuth Server: PingOne Authorize validates tokens issued by the external OAuth server.
After you save the API service, you can’t change whether the token source is PingOne SSO or an external OAuth server.
-
-
If you selected PingOne SSO as the token source, complete the following steps:
-
Select a PingOne Resource in the list, or keep the default option to Automatically create a PingOne Resource.
This resource is managed by the API service, and you can’t delete the resource while it’s associated with an API service. Resources created automatically will have the same name as the API service.
-
To enable custom policies for the API service and its operations, select the Enable Custom Policies checkbox.
Result:
This generates a policy tree for the API service, enabling you to add your own custom authorization policies for the APIs managed by this API service.
After you save the API service, you can’t change this setting. Custom policies are enabled by default if the API service uses an External OAuth Server as the token source.
-
-
If you selected External OAuth Server as the token source, complete the following steps:
-
Select the External OAuth Server that issues access tokens for the protected API.
Learn more in External OAuth servers in PingOne Authorize.
-
Enter the token Audience.
-
-
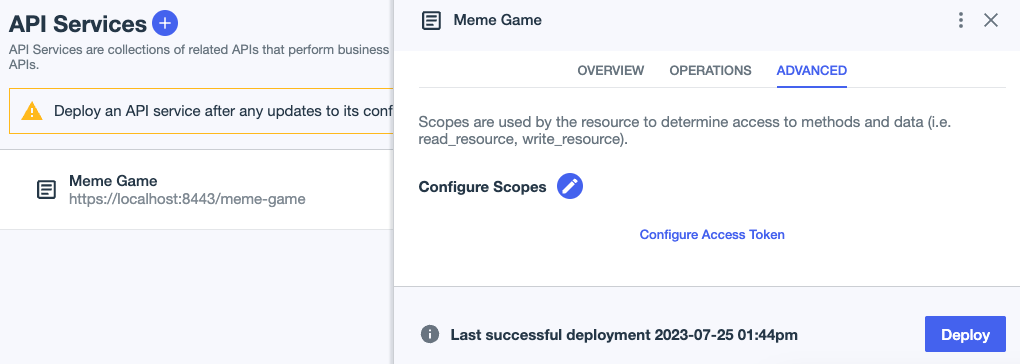
Click Save.
-
Click Deploy.
-
If PingOne SSO is the token source, add a scope to the API service’s resource:
The scope defines which resources an API client can access. An application requests a scope for the resource associated with an API service in order to set the audience for the access token.
-
On the Overview tab, under PingOne Resource, click the resource link.
-
In Applications > Resources, click the Scopes tab, and then click + Add Scope.
-
In the Scope Name field, enter a name for the scope.
For consistency, use a lowercase version of the API service name and replace spaces with hyphens.
-
(Optional) Enter a Description for the scope.
-
Click Save
-
Go to Authorization > API Services, select the API service, and then click Deploy.
-
Result
PingOne Authorize is now configured to recognize the API.
Next steps
-
If PingOne SSO is the token source for the API service, add a PingOne application that’s allowed to access the protected API service. To allow access, grant the application the same scope that you configured for the API service. Learn more in Editing scopes for an application.
-
To configure built-in access control rules, define operations for protected API actions.
-
For more complex access control scenarios, add custom policies for the API service.
-
Configure an API gateway integration kit to connect your API gateway to PingOne.