Manage entitlement lifecycle management
Entitlement lifecycle management (LCM) provides a form of delegated administration, allowing application owners, entitlement owners, and end users with the scope permissions to manage entitlements in the applications available to them.
A key capability of Entitlement LCM is metadata management. Users need clear and accurate entitlement information when making requests or assigning permissions. Entitlement LCM enables organizations to maintain up-to-date entitlement attributes, preventing outdated or stale metadata from affecting decision-making.
Entitlement LCM also enforces policies by requiring approvals before entitlement changes take effect. This prevents users from granting excessive permissions without oversight, ensuring that access rights align with organizational policies.
Enable Entitlement LCM
Tenant administrators must enable Entitlement LCM to activate the feature for their end users:
-
In the Advanced Identity Cloud admin console, go to Governance > Requests.
-
On the Requests page, click the Settings tab.
-
In the Governance LCM section, click Activate.
-
In the Governance LCM modal, read what activating this feature entails, and click Next.
-
In the Governance LCM modal, click Entitlement LCM, and then click Activate. The governance LCM is now active on your tenant.

Adds scopes
Scopes provide the permissions to let end users to take action only on applications and entitlements to which they are permitted. Tenant or governance administrators assign these scopes to end users.
For example, when you assign a scope for an application with the Create Entitlements permission,
the end user can create entitlements for the application in that scope.
However, this doesn’t mean they can view entitlements. For that, they must have the View Entitlements permission.
The following rules apply to scope permission:
-
If end users have scope permissions for view entitlements, they can view those entitlements regardless of the application permissions.
-
If end users have modify permissions, they can modify the entitlements they can see.
-
If end users have view grant permissions, they can view the users of the entitlements you can see.
To add scopes:
-
Sign on to the Advanced Identity Cloud admin console as a tenant administrator.
-
In the Advanced Identity Cloud admin console, go to Governance > Scopes.
-
Click New Scopes.
-
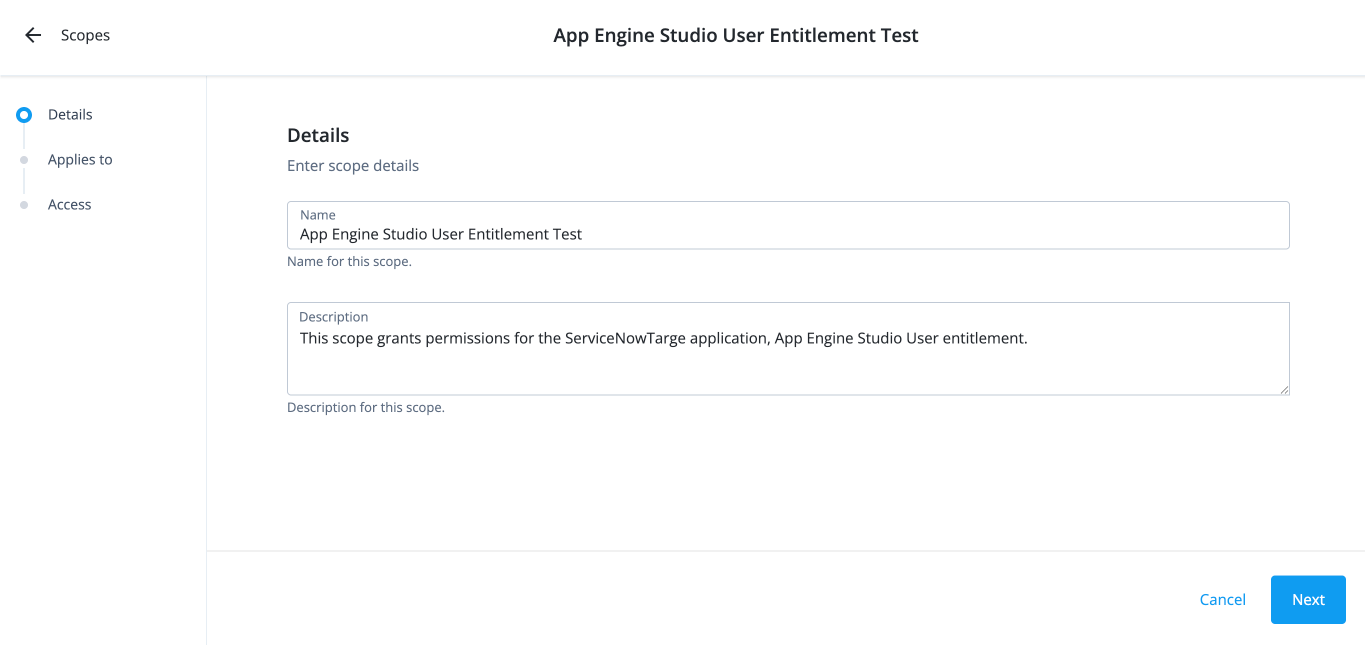
On the New Scope page, enter the following in the Details section:
-
Name: Enter the name for the scope.
-
Description: Enter a description for the scope.
-
Click Next.
-
-
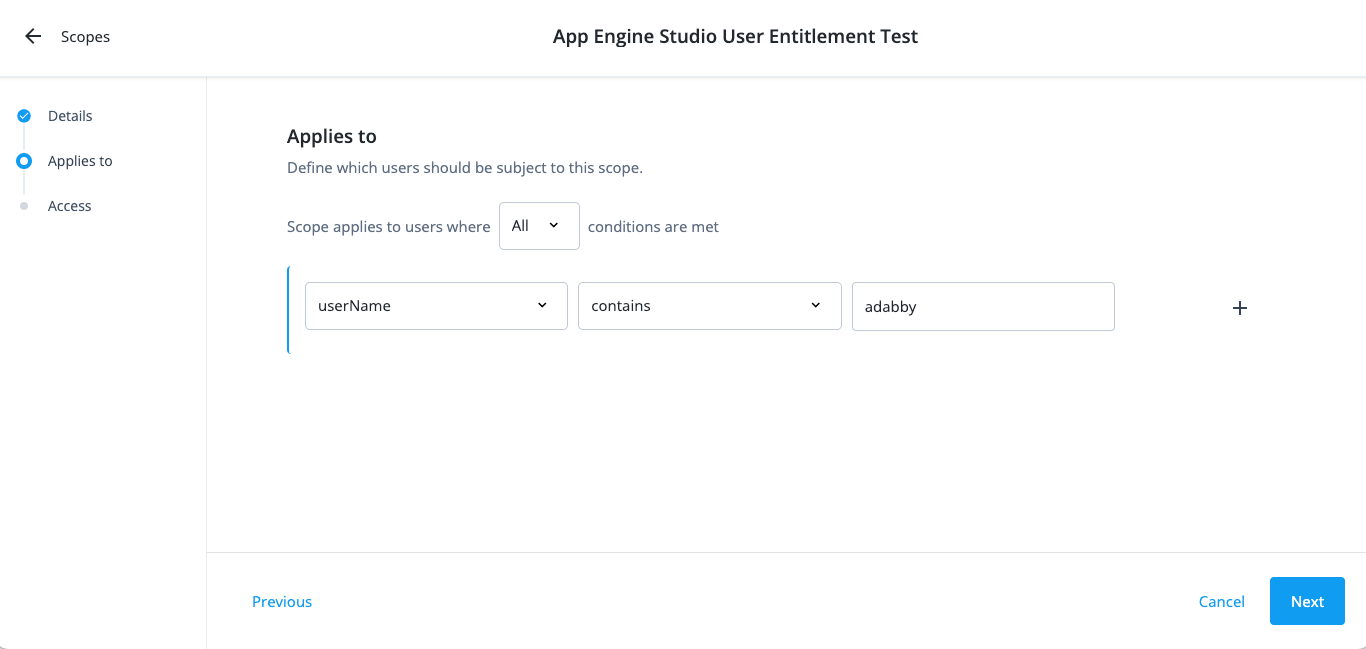
On the Applies to page, define which users should be subject to this scope. Decide if you want to grant application or entitlement permissions to the end user.
-
Select if the All or Any condition must be met.
-
Select a property for this scoping rule. For example, select userName.
-
Select an operator for the scoping rule. For example, select contains.
-
Enter an entitlement.
-
If you want to add another rule, click and repeat the steps.
-
Click Next.
-
-
On the Access page, enter the following depending if you are granting applications or entitlement permissions:
-
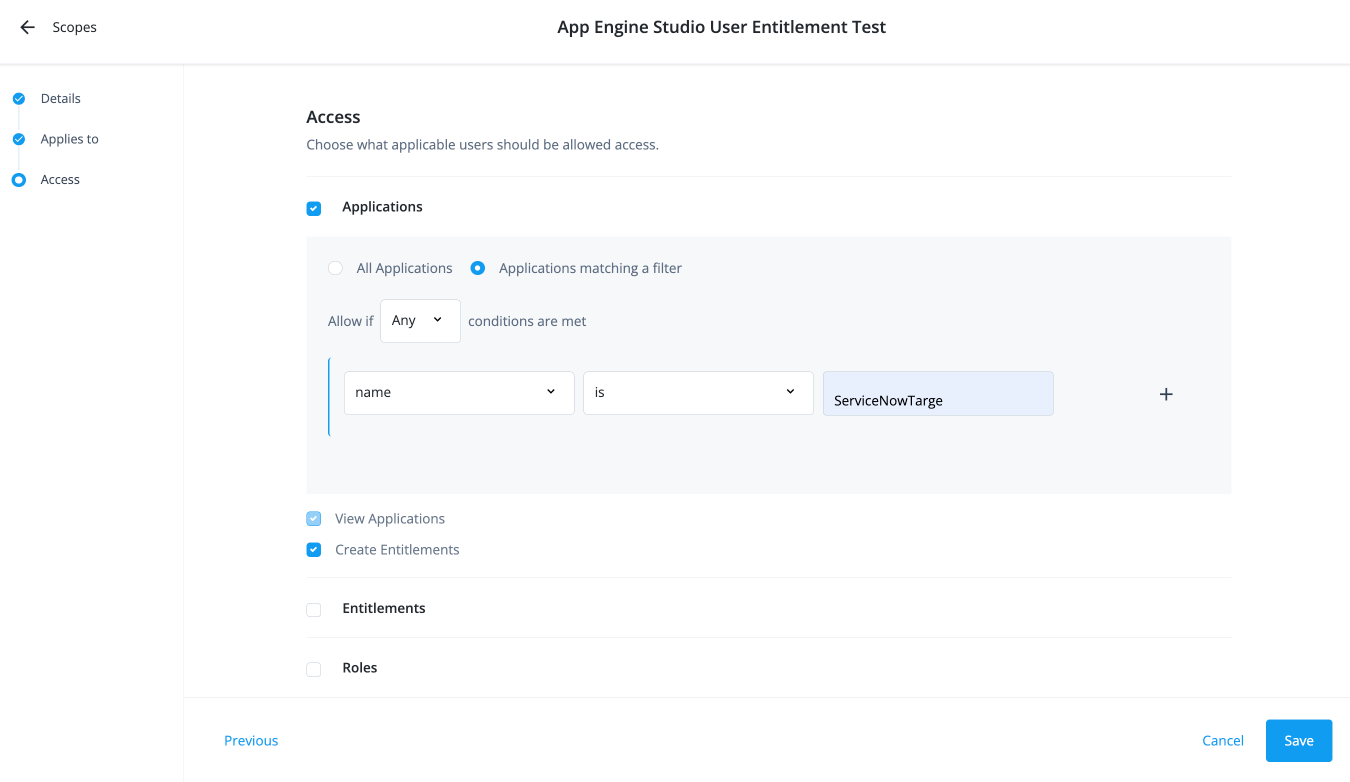
For application permissions:
-
Select the Applications checkbox.
-
Click All Applications or Applications matching a filter. Click Applications matching a filter.
-
Select if All or Any condition must be met.
-
Select a property for this scoping rule. For example, select name.
-
Select an operator for the scoping rule. For example, select is.
-
Enter an application.
-
If you want to add another rule, click and repeat the steps.
-
Click Create Entitlements.
The View Applications scope permission is also included.
-
Click Save.
The end user now has the permission to create new entitlements for the matching application.
-
-
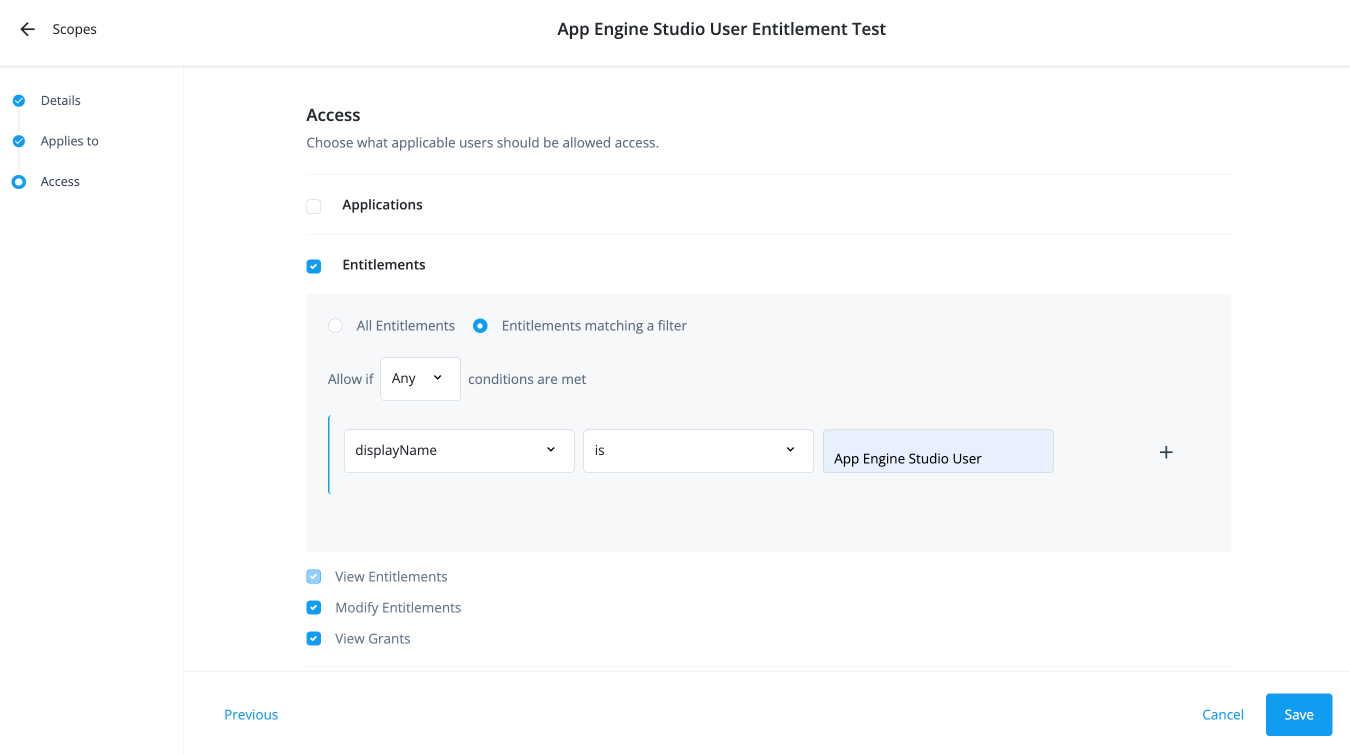
For entitlement permissions:
-
Select the Entitlements checkbox.
-
If you click Applications matching a filter, click All Entitlements or Entitlements matching a filter.
-
Select if the All or Any condition must be met.
-
Select a property for this scoping rule. For example, select userName.
-
Select an operator for the scoping rule. For example, select is.
-
Enter a user.
-
If you want to add another rule, click and repeat the steps.
-
Click Modify Entitlements.
The View Entitlements scope permission is also included.
-
Click View Grants to allow the end user to view who has the entitlement.
-
Click Save.
-
-
Application tasks
End users with application permissions on entitlements can only work with entitlements specific to the application. They can:
View entitlements in an application
-
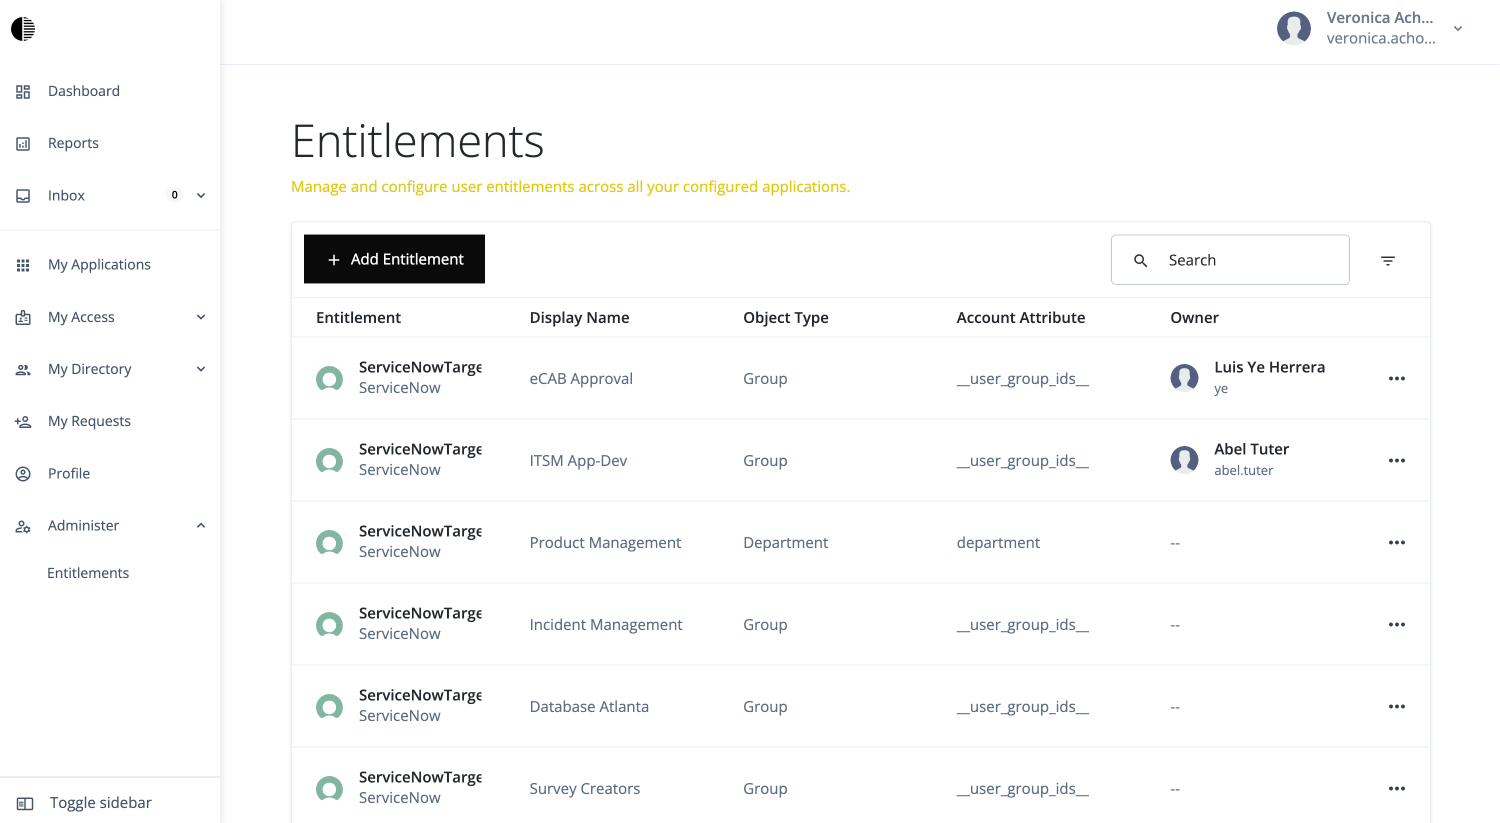
In the Advanced Identity Cloud end-user UI, sign on as your test application owner:
veronica.achorn. -
Go to Administer > Entitlements. All entitlements specific to the selected application are displayed.
-
From here, the end user can do:
-
View all entitlements specific to the application.
-
View the details, object properties, and users of a specific entitlement.
-
Create an entitlement.
-
Modify an entitlement.
-
Add a new entitlement to an application
-
In the Advanced Identity Cloud end-user UI, sign on as your test user who has application permissions.
-
Go to Administer > Entitlement. The application’s entitlements are accessible to the end user.
-
On the Entitlements page, click New Entitlement.
-
In the New Entitlement modal:
-
Click Application and click the application available to the test user. You should see only one available option.
-
Click Object Type and select an object type for the new entitlement.
-
Click Next.
-
-
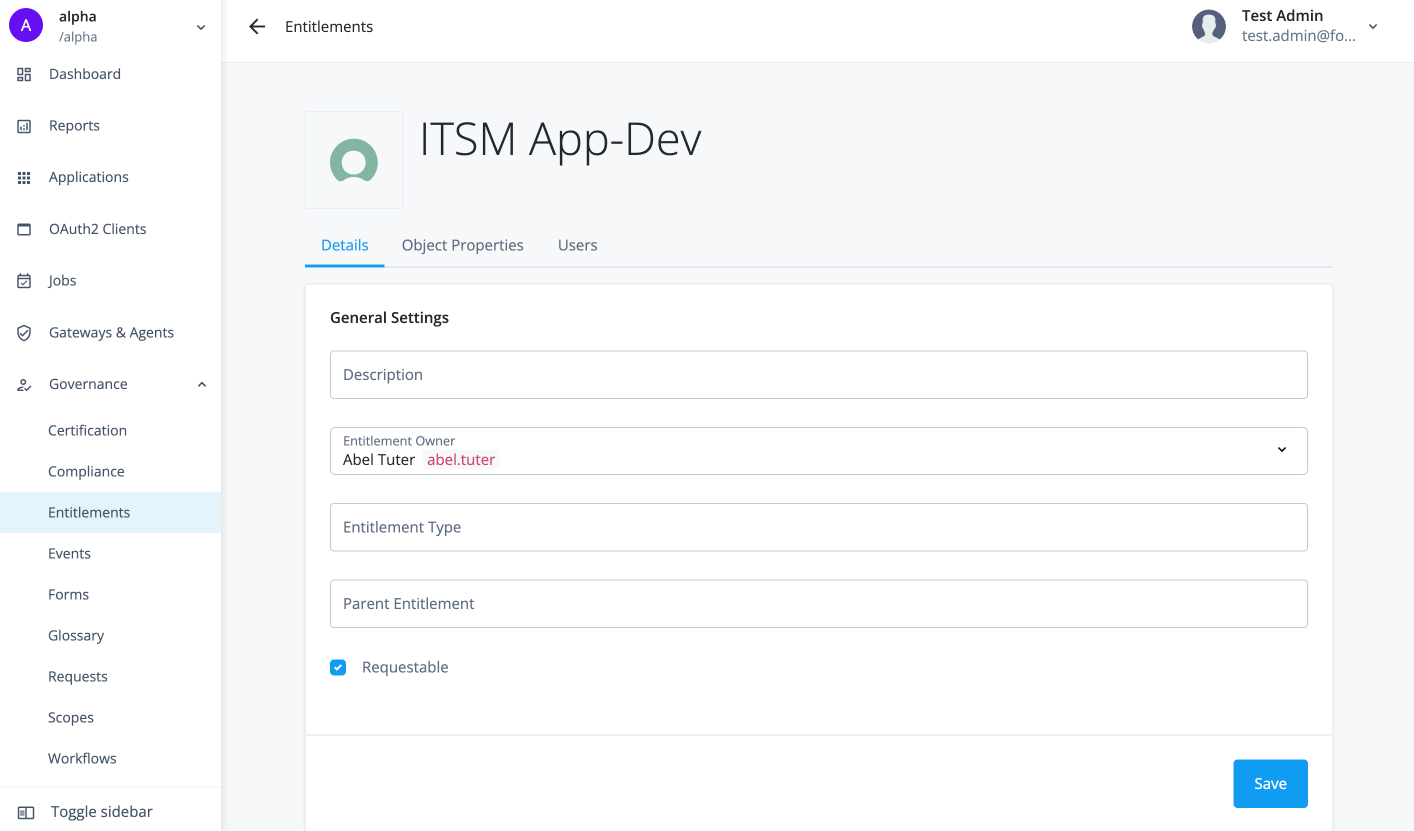
In the Entitlement Details modal:
-
Enter or select the fields required for your entitlement. Fields can differ based on how you configured your glossary items. For example:
-
Description: Enter a general description of the entitlement.
-
Entitlement Owner: Type a user to add as an entitlement owner.
-
Entitlement Type: Enter the type of entitlement.
-
Parent Entitlement: Enter any parent entitlement if any.
-
Requestable: Click to make the entitlement requestable.
-
-
Click Submit.
The new entitlement appears in the list of entitlements specific to the application.
-
Modify entitlement details in an application
-
In the Advanced Identity Cloud end-user UI, sign on as your test user who has application permissions.
-
Go to Administer > Entitlements. The application’s entitlements are accessible to the end user.
-
Click an entitlement.
-
Modify any field including Entitlement Owner and click Save.
A change request is entered in the system and must be approved by the user specified in the workflow. For example: the Modify Entitlement workflow specifies that the entitlement approves any entitlement change requests.
End user tasks
After administrators grant end users the required scope permissions to view and act on any applications and entitlements, the end users can take action on the permitted entitlements.
End user UI
-
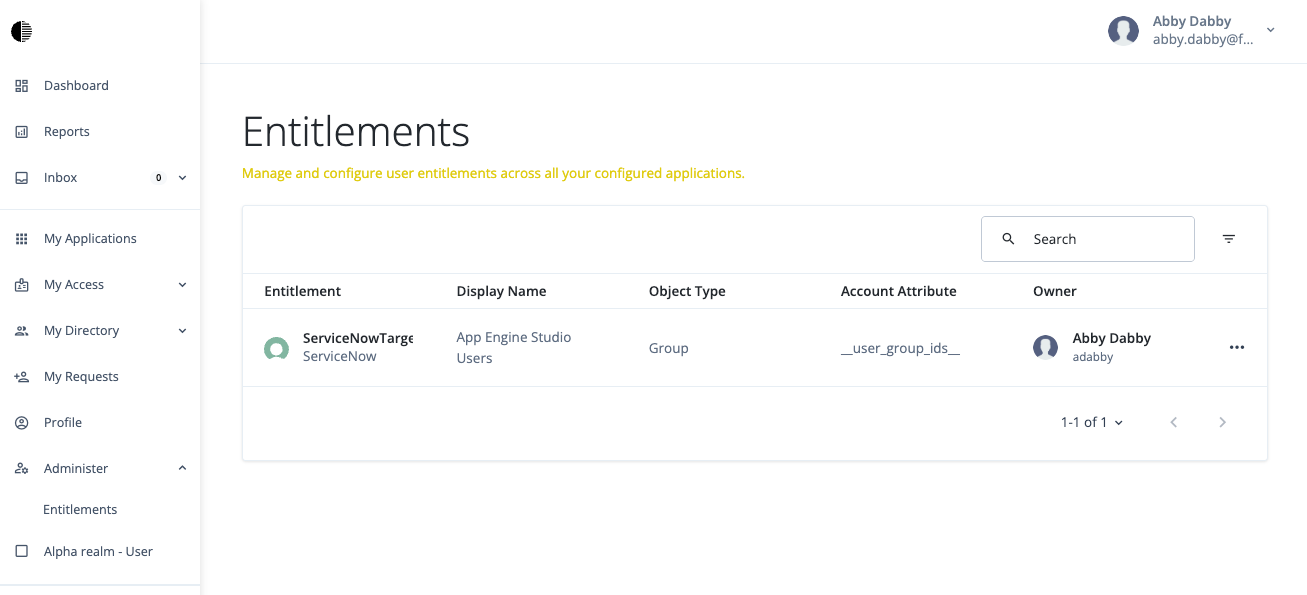
In the Advanced Identity Cloud end-user UI, sign on as your test end user:
Abby Dabby. -
Go to Administer > Entitlements. The entitlement is accessible to the end user.
-
From here, the end user can do the following depending on their scope permissions:
-
View the entitlement details.
-
View users who have the entitlement.
-
Modify the entitlement: If the end user makes a change to the entitlement, Identity Governance generates a request that awaits review and approval by the designated approver. Tenant administrators can designate the approver within the Modify Entitlement workflow.
-