Request Header node
The Request Header node lets you insert values from request headers into configurable node state properties. This lets you customize journeys based on the request header values.
Compatibility
| Product | Compatible? |
|---|---|
Advanced Identity Cloud |
Yes |
PingAM (self-managed) |
Yes |
Ping Identity Platform (self-managed) |
Yes |
Inputs
This node takes its inputs from one or more request headers and maps these values to properties in the node state. For
multi-valued headers, the node delimits headers with a comma (,) and assigns the value to the node state property
as a comma-delimited list.
The node doesn’t read input from the state.
The node has no required predecessor nodes.
Configuration
| Property | Usage |
|---|---|
Allowed headers |
List the header names the node can obtain from the URL and map them to a property in the node state:
If a provided request header isn’t in this list, the node ignores it. To edit an entry, click the Pencil icon (). To remove an entry, click the Delete icon (). |
Allowed headers to be delimited |
The allowed headers that can take multiple values and whose values you want to store in the node
state in a comma-delimited list. For example, Enter the header name in the Add value field and click Add. If you don’t delimit the values of a multi-valued header, the node stores the values in the node state as a
single string value. For example, To edit an entry, click the Pencil icon (). To remove an entry, click the Delete icon (). |
Outputs
-
If the Allowed headers setting has one or more values, the node adds the values of the listed request headers to the corresponding properties in the node state.
-
If the Allowed headers to be delimited setting has a value but that header isn’t provided in the request, the node sets an empty list (
[]) in the corresponding node state property. -
If an allowed header is also listed in the Allowed headers to be delimited, the node sets the values of that header in the node state as a comma-delimited list.
-
The node performs no decoding or sanitization on the header value. It simply passes the value into the node state as a string.
|
Values stored in the node state can override values in the authentication journey. Take special care when you configure this node so that you don’t unintentionally override parameters such as usernames and passwords. The output of this node isn’t under the control of the node itself. Encode sensitive values appropriately, either at node output or before the values are used later in the journey. |
Errors
-
No headers configured – this node is redundantThe node logs this error if you include it in a journey but don’t configure any Allowed headers.
-
Cannot delimit header if it is not configured as a header to be stored in node stateThe node logs this error if you add a header to the list of Allowed headers to be delimited but not to the list of Allowed headers.
Examples
Use the Request Header node to customize a journey based on the values of specific request headers. The following scenarios illustrate how this node could be used:
Customized branding
An organization has several brands that use the same journey. Use this node to customize the brand the user sees, based on the request header.
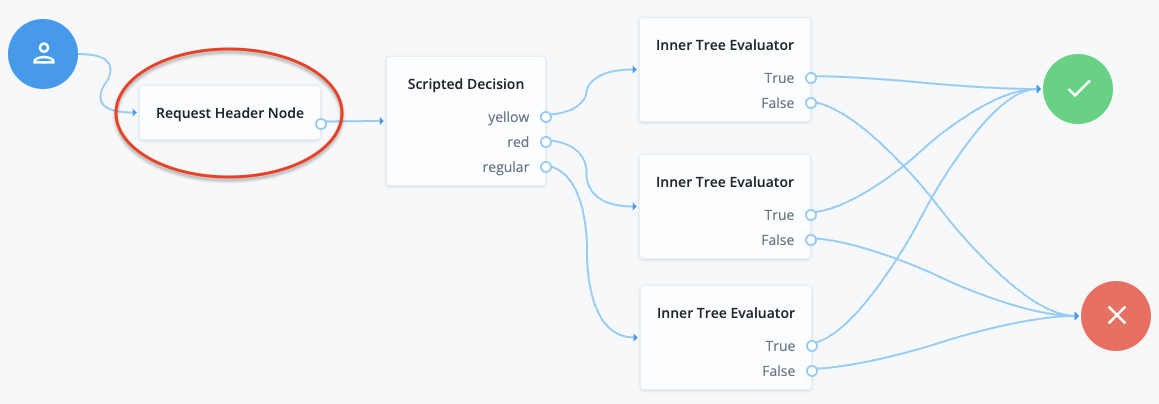
Consider the following authentication journey:

-
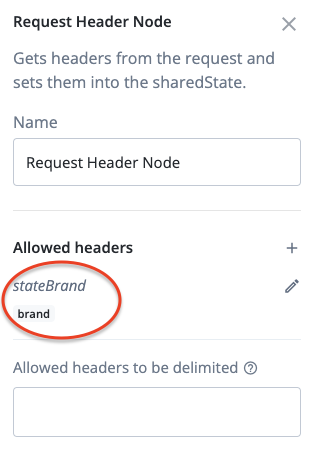
The configuration of the Request Header node maps the
brandheader to a property in the node state namedstateBrand
-
The REST request to access the journey includes one of the following headers:
-
--header "brand: yellow" -
--header "brand: red" -
--header "brand: regular"
-
-
The Request Header node obtains the value of the
brandheader and sets that value in thestateBrandproperty in the node state. For example,stateBrand=yellow -
The journey progresses to the scripted decision node that includes the following script:
var brand = JSON.parse(nodeState.get('stateBrand')); if (brand.indexOf("yellow") >= 0) { outcome = "yellow"; } else if (brand.indexOf("red") >= 0) { outcome = "red"; } else { outcome = "regular"; } -
The script routes the journey to one of three outcomes;
yellow,red, orregular, depending on the value of thestateBrandproperty. -
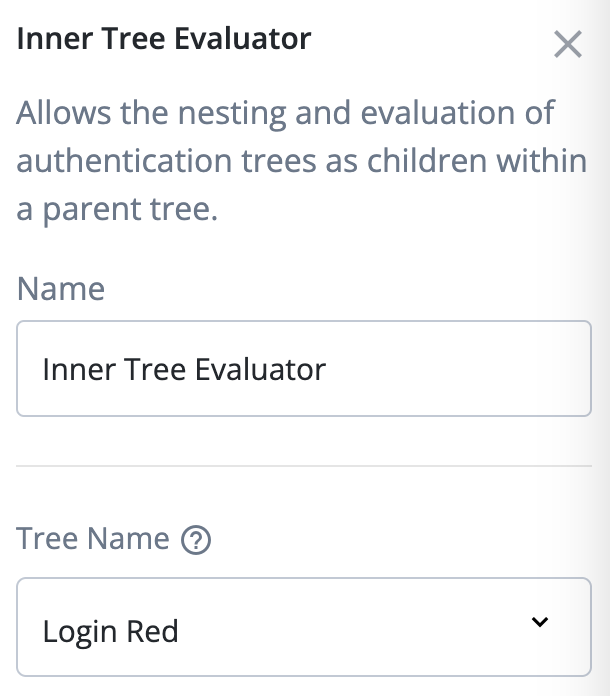
The outcomes direct the user to a custom branded Login journey configured in an Inner Tree Evaluator node. For example:

-
Each Inner Tree Evaluator node routes the end user to a login journey that uses a custom brand.