Manage ESVs using the admin console
You can find background information on ESVs in PingOne Advanced Identity Cloud in ESVs.
Create variables
-
In the Advanced Identity Cloud admin console, go to Tenant Settings > Global Settings > Environment Secrets & Variables.
-
Click the Variables tab.
-
Click + Add Variable.
-
In the Add a Variable modal window, enter the following information:
Name
Enter a variable name. Learn more in ESV naming.
Variable names cannot be modified after the variable has been created. Type
Select a variable expression type.
Description
(Optional) Enter a description of the purpose of the variable.
Value
Enter a variable value.
If the variable value is JSON, you can optionally click the JSON toggle to turn on JSON validation. You can find the toggle above the top right of the field.
-
Click Save to create the variable.
Update variables
-
In the Advanced Identity Cloud admin console, go to Tenant Settings > Global Settings > Environment Secrets & Variables.
-
Click the Variables tab.
-
Find a variable in the paginated list of variables, then click + Update for that variable.
-
In the Update Variable modal window:
-
At the top, you can optionally click Add a Description to update the variable description:
-
Click the Add a Description link to open a secondary modal.
-
In the Edit Variable Description secondary modal window, enter the following information:
Description
Enter a new or updated description of the purpose of the variable.
-
Click Save Description to update the variable description and close the secondary modal.
-
-
Below that, you will see the read-only Configuration Placeholder field. The placeholder value is derived from the variable name. You can optionally use the clipboard widget to copy the placeholder value.
-
Below that, you can optionally click Edit to update the variable value:
-
Click the Edit link to open a secondary modal.
-
In the Edit Variable Value secondary modal window, enter the following information:
Value
Enter a new variable value.
If the variable value is JSON, you can optionally click the JSON toggle to turn on JSON validation. You can find the toggle above the top right of the field.
-
Click Save Value to update the variable value and close the secondary modal.
-
-
Below that, you will see the read-only Type field. The variable type cannot be modified.
-
-
Click Done to close the modal.
Delete variables
| Before you delete a variable, you may need to remove references to it from your environment. Learn more in Preconditions to delete an ESV. |
-
In the Advanced Identity Cloud admin console, go to Tenant Settings > Global Settings > Environment Secrets & Variables.
-
Click the Variables tab.
-
Find a variable in the paginated list of variables, then click the Delete Variable icon on the right-hand side.
-
In the Delete Variable? modal window, click Delete.
Create secrets
-
In the Advanced Identity Cloud admin console, go to Tenant Settings > Global Settings > Environment Secrets & Variables.
-
Click the Secrets tab.
-
Click + Add Secret.
-
In the Add a Secret modal, choose one of the following secret types:
-
Secret: A plaintext or JSON secret such as a password or API key.
-
PEM-Encoded Secret: A key or certificate that has been formatted according to the Privacy-Enhanced Mail (PEM) standard. Use for keys, certificates, certificate chains, or certificate signing requests (CSRs).
-
Base64-Encoded HMAC Key: A Hash-based Message Authentication Code (HMAC) key that has been encoded using base64. Use for secrets needed to verify the authenticity and integrity of data. For example, when verifying OAuth 2.0 access tokens.
-
Base64-Encoded AES Key: An Advanced Encryption Standard (AES) key that has been encoded using base64. Use for secrets needed to encrypt and decrypt data. For example, when storing sensitive information like credit card numbers.
The secret’s type can’t be modified after the secret has been created. -
-
Click Next.
-
In the next modal, enter the following information:
Name
Enter a secret name. Learn more in ESV naming.
Description
(Optional) Enter a description of the purpose of the secret.
Value
Choose one of the following based on the secret type you selected earlier:
- Secret
-
Enter a secret value.
The field obscures the secret value by default. You can optionally click the visibility toggle () to view the secret value as you enter it.
If the variable value is JSON, you can optionally click the JSON toggle to turn on JSON validation. You can find the toggle above the top right of the field.
- PEM-encoded secret
-
Enter a PEM-encoded value. Ensure that the value includes the appropriate PEM headers and footers, such as
-----BEGIN CERTIFICATE-----and-----END CERTIFICATE-----.For an example of how to create a PEM-encoded certificate, refer to Generate an RSA key pair.
- Base64-encoded HMAC key
-
Enter a base64-encoded HMAC key value.
For an example of how to create a base64-encoded HMAC key, refer to Generate an AES or HMAC key.
- Base64-encoded AES key
-
Enter a base64-encoded AES key value.
For an example of how to create a base64-encoded AES key, refer to Generate an AES or HMAC key.
Use in Placeholders
Select this checkbox to make the secret available to configuration placeholders and scripts. For guidance on how to use this setting, refer to Control access to secrets.
The secret’s name and Use in Placeholders selection can’t be modified after the secret has been created. -
Click Save to create the secret.
Update secrets
-
In the Advanced Identity Cloud admin console, go to Tenant Settings > Global Settings > Environment Secrets & Variables.
-
Click the Secrets tab.
-
Find a secret in the paginated list of secrets, then click + Update or Updated for that secret.
-
In the Update Secret modal window:
-
At the top, you can optionally click Add a Description to update the secret description:
-
Click the Add a Description link to open a secondary modal.
-
In the Edit Secret Description secondary modal window, enter the following information:
Description
Enter a new or updated description of the purpose of the secret.
-
Click Save Description to update the secret description and close the secondary modal.
-
-
Below that, you will see the read-only Configuration Placeholder field. The placeholder value is derived from the secret name. You can optionally use the clipboard widget to copy the placeholder value.
-
Below that, you will see the secret versions interface, which shows a paginated list of secret versions for the secret:
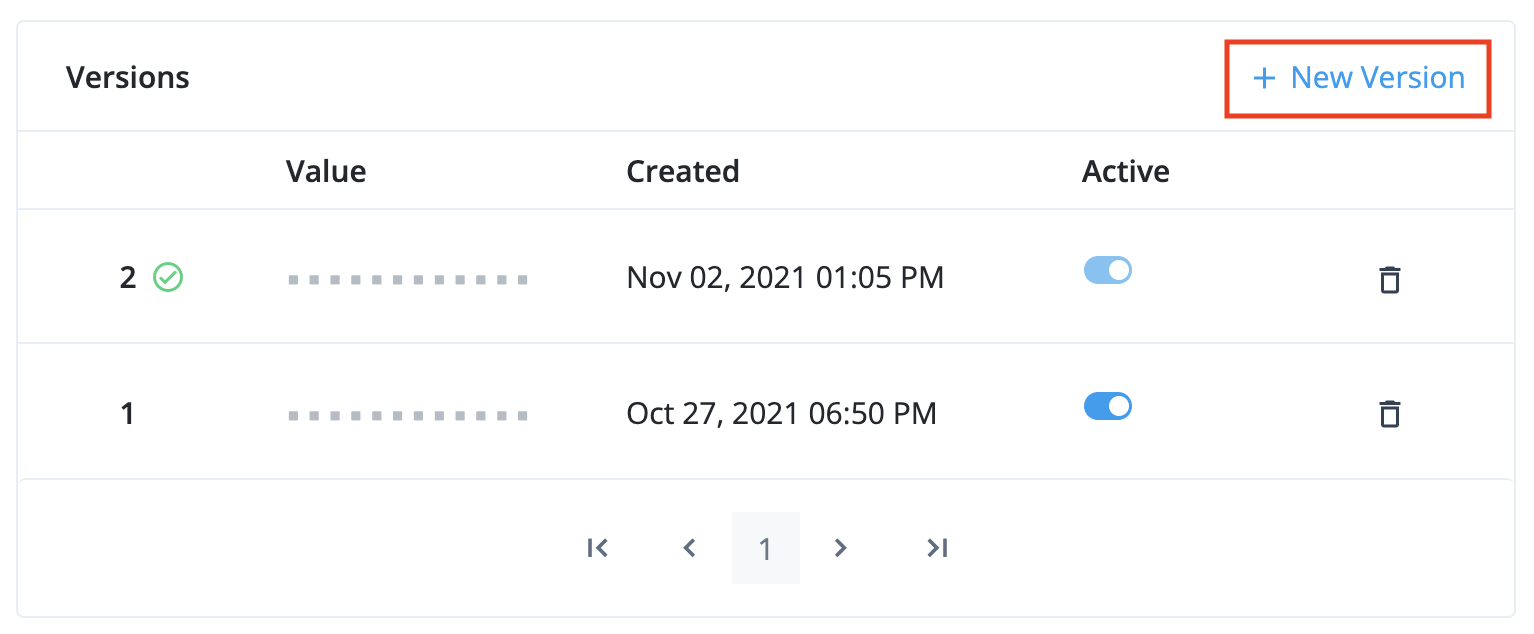
Learn more about the rules for enabling, disabling, and deleting secret versions in Secret versions. -
To add a new secret version, click + New Version to open a secondary modal.
-
In the Create a New Secret Version secondary modal window:
-
At the top, you will see the readonly Secret field, which contains the secret name.
-
Below that, enter the following information:
Value
Enter a secret value.
The field obscures the secret value by default. You can optionally click the visibility toggle () to view the secret value as you enter it.
If the variable value is JSON, you can optionally click the JSON toggle to turn on JSON validation. You can find the toggle above the top right of the field.
-
Then, click the + Add Version button to create the secret version and close the secondary modal.
-
-
The new secret version should now be visible at the top of the the secret versions interface:
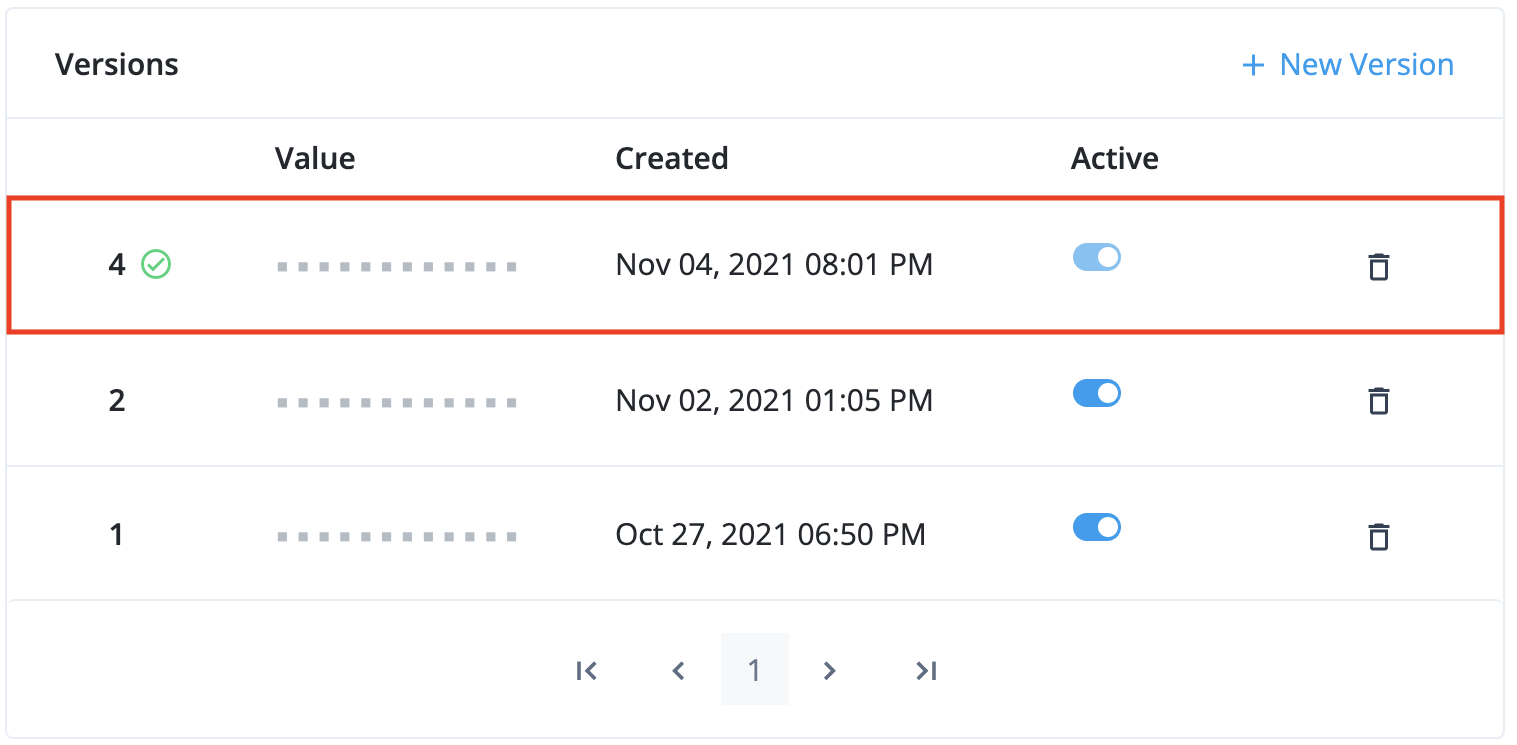
-
Click Done to close the modal.
-
-
Delete secrets
| Before you delete a secret, you may need to remove references to it from your environment. Learn more in Preconditions to delete an ESV. |
-
In the Advanced Identity Cloud admin console, go to Tenant Settings > Global Settings > Environment Secrets & Variables.
-
Click the Secrets tab.
-
Find a secret in the paginated list of variables, then click the Delete Secret icon on the right-hand side.
-
In the Delete Secret? modal window, click Delete.
Apply updates
When one or more ESVs have been created or updated by any of the tenant administrators, the ESV entry screen displays a banner at the top to tell you how many updates are waiting to be applied:
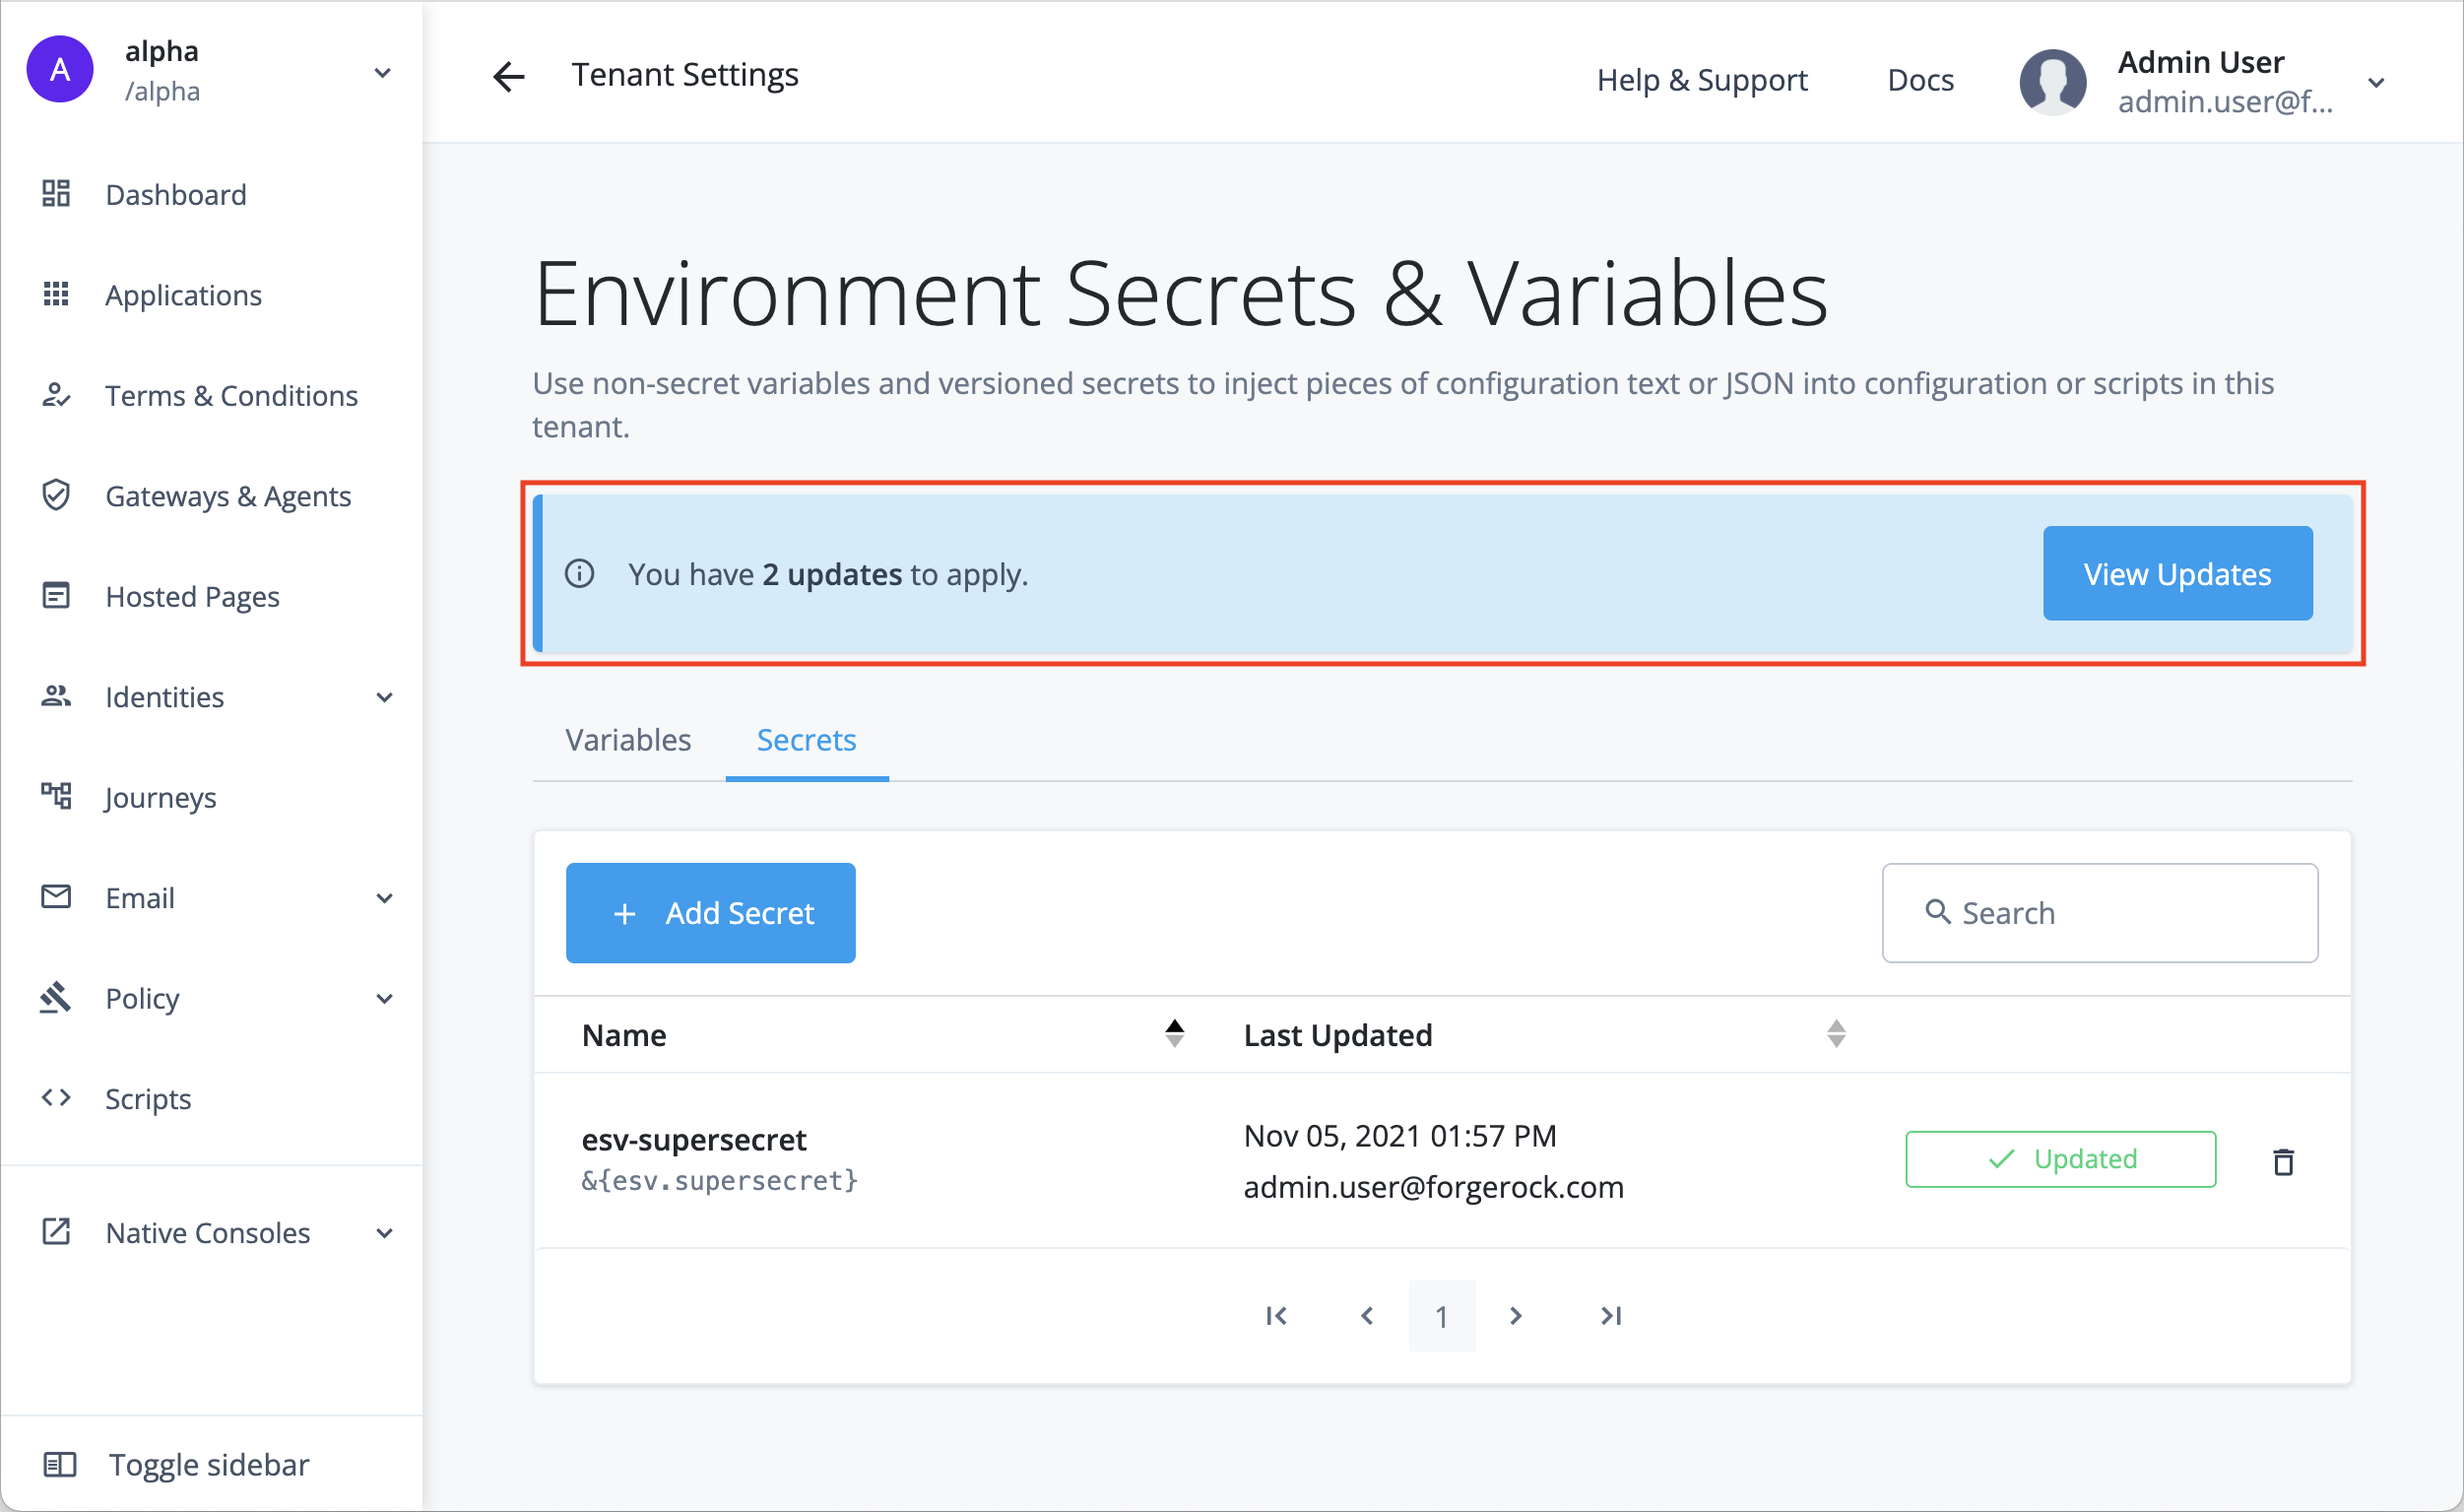
| Before you apply any updates, ensure that you have made all the ESV changes that you need, as applying the updates will disable ESV management in the admin console for the next 10 minutes and prevent further ESV changes. This behavior will apply to all tenant administrators. |
To apply any pending updates:
-
Click the View Updates button in the update banner.
-
In the Pending Updates modal, review the list of ESVs that have been updated, then click Apply n Updates.
-
In the Apply n Updates? confirmation modal, click Apply Now.
-
The banner will change color from blue to orange while the updates are applied, and ESV management in the admin console will be disabled. This behavior will apply to all tenant administrators.
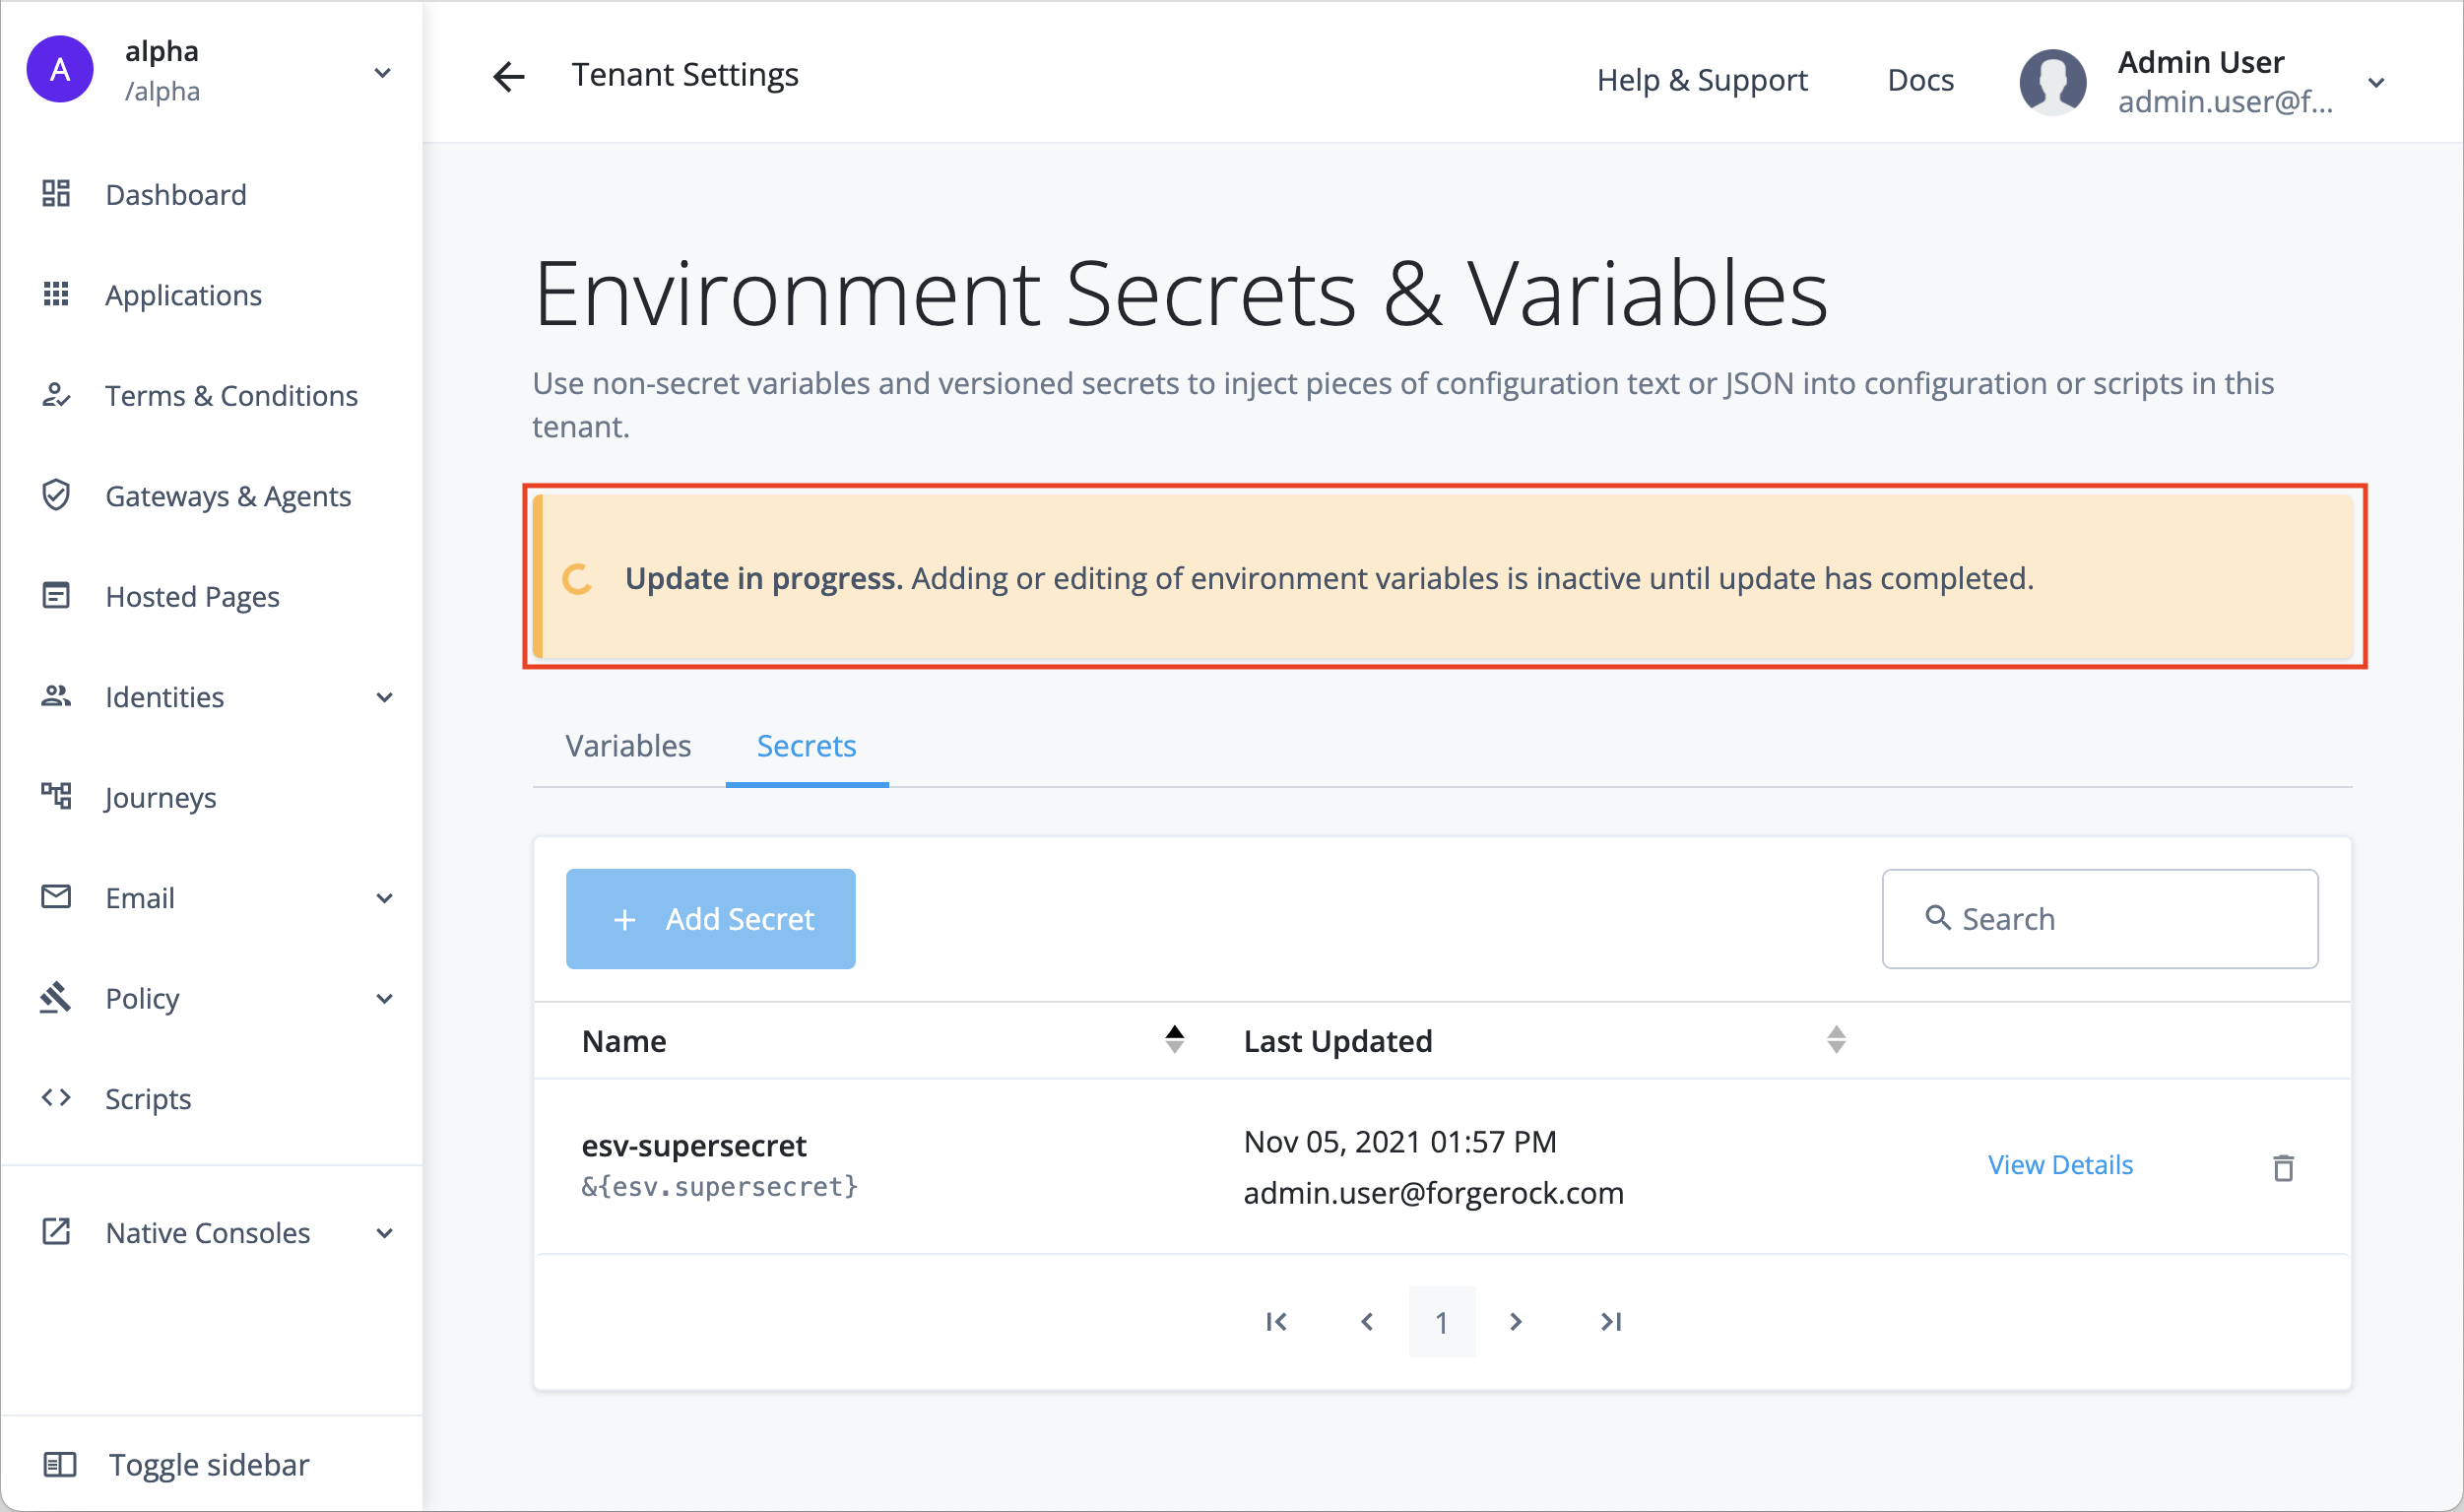
-
When the update is complete, the banner will no longer be visible, and ESV management in the admin console will be enabled again.
