Manage user lifecycle management
User lifecycle management (user LCM) allows authorized end users to create, update, delete, and view user information. User LCM enforces policies by requiring approval workflows before authorized end users can apply any user changes.
User LCM Permissions
By default, governance administrators, manager, direct report, and end users have the following permissions:
| Action | Admin | Manager | End user |
|---|---|---|---|
View user |
Yes |
Yes |
If scoped |
View users access |
Yes |
Yes |
If scoped |
Create user |
Yes |
If scoped |
If scoped |
Modify user |
Yes |
If scoped |
If scoped |
Delete user |
Yes |
If scoped |
If scoped |
Enable user LCM
Governance administrators must enable user LCM to activate the feature in the hosted account pages.
-
In the Advanced Identity Cloud admin console, go to Governance > Requests.
-
On the Requests page, click the Settings tab.
-
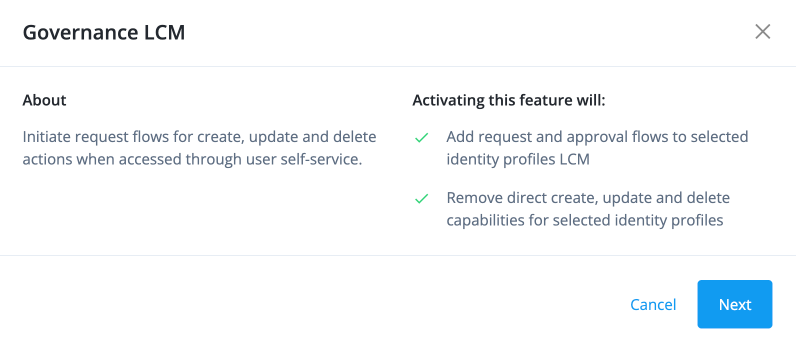
In the Governance LCM section, click Activate.
-
In the Governance LCM modal, read what activating this feature entails, and click Next.
-
In the Governance LCM modal, click User LCM, and then click Activate.
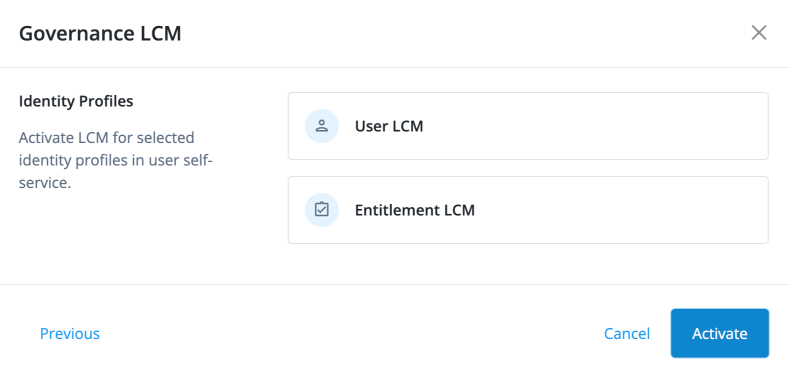
User LCM is now enabled.
Configure authorization using scopes
Scope permissions grant a specific subset of permissions for user LCM.
Permissions for user LCM are as follows:
| Permission | Description |
|---|---|
Create User |
Allows the end user to create new users in the system. This global permission overrides a scope’s target conditions. For example, even if a scope is set to target only contractor users, a person with this permission can create any type of user, not just contractors. |
Modify User |
Allows the end user to modify the users matching the filter. |
Delete User |
Allows the end user to delete the users matching the filter. |
View Grants |
Allows the user to view the access of the matching users, for example, applications, entitlements, and roles. |
Add scopes and assign to users
-
Sign on to the Advanced Identity Cloud admin console as a tenant administrator.
-
Go to Governance > Scopes.
-
Click New Scopes.
-
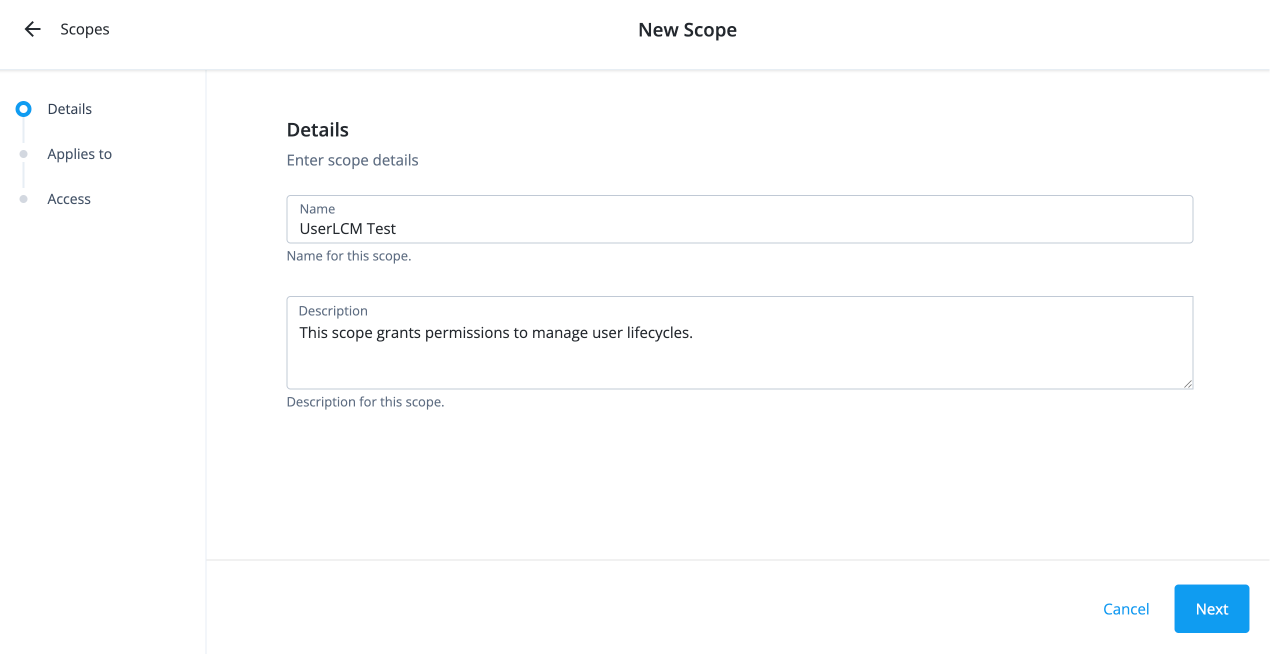
On the New Scope page, enter the following in the Details section:
-
Name: Enter the name for the scope.
-
Description: Enter a description for the scope.
-
Click Next.
-
-
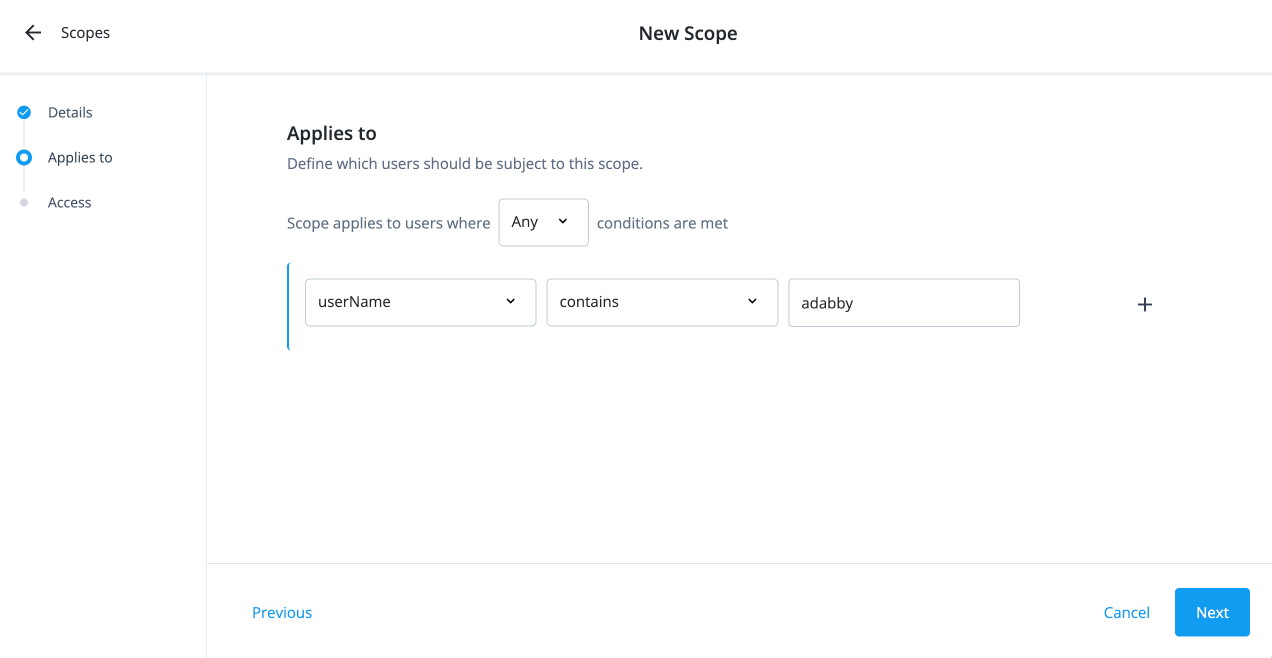
On the Applies to page, define which users should be subject to this scope.
-
Select if the All or Any condition must be met.
-
Select a property for this scoping rule. For example, select userName.
-
Select an operator for the scoping rule. For example, select contains.
-
If you want to add another rule, click and repeat the steps.
-
Click Next.
-
-
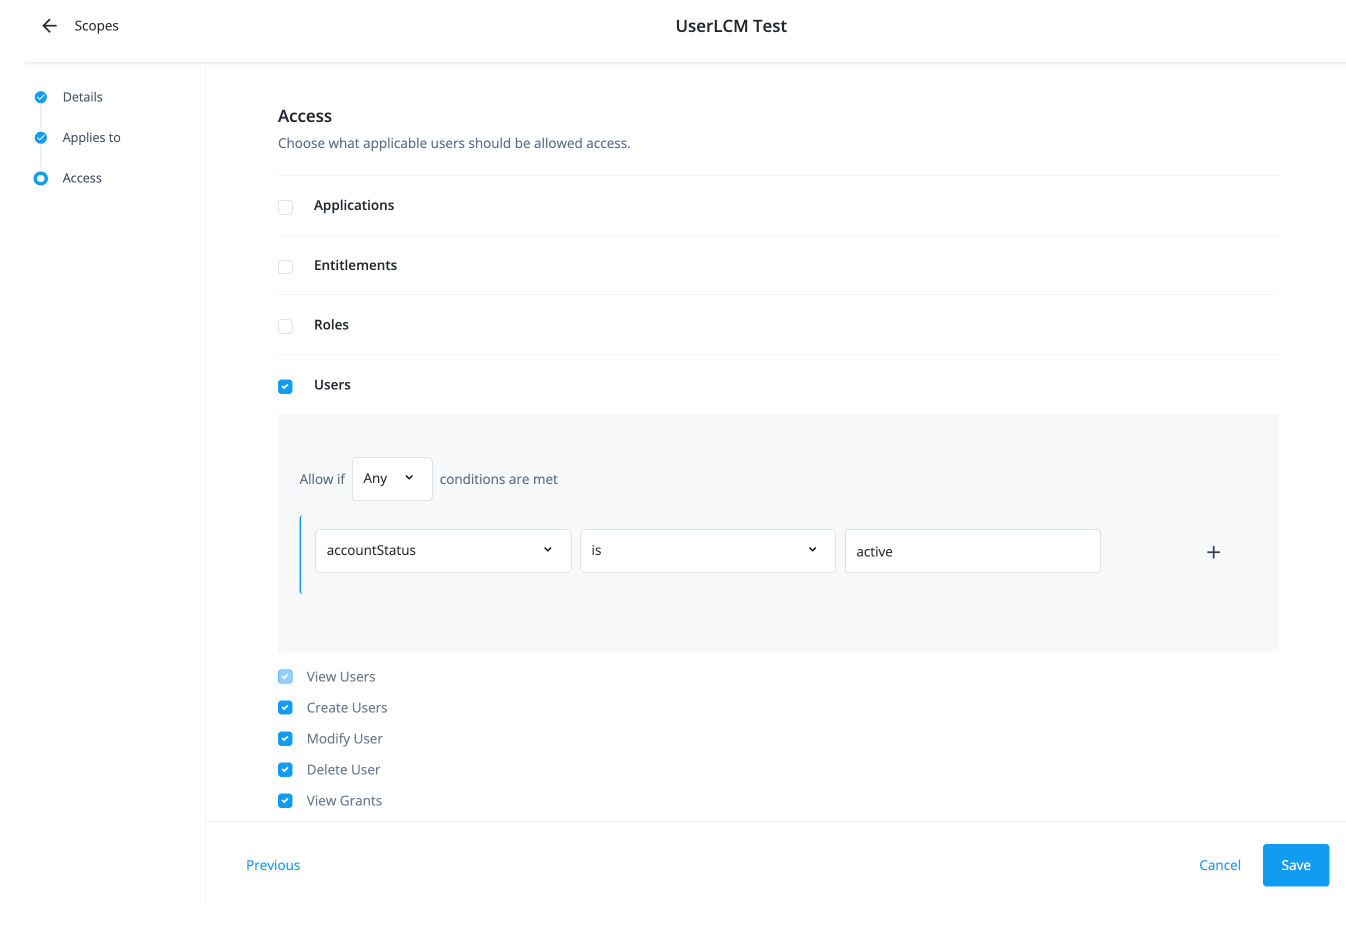
If you are granting user permissions, configure the following on the Access page:
-
Select the Users checkbox.
-
Select if All or Any condition must be met.
-
Select a property for this scoping rule. For example, select accountStatus.
-
Select an operator for the scoping rule. For example, select is.
-
Enter a condition. For example, enter active.
-
If you want to add another rule, click and repeat the steps.
-
Select the permissions available to the scope:
-
Create Users: Permission to create a new user.
-
Modify User: Permission to modify a user.
-
Delete User: Permission to delete a user.
-
View Grants: Permission to view the access for the users matching the scope filter.
-
-
Click Save.
-
Create an internal role
Administrators must create an internal role so that authorized end users can view the Users identity object.
-
Sign on to the Advanced Identity Cloud admin console as a tenant administrator.
-
Go to Identities > Manage.
-
Click Internal Roles > New Internal Role.
-
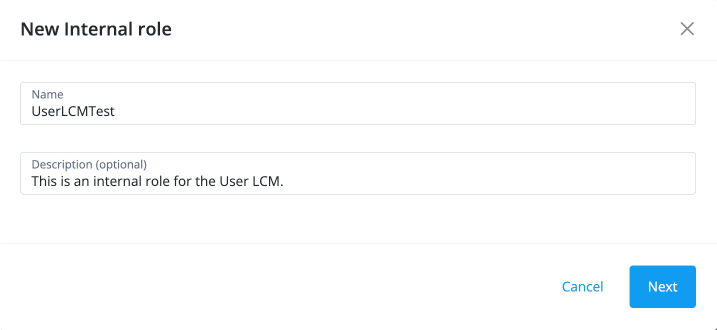
In the New Internal Role modal, enter the following and click Next.
-
Name: Enter a name for the internal role, such as UserLCMTest.
-
Description: Enter a description for the internal role.
-
-
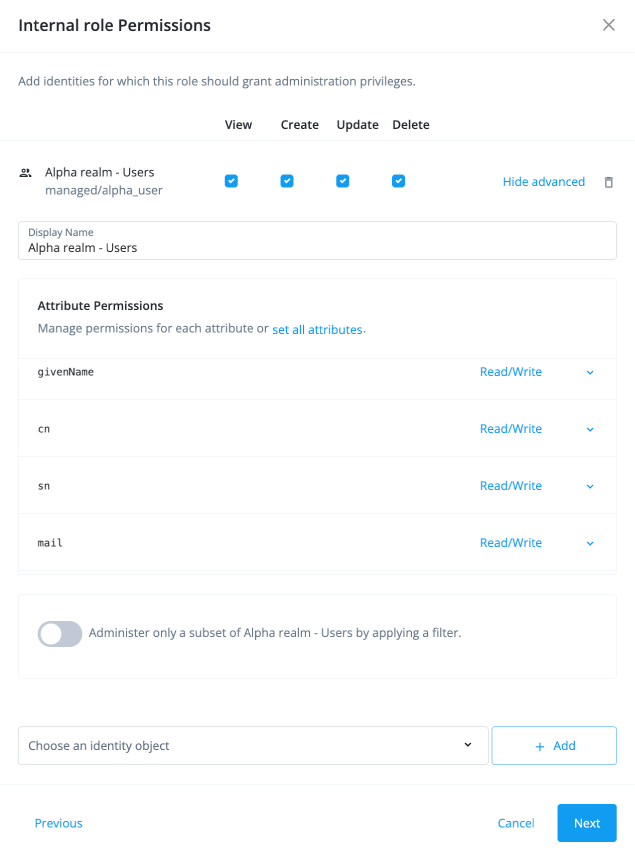
In the Internal role Permissions modal, select Alpha realm - Users managed/alpha_user, and click Add.
-
Click the internal role permissions you want available with the role:
-
View
-
Create
-
Update
-
Delete
-
-
Click Show advanced. Select Read/Write for the attribute permissions and click Next:
-
userName
-
givenName
-
cn
-
sn
-
mail
-
-
In the Dynamic Internal role Assignment modal, click Next.
-
In the Time Constraint modal, click Save.
-
-
-
In the UserLCMTest page, click Add Members.
-
In the Add Members modal, select the users to which the internal role applies, and then click Save.
-
Configure the user create form
Create a form for the end users to use during the user create process.
-
In the Advanced Identity Cloud admin console, go to Governance > Forms.
-
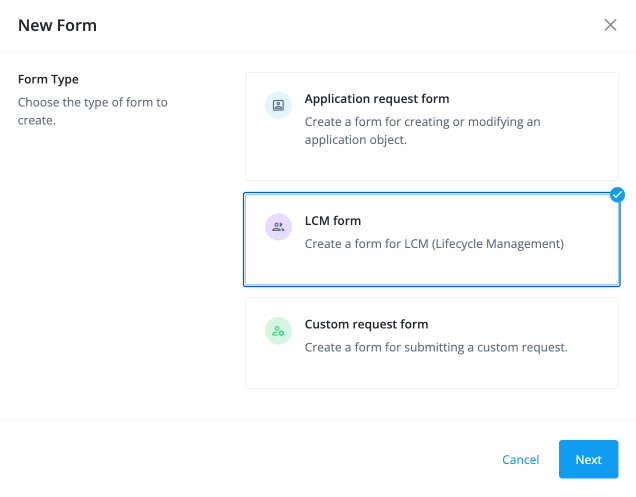
Click New Form.
-
In the New Form modal, select LCM form.
-
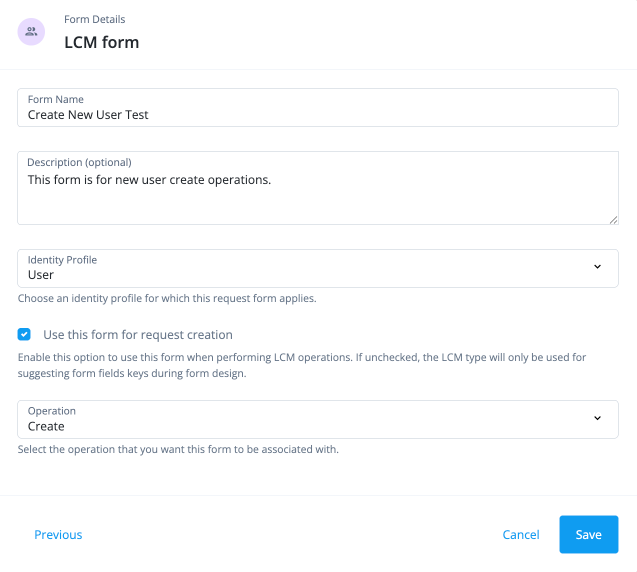
In the LCM form modal, configure the following:
-
Form Name: Enter a form name.
-
Description (optional): Enter a general description of the form.
-
Identity Profile: Select User.
-
Use this form for request creation: Click this option to use with LCM operations.
-
Operation: Associate the form to the LCM operation. Select Create.
-
-
Click Save.
-
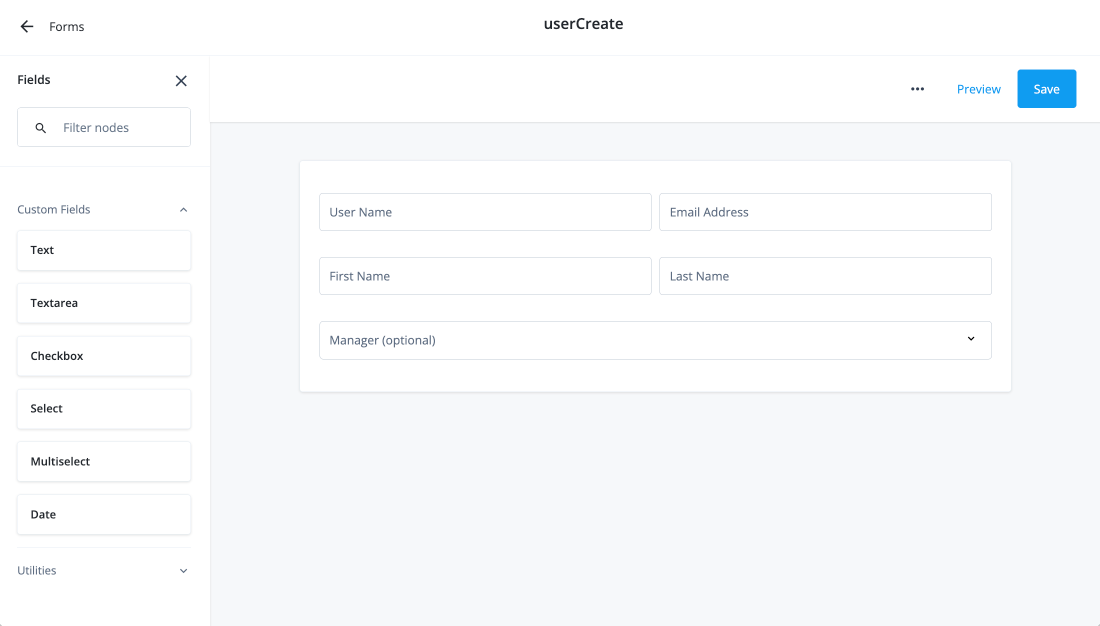
In the Create New User form editor, drag and drop the fields you want to include on the form and then click Save.
-
(Optional) Repeat the process to create forms for Modify User and Delete User, which appear in place of the default forms.
Configure user lifecycle workflows
Identity Governance provides the out-of-the-box request types and workflows to enable authorized users to carry out user LCM tasks. You can customize these workflows by creating copies of the workflow.
| Request Type | Workflow |
|---|---|
Create User |
Create User |
Modify User |
Modify User |
Delete User |
Delete user |
Configure workflows for user LCM
-
In the Advanced Identity Cloud admin console, go to Governance > Workflows.
-
Click ellipsis () next to Create User and click Duplicate.
-
In the Workflow Details modal, enter a name for the workflow, and click Save.
-
In the Workflow Editor, click the Approval node.
-
In the right pane, click add approvers manually and click to add approvers.
-
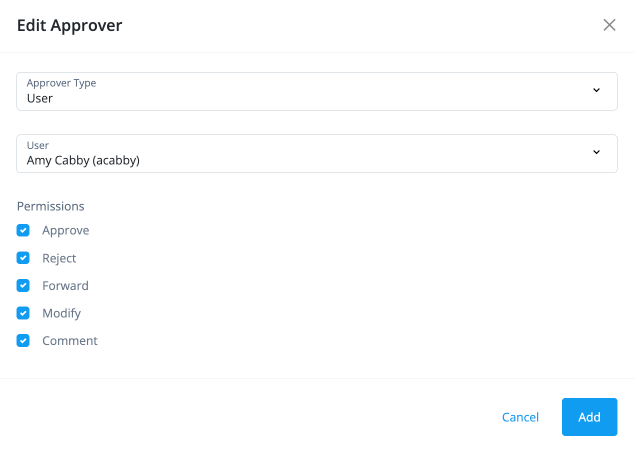
In the Edit Approver modal, configure the following:
-
Approver Type: Select User.
-
User: Select a user.
-
Permissions: Select the permissions available to the approver.
-
Approver
-
Reject
-
Forward
-
Modify
-
Comment
-
-
-
Click Add.
-
Click Save to apply your changes to the workflow.
-
When you are ready to use your workflow, click Publish.
-
Repeat the process to set the approver for the Modify User and Delete User workflows.
Create a new user
-
In the Advanced Identity Cloud end-user UI, sign on as your test user who has application permissions.
-
Go to Administer > Users.
-
On the Users page, click New User.
-
In the New user modal, fill out the form for the new user.
-
Click Submit.
A change request is entered in the system and must be approved by the user specified in the workflow.
Modify a user
-
In the Advanced Identity Cloud end-user UI, sign on as your test user who has application permissions.
-
Go to Administer > Users.
-
Click > Edit to edit a user.
-
Modify any field in the Profile page and click Save.
A change request is entered in the system and must be approved by the user specified in the workflow.
Delete a user
-
In the Advanced Identity Cloud end-user UI, sign on as your test user who has application permissions.
-
Go to Administer > Users.
-
Click > Delete to remove a user.
-
In the Delete User? modal, click Submit if you’re certain you want to delete the user.
A change request is entered in the system and must be approved by the user specified in the workflow.