Create a form for custom request types
Creating a form for custom request types requires several steps the administrator must carry out:
-
Create a custom request type.
-
Create a simple form for the new custom request type.
-
Create a workflow to handle the custom request type and the form.
-
Submit a request.
Key points
The Form creator must consider the following key points:
-
You can only link a custom request type to a single form. While a form can be used with multiple custom requests, each custom request can only be associated with one form at a time.
-
The typical use case is to create a form that aligns with the custom request’s object type schema. For an example, refer to Create a custom request type.
-
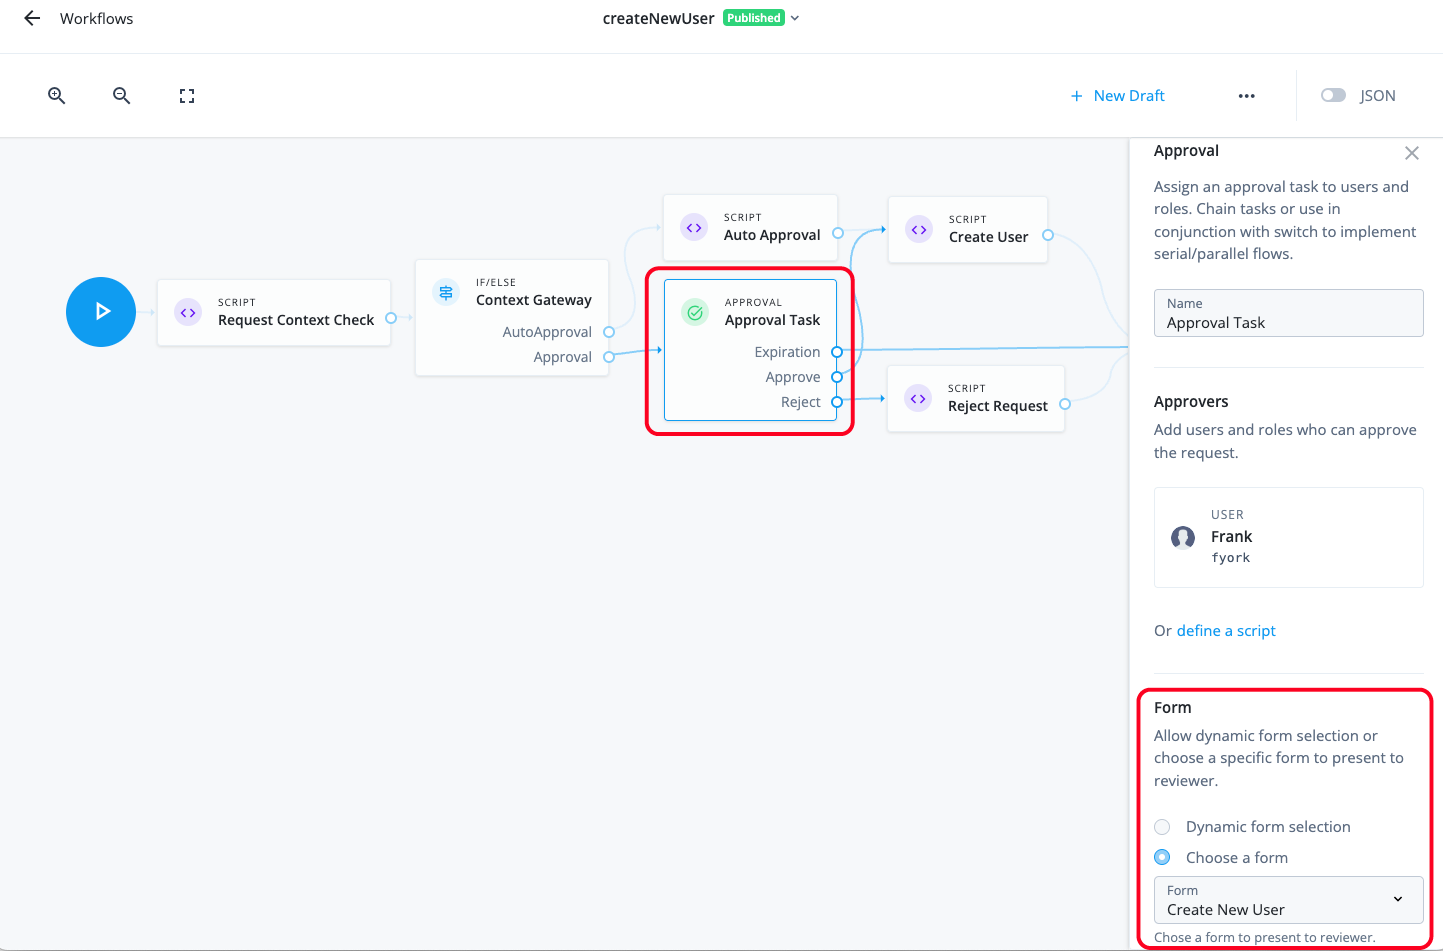
In a workflow, you can assign a form in the Approval node properties pane. For typical cases, you can select Choose a form and select your custom request form.
-
For more customization, you can define the keys exactly as you want. Once a request is generated, the form’s contents are copied into the request, making those properties available for use within the workflow to provision access as needed. For example, you can define a key with a value of
NAME. When a user submits a request, the key appears inrequest.common.object.blob.NAMEwith the value, Testing:{ "id": "409f28fc-65f6-41b8-a9f5-bb3a64f55925", "requester": { "givenName": "Frank", "id": "managed/user/c51d9ee1-43b3-49d1-8742-cbb33842a5cc", "mail": "frank.york@example.com", "sn": "York", "userName": "fyork", "isAdmin": false }, "requestType": "applicationGrant", "request": { "common": { "priority": "low", "justification": "Testing", "applicationId": "d248cc89-79b2-4f6a-98bc-46d0a938318f", "userId": "f3617664-4dd2-48eb-bdae-512f45b157df", "blob": { "form": { "NAME": "Testing" } }, "isDraft": false, "context": { "type": "request" } }, "_rev": 1 } ..... }
Steps
Governance or tenant administrators can carry out the following steps to create a new custom request form:
-
Create a custom request type. You can find an example in Workflow using a custom request type and form.
-
In the Advanced Identity Cloud end-user UI, click Forms > New Form.
-
In the New Form modal, click Custom request form, and then click Next.
-
In the modal, enter the following and click Save when completed:
Field Description Form Name
Enter a descriptive name for your form. Follow any convention established by your company.
Description (optional)
Enter a general description for the form.
Request Type (optional)
Select a request type this form is intended for.
You can only assign one form to each request type. If you click the checkbox, make this form available to the end user for new requests on the Advanced Identity Cloud end-user UI.
If you leave the checkbox unchecked, the request type only offers
Keyfield suggestions during the form design process.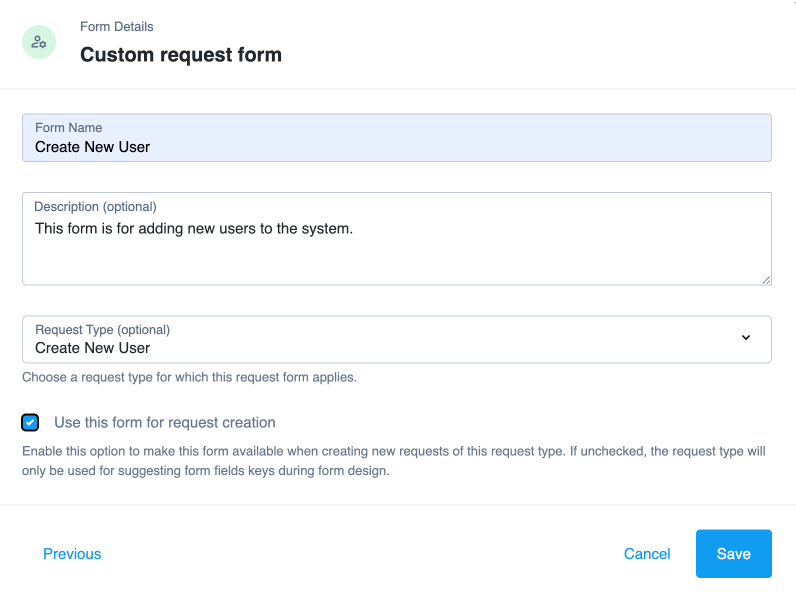
-
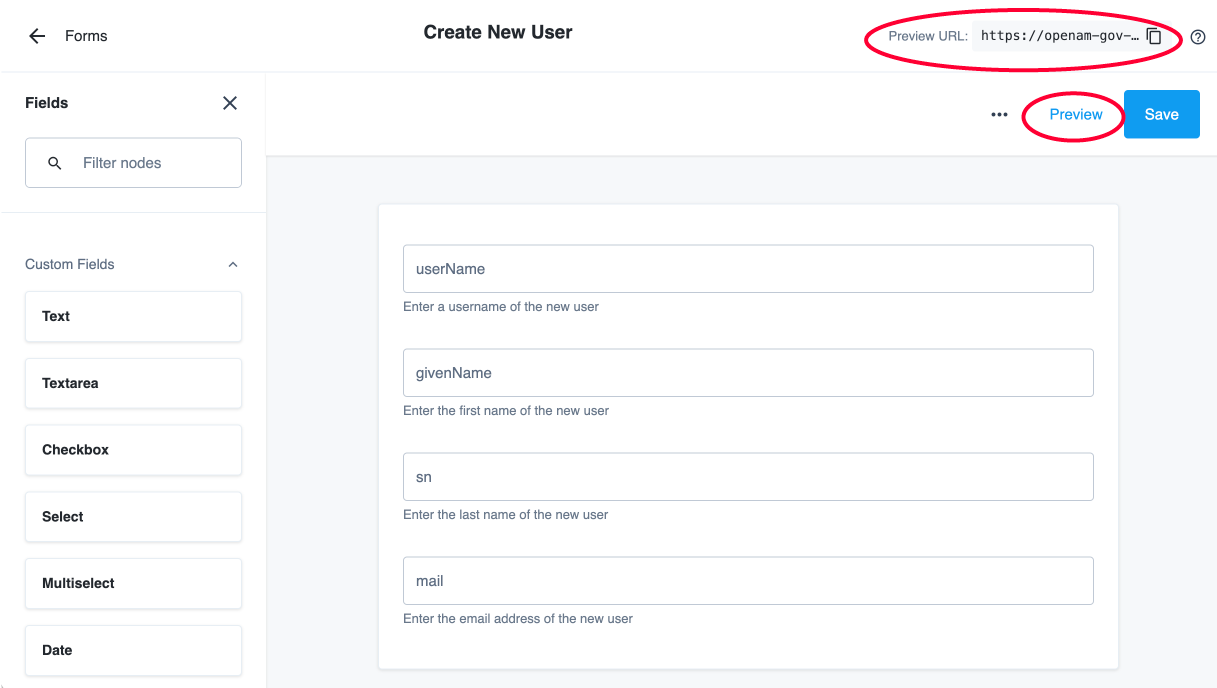
In the Forms editor, create your form by dragging and dropping any of the form fields onto the canvas and fill in the fields in the right pane.
-
Click Preview to see the form you created. Click Exit Preview to go back. Copy and save the Preview URL in the top right corner. This is the URL on the Advanced Identity Cloud end-user UI.
-
Click Save. Your form appears on the Forms page.
End user steps
Administrators can test the new custom request form by logging in to an end-user account.
-
In the Advanced Identity Cloud end-user UI, log in as an end user.
-
If you clicked Use this form for request creation, you can make the new custom request form available to the end user by using the Preview URL. For example, the end user pastes in the preview URL in the Advanced Identity Cloud end-user UI browser to access the custom request form.
