Run training
|
End of life for Autonomous Access After much consideration and extensive evaluation of our product portfolio, Ping Identity is discontinuing support for the Advanced Identity Cloud Autonomous Access product, effective October 31, 2024. To support our Autonomous Access customers, we’re offering migration assistance to PingOne Protect, an advanced threat detection solution that leverages machine learning to analyze authentication signals and detect abnormal online behavior. PingOne Protect is a well-established product, trusted by hundreds of customers worldwide. The end of life for Autonomous Access indicates the following:
For any questions, please contact Ping Identity Support for assistance. |
The Training job is the first part of a multi-step process that automates machine learning workflows to generate the machine learning (ML) models. An ML model is an algorithm that learns patterns and relationships from data, enabling it to make predictions or perform tasks without explicit programming instructions.
Initially, Autonomous Access’s training job operates without a model, focusing on processing jobs to gather and correlate unstructured and unlabelled data into structured input data. Subsequently, the training workflow utilizes this input data and heuristics to generate machine learning models, iteratively refining its processing to enhance model accuracy.
| Whenever you add new users after a training run, you need to create a new training job and run training again to update the model. You will need atleast twenty events for a new user to successfully be part of the UEBA and heuristics learning process. |
Once the training job has completed, you must tune the models for greater accuracy and performance. Once the models are tuned, you must rerun the training job, and then publish the model, saving it for later use in production.
Finally, with the new training model and rules, run a predictions job on the historical data.
| ForgeRock encourages customers to create and run the training pipelines and evaluate the models for accuracy. Administrators can run training on a periodic basis (e.g., bi-weekly or bi-monthly) and as soon as the Autonomous Access journeys begin to collect data. |
Run training
Using the default data source, autoaccess-ds, run the training job on the UI.
The general guidance as to when you can run your first training model is as follows:
-
Six months of customer data. For optimal results, Autonomous Access requires six months of customer data, or data with 1000 or more events. Data collections with less than 1000 events will not yield good ML results.
The training job takes time to process as it iteratively runs the machine learning workflows multiple times.
Run the Training job
-
On the Autonomous Access UI, go to Risk Administration > Pipelines.
-
Click Add Pipeline.
-
On the Add Pipeline dialog box, enter the following information:
-
Name. Enter a descriptive name for the training job.
-
Data Source. Select the data source to use for the job.
-
Select Type. Select Training. The dialog opens with model settings that you can change if you understand machine learning.
-
Model A. Model A is a neural-network module that is used to learn the optimal coding of unlabeled data. You can configure the following:
-
Batch size. The batch size of a dataset in MB.
-
Epochs. An epoch is the number of iterations the ML algorithm has completed during its training on the entire dataset.
-
Learning rate. The learning rate is a parameter that determines how much to tune the model as model weights are adjusted. Thus, the learning rate adjusts the step size of each iterative training pass.
-
-
Model B. Model B is a neural-network module that returns good data points that helps with predictive training. You can configure the following:
-
Batch size. The batch size of a dataset in MB. The smaller the batch size, the longer the training will run, but the results may be better.
-
Epochs. An epoch is the number of iterations the ML algorithm has completed during its training on the entire dataset.
-
Learning rate. The learning rate is a parameter that determines how much to tune the model as model weights are adjusted. Thus, the learning rate adjusts the step size of each iterative training pass.
-
-
Model C. Model C is a module that aggregates and groups data points.
-
Max number_of_clusters. Maximum number of clusters for the dataset.
-
Min number_of_clusters. Minimum number of clusters for the dataset.
-
-
Embeddings. The Embeddings module is a meta-model and is used to convert text fields into numbers that the ML models can understand. Autonomous Access trains the embedding model, and then trains the other models on top of the Embeddings model.
-
Embedding dimension. The embeddings module takes actual raw text data and encodes them into tokens or numbers. The embedding dimension determines how many numbers/tokens to use in the encoding. For the purposes of Autonomous Access, 20 is the default number and is sufficient for most Autonomous Access applications.
-
Learning rate. The learning rate is a parameter that determines how much to tune the model as model weights are adjusted. Thus, the learning rate adjusts the step size of each iterative training pass.
-
Window. Indicates how far ahead and behind to look for the data. The minimum number is 1. The default number is 5.
-
-
-
-
Click Save.
-
Click the trailing dots, click Run Pipeline, and then click Run. Depending on the size of your data source and how you configured your job settings, the training run will take time to process.
-
Click View on GCP to display the detailed processing of the pipeline. Take note of the workflow name, you can use it to monitor the logs during the training run.
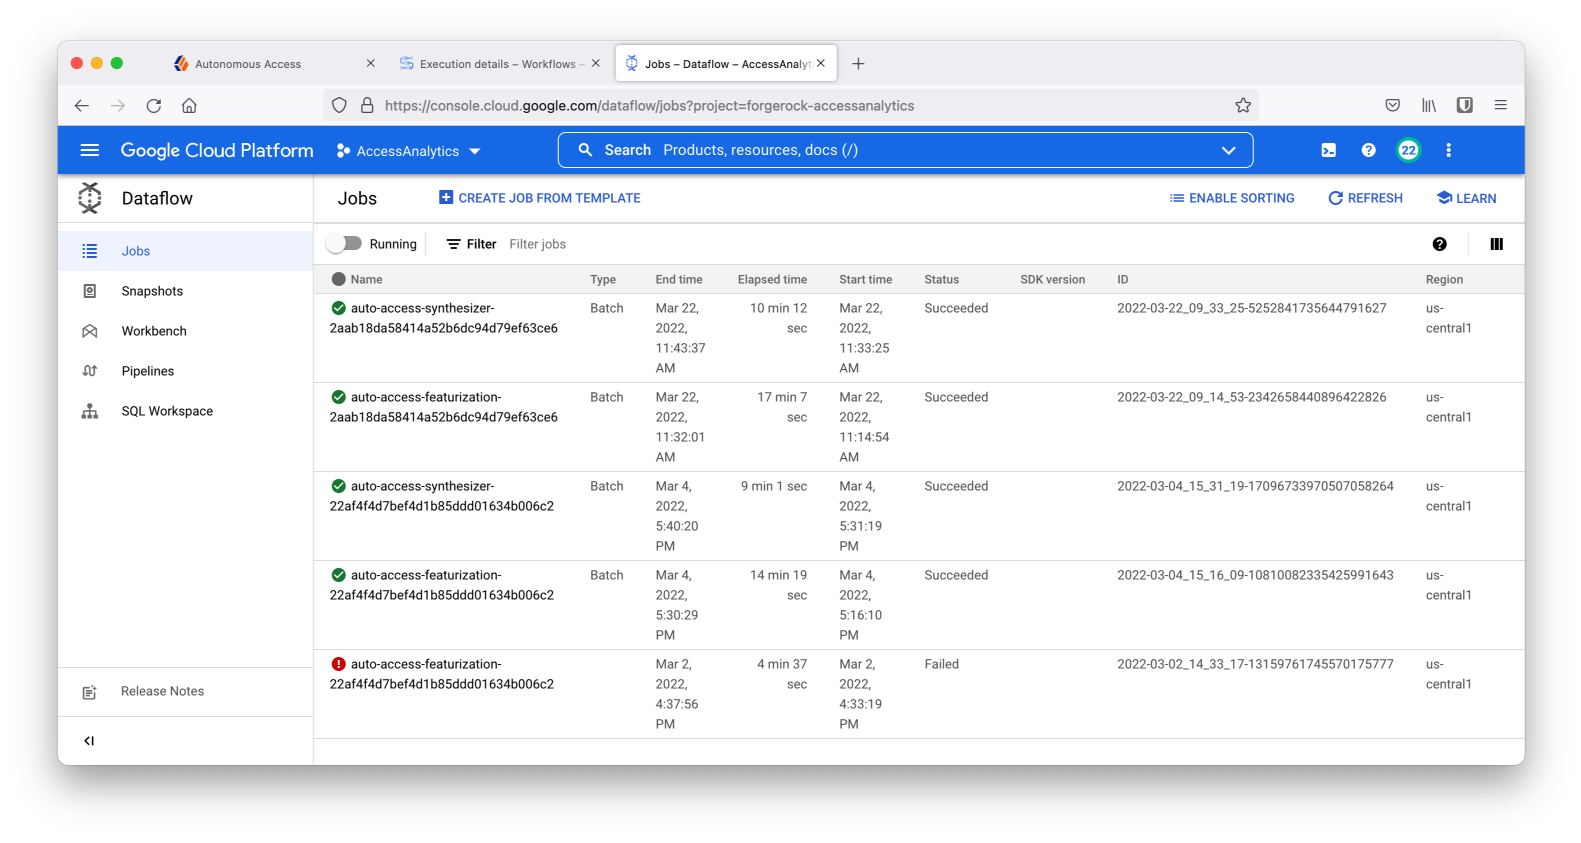
Another useful GCP page is to view the individual training sub-jobs on the Dataflow page. 
-
Click OK to close the dialog box.
-
Upon a successful run, a
Succeededstatus message appears.