Monitor log entries in the admin console
View log events in real time
-
In the Advanced Identity Cloud admin console, go to Monitoring.
-
Change the monitoring settings as needed. For example, you can select specific log sources and extend or shorten the monitoring timeframe.
-
Click Live tail.
Advanced Identity Cloud displays the entries from the stored logs based on the selected log sources and timeframe.
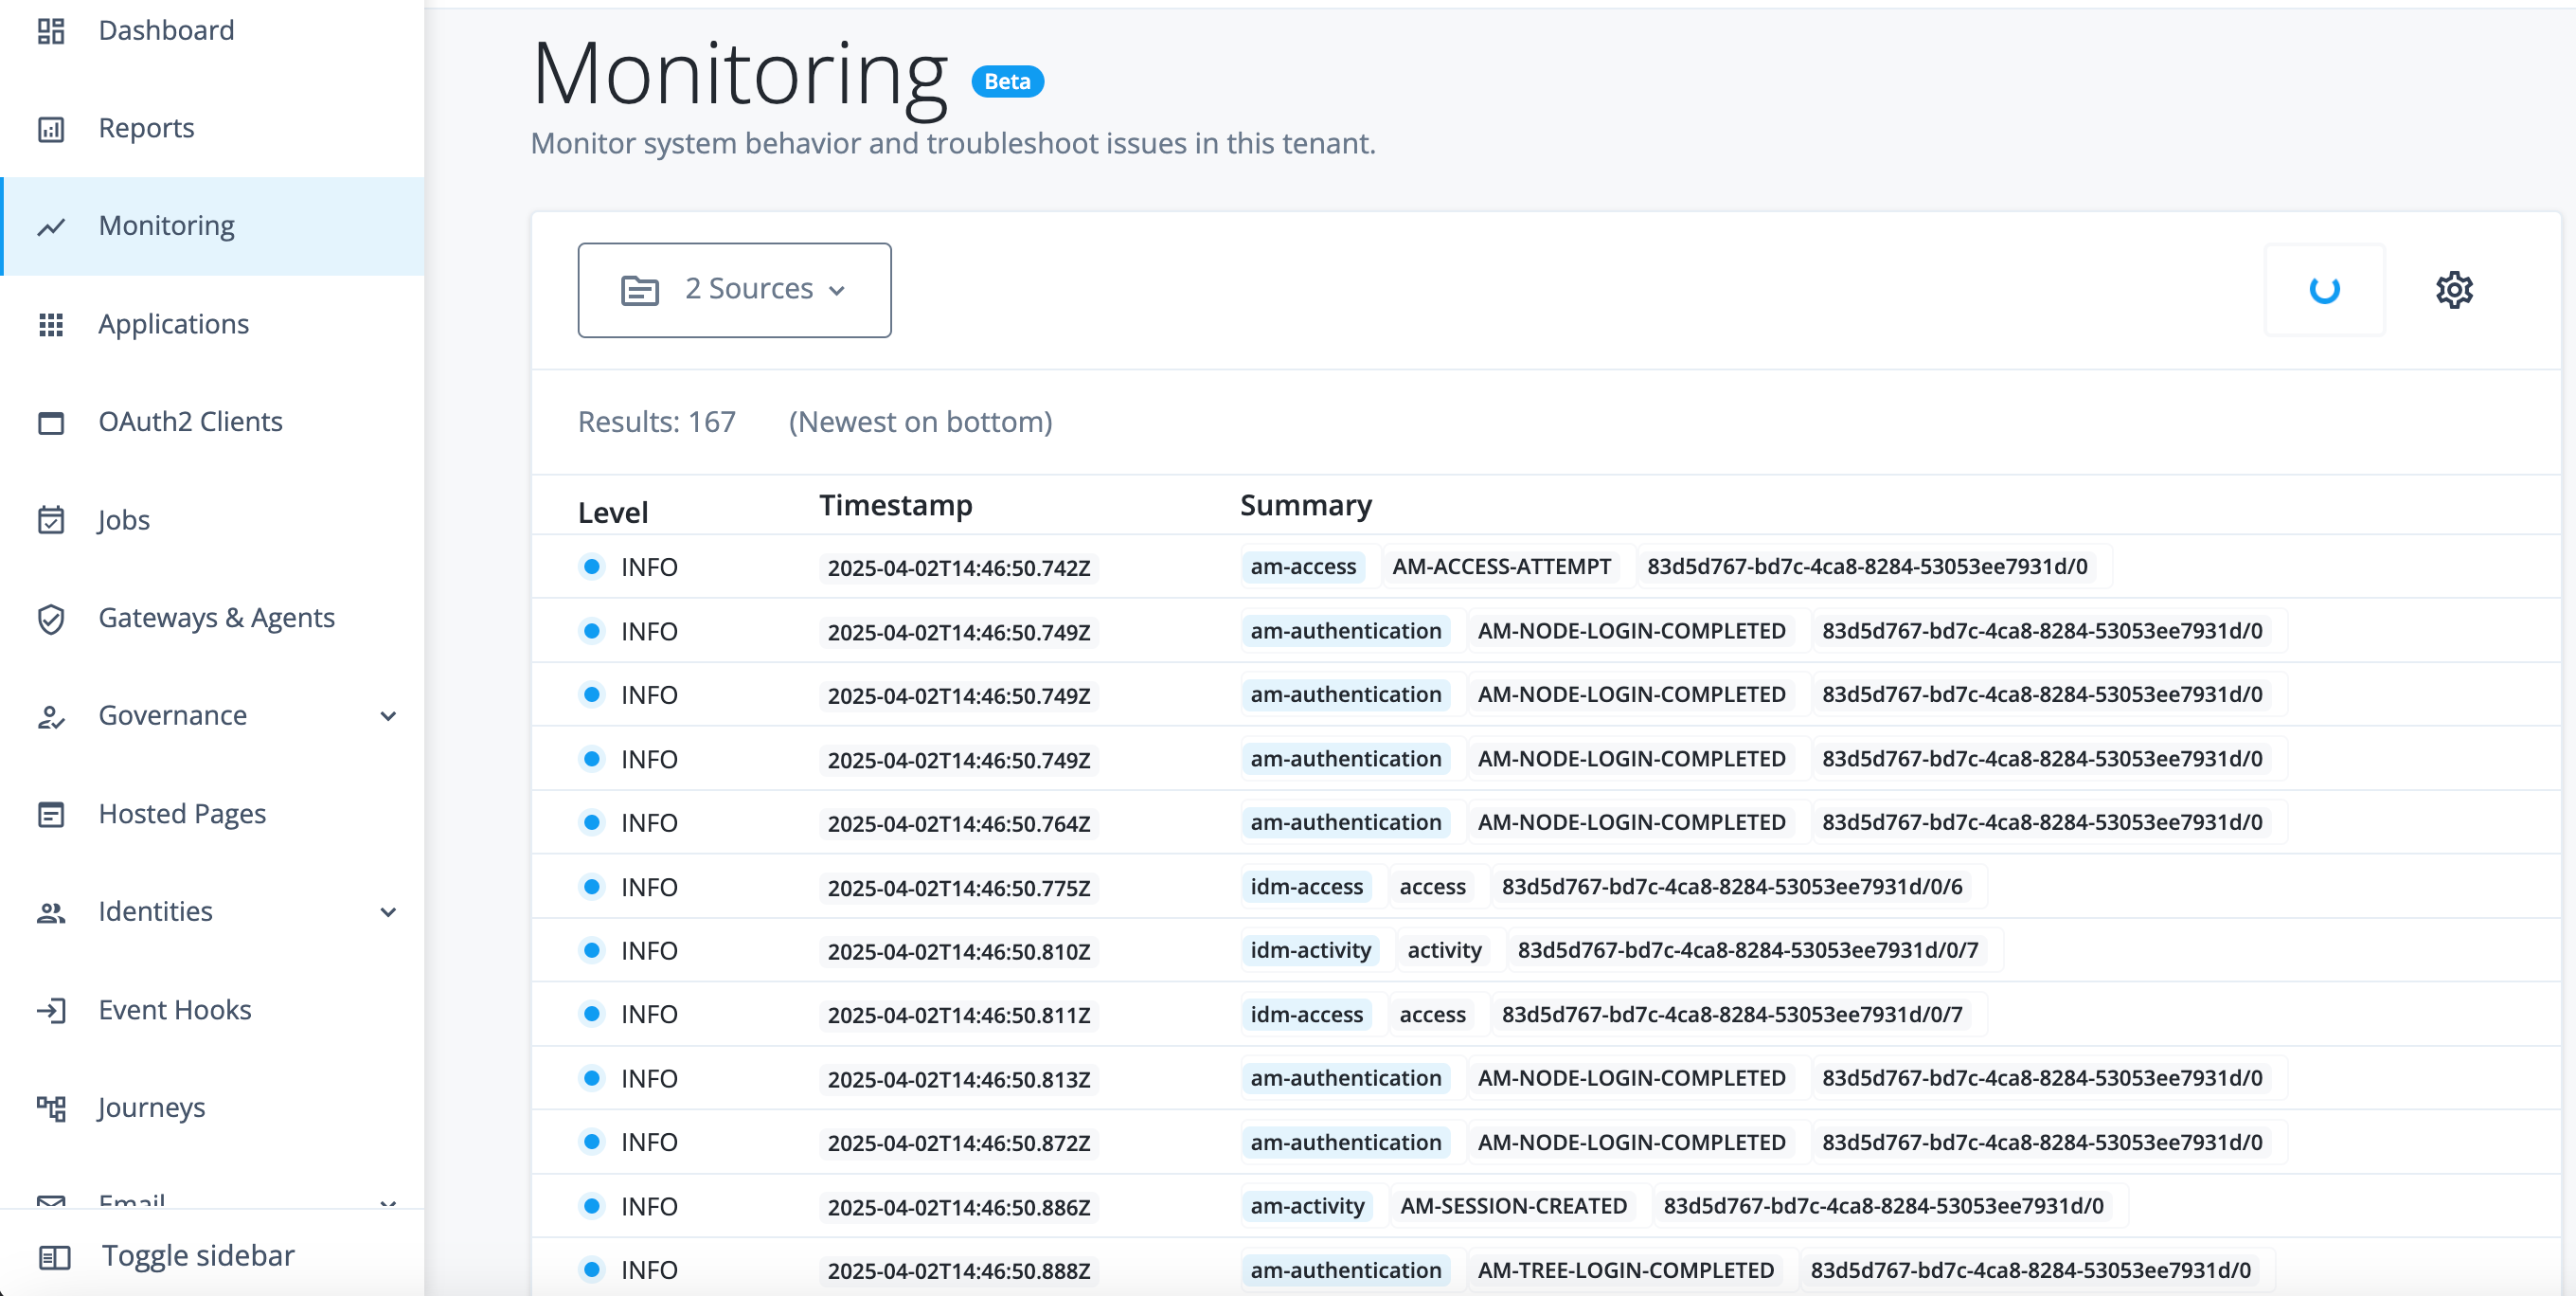
The first call to the tail endpoint returns log entries from the last 15 seconds. Subsequent calls return log entries in a range that starts from the last returned log entry in the previous result (inclusive) and ends with the latest log entry but one. If calls to the tail endpoint are not frequent enough to match the rate at which the log entries are produced, the result might not include all available log entries. Returning log entries could take some time. You can pause the live tail by clicking the progress spinner icon and clicking Pause logging. -
Search or filter the results as needed.
-
Click a log entry to view its JSON payload.
-
If needed, click Copy to copy the JSON payload to the clipboard.
Search and filter log entries
Search for log entries
-
In the Advanced Identity Cloud admin console, go to Monitoring.
-
Change the monitoring settings as needed to refine the log results.
-
Enter a value in the search field. For example, enter
asmithto search for all log entries that containasmithin the payload. -
Press Enter on your keyboard.
The console displays log entries with a payload containing the search value within the specified timeframe and log sources.
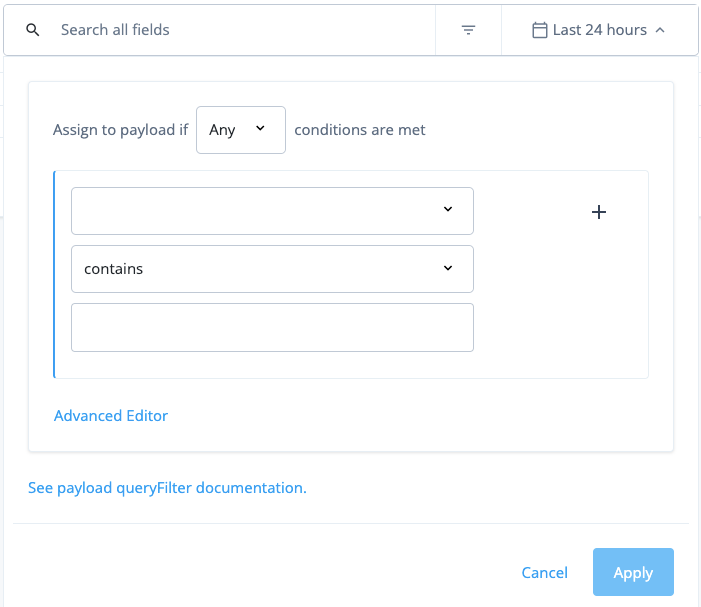
Filter log results using a query
You can filter log entries on any field or combination of fields in a payload.
-
In the Advanced Identity Cloud admin console, go to Monitoring.
-
Change the monitoring settings as needed to refine the log results.
-
Click Advanced search.
-
Select
AnyorAllto determine what conditions to meet. -
Create a rule:
-
Select the payload field in which to filter. For example,
payload/transactionIdfor a transaction ID. -
Select the operator. For example,
contains,starts with, oris. -
Enter the value on which to filter. For example,
141f7e86f-d2b7-49d3-a2a7-582c08961633/0(for a transaction ID) orasmith(for a UserID).
-
-
To add another rule to the filter query:
-
Click and click Add Rule.
-
Repeat step 5.
-
-
To add a group to the filter query:
-
Click and click Add Group.
-
Repeat steps 4 - 6.
-
-
Click Apply.
The console displays log entries matching your filter query.
| You can also construct filter queries by clicking Advanced Editor and entering a filter query. You can find some basic examples of filter expressions in Filter log results. |
Change the monitoring settings
You can adjust the monitoring settings to display only the logs you’re interested in. Any changes to the settings are automatically saved and will persist in your tenant environment the next time you sign on.
Specify the log sources to monitor
By default, Advanced Identity Cloud displays log entries for am-everything and idm-everything. You can change this setting to show only the log sources you’re interested in.
-
In the Advanced Identity Cloud admin console, go to Monitoring.
-
Click Sources and then click Choose sources.
-
Select or deselect the sources to monitor.
-
Click Save Sources.
Change the timeframe
By default, log entries are displayed for the last 24 hours. You can change this to display a preset or custom timeframe, up to 24 hours.
-
In the Advanced Identity Cloud admin console, go to Monitoring.
-
Click the Date range icon and select the required timeframe.
-
Click Apply.
Change the sort order
By default, Advanced Identity Cloud displays the newest log entries at the top.
-
In the Advanced Identity Cloud admin console, go to Monitoring.
-
Click View Settings.
-
Click either Newest on top (the default) or Newest on bottom.
Customize the payload fields shown in the summary
By default, the log event summary displays the source, payload.eventName, and payload.transactionId fields. You can customize the fields displayed and rearrange their order. For example, you might choose to display the payload.userId.
-
In the Advanced Identity Cloud admin console, go to Monitoring.
-
Click View Settings.
-
Click Customize Summary Fields
-
Customize the fields:
-
Select or deselect the fields you want to display in the summary.
-
Rearrange the order of fields by dragging the fields up or down the list.
-
-
Click Apply.