Part 2. Running the JavaScript custom UI sample app
In this section you configure the embedded login sample JavaScript app to act as your custom UI.
This app walks your users through the authentication tree to obtain a session, which it returns to your client app via the authentication server.
-
In a JavaScript-capable IDE, open the
sdk-sample-appsfolder you downloaded earlier. -
Navigate to the
/javascript/embedded-loginfolder, and open the.env.examplefile. -
Edit the values in the file to match your environment:
-
In SERVER_URL, enter the base URL of the PingAM component of your deployment, including the deployment path.
- PingAM example:
-
https://openam.example.com:8443/openam - PingOne Advanced Identity Cloud example:
-
https://openam-forgerock-sdks.forgeblocks.com/am
-
In REALM_PATH, enter the realm that contains the authentication journey you will use.
- PingAM example:
-
root - PingOne Advanced Identity Cloud example:
-
alpha
-
In TREE, enter the name of the authentication journey to sign on end users.
Note that the sample custom UI app only supports a limited number of callbacks by default, so choose a simple authentication tree that authenticates with only username and password.
For example, you can use the default
Loginauthentication tree.
As the custom UI does not perform any OAuth 2.0 interactions you can leave the
SCOPEandWEB_OAUTH_CLIENTproperties blank.The result will resemble the following:
Example.env.examplefileSERVER_URL=https://openam-docs-regular.forgeblocks.com/am REALM_PATH=alpha SCOPE= TIMEOUT=$TIMEOUT TREE=Login WEB_OAUTH_CLIENT= -
-
Save the file as
.envin the same folder. -
Update the
webpack.config.jsfile:-
Change the
portvalue to9443so that it does not clash with the client sample app. -
Change the
hostvalue to0.0.0.0, so that the app is made available on your local IP address, rather than justlocalhost.
The result resembles the following:
devServer: { port: 9443, host: '0.0.0.0', ... } -
-
From the
/javascriptfolder, run the embedded login custom UI app as follows:cd javascript npm run start:embedded-loginWebpack compiles the code and serves it on the local IP address of your computer.
-
In a browser, open the local IP address of your computer, with the port number you edited earlier.
For example,
https://192.168.0.35:9443Webpack outputs links to the locations it is serving in the console, that you can click or copy and paste into a browser.
Look for the line that includes the text
On Your Network (IPv4):[webpack-dev-server] Project is running at: [webpack-dev-server] Loopback: https://localhost:9443/ [webpack-dev-server] On Your Network (IPv4): https://192.168.0.35:9443/ [webpack-dev-server] On Your Network (IPv6): https://[fe80::1]:9443/ -
As the custom UI sample app is running on a self-signed SSL certificate on your local IP address, your browser might display a warning message.
You can ignore this warning for this tutorial:
-
In Chrome, click Advanced and then click Proceed to 192.168.0.35 (unsafe).
-
In Firefox, click Advanced and then click Accept the risk and continue.
-
In Safari, click Show Details and then click visit this website.
The custom UI app displays the first interactive node of the configured authentication journey:
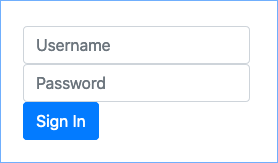 Figure 1. Custom UI app showing the first interactive node of the configured journey.
 -
With the custom UI sample app running, and your server configured, you can now proceed to test the setup by using one of the OIDC sample apps as a client.