Configuring SSL for external APIs
API Security Enforcer (ASE) supports both TLS 1.2 and Secure Sockets Layer (SSL) 3 for external application programming interface (API)s.
OpenSSL is bundled with ASE. The following are the version details:
-
RHEL 7 : OpenSSL 1.0.2k-fips January 26, 2017
-
Ubuntu 16LTS : OpenSSL 1.0.2g March 1, 2016
You can configure SSL in ASE for client side connection using one of the following methods:
-
Using a certificate authority (CA)-signed certificate
-
Using a self-signed certificate
-
Using an existing certificate
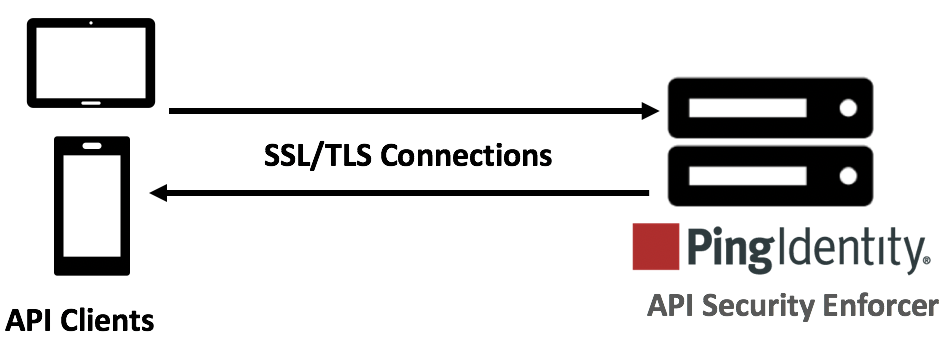
The steps provided in this section are for certificate and key generated for connections between the client and ASE as depicted in the following diagram.

In a cluster setup:
-
Stop all the ASE cluster nodes.
-
Configure the certificate on the management node.
-
Start the cluster nodes one by one for the certificates to synchronize across the nodes.
-
CA-signed certificate
-
Self-signed certificate
Using a CA-signed certificate
About this task
To use a CA-signed SSL certificates, follow the process to create a private key, generate a certificate signing request (CSR), and request a certificate as shown in the following diagram.

|
ASE internally validates the authenticity of the imported certificate. |
To use a CA-signed certificate:
Steps
-
Create a private key.
The ASE command-line interface (CLI) is used to create a 2048-bit private key and to store it in the key store.
Example:
/opt/pingidentity/ase/bin/cli.sh create_key_pair -u admin -p
Warning: create_key_pair will delete any existing key_pair, CSR and self-signed certificate
Do you want to proceed [y/n]:y
Ok, creating new key pair. Creating DH parameter may take around 20 minutes. Please wait
Key created in keystore
dh param file created at /opt/pingidentity/ase/config/certs/dataplane/dh1024.pem
-
Create a CSR.
ASE takes you through a CLI-based interactive session to create a CSR.
Example:
/opt/pingidentity/ase/bin/cli.sh create_csr -u admin -p
Warning: create_csr will delete any existing CSR and self-signed certificate
Do you want to proceed [y/n]:y
please provide following info
Country Code >US
State > Colorado
Location >Denver
Organization >Pingidentity
Organization Unit >Pingintelligence
Common Name >ase
Generating CSR. Please wait...
OK, csr created at /opt/pingidentity/ase/config/certs/dataplane/ase.csr
-
Upload the CSR that you created in step 2 to the CA signing authority’s website to get a CA-signed certificate.
-
Download the CA-signed certificate from the CA signing authority’s website.
-
Use the CLI to import the signed CA certificate into ASE.
Example:
/opt/pingidentity/ase/bin/cli.sh import_cert  <CA signed certificate path>  -u admin -p
Warning: import_cert will overwrite any existing signed certificate
Do you want to proceed [y/n]:y
Exporting certificate to API Security Enforcer...
OK, signed certificate added to keystore
Result:
The certificate is imported into the key store.
-
Restart ASE.
For more information, see Start and stop ASE.
Creating a self-signed certificate
About this task

To create a self-signed certificate:
Steps
-
Create a cluster key pair by running the following command-line interface (CLI) command:
create_cluster_key_pair [--yes | -y]
create private key for cluster server
--yes | -y : create private key without confirmation prompt
The Private key in the pair is automatically created and updated in the keystore in
<pi_install_path>/pingidentity/ase/config/certs/directory.Example:
The following command creates
dh1024.pemin the/opt/pingidentity/ase/config/certs/cluster/directory:$ pingidentity/ase/bin/cli.sh -u admin -p admin create_cluster_key_pair Warning: create_cluster_key_pair will delete any existing cluster key_pair, CSR and self-signed certificate Do you want to proceed [y/n]:y Ok, creating new cluster key pair. Creating DH parameter may take around 20 minutes. Please wait Cluster key created at keystore Cluster dh param file created at /opt/pingidentity/ase/config/certs/cluster/dh1024.pem -
Generate a certificate signing request (CSR) from the private key running the following CLI command:
create_cluster_csr [--yes | -y]
create certificate signing request for cluster server
--yes | -y : create certificate signing request without confirmation prompt
Example:
The following command creates a
.csrfile in the/opt/pingidentity/ase/config/certs/cluster/directory:$ pingidentity/ase/bin/cli.sh -u admin -p admin create_cluster_csr Warning: create_cluster_csr will delete any existing cluster CSR and self signed certificate Do you want to proceed [y/n]:y please provide following info Country Code >OP State >GP Location >IP Organization >KP Organization Unit >Kpase Common Name >www.123.com Generating CSR. Please wait... OK, cluster csr created at /opt/pingidentity/ase/config/certs/cluster/cluster.csrResult:
This
.csrfile is saved in the<pi_install_path>/pingidentity/ase/config/certs/cluster/directory. -
Generate a self-signed certificate by running the following command:
create_cluster_self_sign_cert [--yes | -y]
--yes | -y : create self signed certificate without confirmation prompt
Example:
The following command creates a self-signed certificate in the key store:
$ pingidentity/ase/bin/cli.sh -u admin -p admin create_cluster_self_sign_cert
Warning: create_cluster_self_sign_cert will delete any existing cluster self signed certificate
Do you want to proceed [y/n]:y
Creating new cluster self signed certificate
OK, self sign certificate created in key store
The certificate is automatically created in the key store in the
<pi_install_path>/pingidentity/ase/config/certs/directory. -
Restart the ASE cluster for synchronizing the key and certificate.
For more information, follow the instructions in Restart ASE cluster.