The FAPI trusted directory
In a FAPI-based ecosystem, a central authority operates a trusted directory. Although not required for FAPI conformance testing, the trusted directory is a critical component of the ecosystem.
The trusted directory records the keys and other metadata for API clients of trusted organizations. The central authority vets the participants and restricts access to trusted organizations and their API clients. Each trusted organization registers its API clients with the trusted directory before registering them with other organizations.
When an API client registers with another organization, the trusted directory ensures only a trusted API clients can do so:
-
Each organization configures their authorization server to use the trusted directory.
When an API client registers dynamically with the authorization server, it presents a signed software statement assertion (SSA) from the trusted directory.
The authorization server validates the software statement including the signature and issuer.
-
The software statement from the trusted directory includes the client’s keys and other metadata. It vouches for the API client as a trusted participant in the ecosystem.
The trusted directory issues software statement assertions only to trusted API clients of trusted organizations.
-
The trusted directory can revoke an API client’s participation in the ecosystem.
Production deployments in FAPI-based ecosystems require the trusted directory. In each participating organization, the authorization server depends on SSAs from the central trusted directory. PingGateway protects dynamic client registration (DCR) requests to the authorization server, allowing only trusted API clients to register.
Make sure you understand the trusted directory’s role in API client registration. This page explains how to use the sample trusted directory for this tutorial.
Run the sample trusted directory
|
If you plan to deploy FAPI components on Kubernetes using Helm, generate a keystore for the sample as described in this section, then follow the instructions in Deploy FAPI with Kubernetes and Helm instead. This feature requires PingGateway 2026.6 or later. |
The sample trusted directory is a Docker image available as gcr.io/forgerock-io/ig-sample-trusted-directory:2026.6.0.
You can run it locally or in a test environment accessible to PingGateway.
The sample trusted directory requires the following:
-
A fully qualified domain name (FQDN).
If you’re running the sample trusted directory locally, add an alias to your hosts file:
127.0.0.1 trustdir.example.com -
CA keys for TLS and another key pair for signing.
Generate your own for testing.
-
A configuration file for the sample trusted directory.
Save a configuration file such as the following example as
trusted-directory/config/config.yml:server: port: 8080 trustedDirectory: issuerName: PingGateway Sample Trusted Directory fqdn: trustdir.example.com:8080 signing: keystorePath: /var/trusted-directory/secrets/trusted-directory-keystore.p12 keystoreType: PKCS12 keyAlias: jwt-signer ca: keystorePath: /var/trusted-directory/secrets/trusted-directory-keystore.p12 keystoreType: PKCS12 keyAlias: ca certSigningAlg: SHA256withRSA storageFilePath: /var/trusted-directory/data/trusted-directory-jwks.json cert: keySize: 4096 validityDays: 365Notice the issuer name is
PingGateway Sample Trusted Directory. When the sample trusted directory issues a software statement, it uses this issuer name. You’ll need it when you register the trusted directory in PingOne Advanced Identity Cloud.
The following sample script runs the sample trusted directory as a Docker container listening on port 9080.
It generates the keys in a ./secrets folder using the keytool command on the first run:
#!/usr/bin/env bash

DOCKER_IMAGE="gcr.io/forgerock-io/ig-sample-trusted-directory:2026.6.0"
SECRETS_DIR="trusted-directory/secrets"
KEYSTORE_FILE="${SECRETS_DIR}/trusted-directory-keystore.p12"

checkForDocker() {
  OUT=$(docker --version)
  RC=$?
  if [ $RC -ne 0 ]; then
      echo "### 'docker' command not found. The sample trusted directory requires Docker to run."
      exit $RC
  else
    echo "Found ${OUT}"
  fi
}

checkForKeytool() {
  OUT=$(keytool --version)
  RC=$?
  if [ $RC -ne 0 ]; then
      echo "### 'keytool' command not found. The sample trusted directory requires keytool to create test keys."
      exit $RC
  else
    echo "Found ${OUT}"
  fi
}

createKeys() {
  echo "### Creating trusted directory keystore ${PWD}/${KEYSTORE_FILE}..."
  echo
  mkdir -p "${SECRETS_DIR}"

  echo "### Generating CA keys..."
  echo
  keytool -keystore "${KEYSTORE_FILE}" -storetype PKCS12 \
          -genkeypair -alias ca -ext bc=ca:true -keyalg RSA -keysize 4096 -validity 365 \
          -dname "CN=PingGateway Sample Trusted Directory Root CA" \
          -storepass changeit -keypass changeit

  echo
  echo "### Generating JWT Signing keys..."
  echo
  keytool -keystore "${KEYSTORE_FILE}" -storetype PKCS12 \
          -genkeypair -alias jwt-signer -keyalg RSA -keysize 4096 -validity 365 \
          -dname "CN=PingGateway Sample Trusted Directory JWT Signer" \
          -storepass changeit -keypass changeit

  echo
  echo "### Listing keystore contents..."
  echo
  keytool -keystore "${KEYSTORE_FILE}" -storetype PKCS12 -list -storepass changeit

  echo
  echo "### Exporting CA certificate..."
  echo
  keytool -exportcert -alias ca -rfc -file "${SECRETS_DIR}/trusted-directory-ca.pem" \
          -keystore "${KEYSTORE_FILE}" -storetype PKCS12 -storepass changeit

  echo
  echo "### Done."
}

initializeDataDir() {
    echo "### Initializing trusted directory data directory..."
    echo
    mkdir -p "${PWD}/trusted-directory/data"
}

runTestTrustedDirectory() {
  echo "### Running sample trusted directory in Docker..."
  echo

  docker pull "${DOCKER_IMAGE}"

  docker run \
  --detach \
  --init \
  --tty \
  --rm \
  --mount type=bind,src="${PWD}/trusted-directory",dst="/var/trusted-directory" \
  --env TD_CONFIG_PATH="/var/trusted-directory/config/config.yml" \
  --env TD_SIGNING_KEYSTORE_PWD=changeit \
  --env TD_SIGNING_KEYSTORE_KEY_PWD=changeit \
  --env TD_CA_KEYSTORE_PWD=changeit \
  --env TD_CA_KEYSTORE_KEY_PWD=changeit \
  --name sample-trusted-directory \
  --publish 9080:8080 \
  "${DOCKER_IMAGE}"
}

checkForDocker

if [ ! -f "${KEYSTORE_FILE}" ]; then
  checkForKeytool
  createKeys
else
  echo "### Sample trusted directory keystore already exists, skipping key creation."
  echo
fi

initializeDataDir

runTestTrustedDirectory
You’ve successfully started the sample trusted directory.
Update the PingGateway trust store
For mutual TLS, PingGateway must trust the sample trusted directory’s CA certificate. The sample trusted directory uses its CA certificate to sign API client TLS certificates.
The following example generates imports the sample trusted directory’s CA certificate from a file named
trusted-directory/secrets/trusted-directory-ca.pem into secrets/keystore.p12:
keytool -keystore secrets/keystore.p12 -storetype PKCS12 \
        -importcert -trustcacerts -alias ca -rfc \
        -file trusted-directory/secrets/trusted-directory-ca.pem -storepass:file secrets/keystore.pin -noprompt
Register the sample trusted directory
In PingOne Advanced Identity Cloud the trusted directory plays the role of a software publisher. The authorization server uses a software publisher agent profile with the trusted directory’s metadata and keys. It uses the profile to validate and trust software statements (SSAs) the API clients present during registration.
| In production deployments, use your FAPI ecosystem’s official trusted directory service instead. |
-
In the Advanced Identity Cloud admin UI, click Native Consoles > Access Management to open the AM admin UI.
-
Go to Services > Applications > Software Publisher > Add Software Publisher Agent and configure the account for the trusted directory:
Field Value Agent ID
Trusted DirectorySoftware publisher issuer
PingGateway Sample Trusted DirectorySoftware statement signing Algorithm
PS256Public key selector
JWKs_URIJson Web Key URI
-
Click Save Changes.
You have successfully configured the software publisher account for the sample trusted directory.
Register the API clients
The FAPI conformance tests use two API clients, each with different keys and the same redirect URIs.
Create an organization
-
Go to the trusted directory Organizations UI page at http://trustdir.example.com:9080/ui/orgs, and click + New Organization.
-
Name the new organization
Test organizationand click Create Organization.
You’ve successfully created a test organization.
Create the API clients
Create both API clients by following these steps for each client:
-
On the Organizations UI page, click > in the Actions for the
Test organization. -
Click + New Software and use the following hints for the settings before clicking Create Software:
Field Example values Name
FAPI test client 1orFAPI test client 2Description
FAPI test client for conformance testsRedirect URIs
https://www.certification.openid.net/test/a/pinggateway/callbackhttps://www.certification.openid.net/test/a/pinggateway/callback?dummy1=lorem&dummy2=ipsumChange
pinggatewayin the URLs to a path element that’s unique to your test deployment.Roles
DATATerms of Service URI
https://example.com/terms-of-servicePolicy URI
https://example.com/policyAfter you create the API clients, they show up in the UI software list for the test organization:
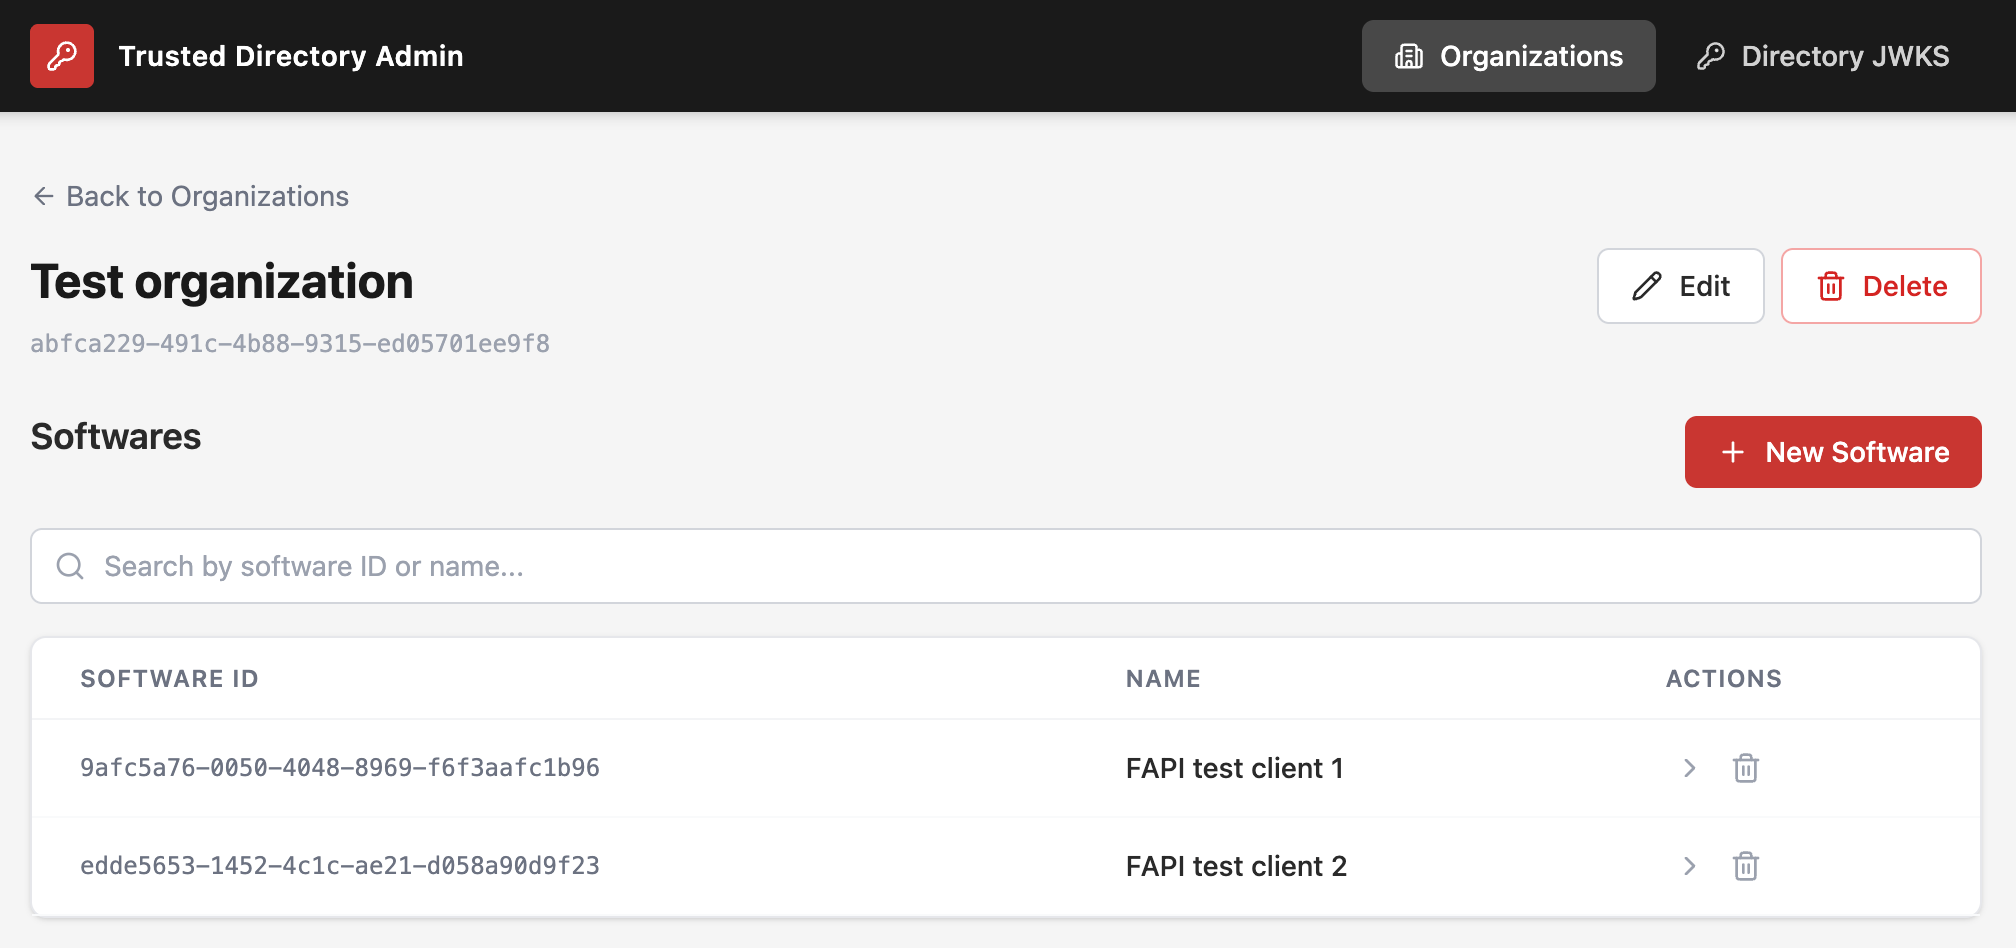
You’ve successfully created the test API clients.
Register each API client
Register each API client through PingGateway into PingOne Advanced Identity Cloud.
You provide the SSA and other client metadata as a client-signed JWT in the POST data of the registration request. Make sure you use the SSA and your client-signed JWT before either expires.
-
Get the SSA for the API client.
-
Go to the trusted directory UI
Test organizationpage under http://trustdir.example.com:9080/ui/orgs. -
Click the > in the Actions for test API client software to open its page.
-
Click Generate SSA and copy the generated JWT.
-
-
Prepare the JSON payload for the client registration request.
Here’s an example payload template for the first API client:
{ "client_name": "FAPI test client 1", "issuer": "PingGateway Sample Trusted Directory", "grant_types": [ "authorization_code", "client_credentials", "refresh_token" ], "id_token_signed_response_alg": "PS256", "iss": "test-client-1", "redirect_uris": [ "https://www.certification.openid.net/test/a/pinggateway/callback", "https://www.certification.openid.net/test/a/pinggateway/callback?dummy1=lorem&dummy2=ipsum" ], "request_object_signing_alg": "PS256", "response_types": [ "code id_token" ], "scope": "openid", "token_endpoint_auth_method": "tls_client_auth", "tls_client_auth_subject_dn": "CN=Test organization", "token_endpoint_auth_signing_alg": "PS256", "exp": <expiration-time>, "iat": <issued-at-time>, "nbf": <issued-at-time>, "software_statement": "<SSA-JWT>" }-
Copy the SSA JWT into the template as the
software_statementvalue. -
Decode the SSA JWT using the Ping Identity JWT Decoder online.
-
Copy the
expandiatclaim values from the decoded SSA JWT into the template.Use the value of
iatto set thenbf(not before) claim.
-
-
Generate the signed JWT for the client registration request:
-
Go to https://www.jwt.io/, select JWT encoder, and fill the form:
Field Use Header
{ "alg": "PS256", "typ": "JWT" }Payload
The completed JSON template from the previous step.
Sign JWT
Find the
sigkey in the JWK set you received when requesting the keys from the trusted directory.Copy and paste the JSON object just for that key, not the whole JWK set.
Private key format
JWK
-
-
Copy the resulting signed JWT to your clipboard.
-
Register the API client in PingOne Advanced Identity Cloud using the SSA JWT from the trusted directory for dynamic client registration, (DCR).
The following example registers an API client through PingGateway. Adapt this to match the realm and redirect URIs you use for testing:
$ curl \ --request POST \ --url 'https://gateway.example.com:8443/am/oauth2/realms/root/realms/alpha/register' \ --cacert "$HOME/path/to/secrets/gateway.pem" \ --header 'Content-Type: application/json' \ --header "ssl-client-cert: ${SSL_CLIENT_CERT}" \ --data "<client-signed-jwt>" -
Save the JSON response.
It includes the client ID, client secret, and important metadata required for conformance testing.
You have successfully registered the API client using the sample trusted directory. Repeat the steps for the other API client unless you have already done so.
When you’ve successfully registered both API clients, you can proceed to the conformance tests.