Accessing the PingOne Advanced Services admin console and administrative API
You can use the PingOne Advanced Services admin console or a REST-based API to perform many tasks yourself instead of submitting a service request.
For example, you can create and update virtual hosts yourself through the admin console or the administrative API. Learn more about virtual hosts in Creating and updating virtual hosts.
| You must be using the appropriate platform version to access the admin console and administrative API. The administrative API functionality was introduced in platform version 2.0.0, which was released in December 2024, and the administrative console was introduced in platform version 2.2.0, which was released in March 2026. |
To access the admin console:
-
Ensure that you have the appropriate roles assigned. Learn more about the roles available in User access control roles. Learn how to assign these roles in Assigning users the appropriate roles
-
Take these steps to access the admin console.
To access the administrative API:
-
Ensure that you have the appropriate roles assigned. Learn more about the roles available in User access control roles. Learn how to assign these roles in Assigning users the appropriate roles
-
Take these steps to configure access to the API.
| All administrative API events are logged. These logs include information about each event, the date and time it occurred, and information that identifies the users involved. Learn more about event logs in Monitoring and logging. |
Accessing the admin console
To complete platform self-service tasks, access the admin console.
Steps
-
Go to the following URL:
https://self-service.
<customer>.<region>.ping.cloud -
When prompted, enter your username and password.
The admin console displays.
-
The toolbar at the top of the page indicates which environment is selected. Ensure you’re working in the right environment by selecting it in the list.
-
Note the following:
-
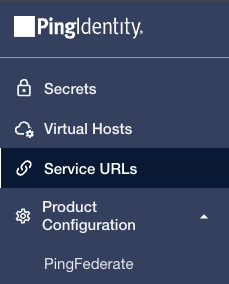
The Self-service section of the sidebar helps you navigate between self-service tasks.
-
Each page contains resource icons that indicate status:
-
Blue indicates creating
-
Green indicates complete
-
Yellow indicates updating
-
Red indicates an error
-
-
Configuring access to the administrative API
The API requires a JWT Bearer token for authenticating requests. This token can be retrieved using either an authorization code flow or a client credentials flow.
Authenticate using an authorization code flow
The API supports the authorization code flow, which gets access tokens by securely redirecting users to the authorization server for authentication.
To set this up, you’ll need to:
-
Ensure users are assigned the appropriate PingOne Advanced Services user access control roles.
-
Use the token to authenticate and access the API using Swagger UI, or command-line tools, such as Postman or cURL.
Assigning users the appropriate roles
If you’re using the PingOne platform:
Steps
-
In the user profile, add a custom attribute. Learn more about adding these attributes in Add custom attributes to a user in the PingOne documentation.
-
Select the appropriate PingOne Advanced Services roles for the user and click Save. You can find a complete list of available roles in User access control roles.
If you’re using the CAP, Ping Identity manages the roles and permissions your administrators are assigned. Submit an Elevate Admin service request and specify which roles and permissions users should have.
Signing on to an application to get an access token
To get a token:
Steps
-
Go to the PingOne Advanced Services login URL:
https://self-service-api.<environment>-<customer>.<region>.ping.cloud/api/v1/auth/login/<application>
Valid values for the application are “self-service”, “pingaccess”, “pingfederate”, “opensearch”, and “argocd”.
-
Enter your credentials and click Submit.
If authentication is successful, you’re redirected to the Success page and a Copy Token button displays.
-
Click Copy Token to copy the token to your clipboard.
Using the token to authenticate
If you’re using the API interactive documentation:
Steps
-
Go to the respective API docs URL.
-
Click Authorize.
-
Paste the token into the input field and click Authorize and then Close.
All requests made from the interactive documentation will be authenticated.
If you’re using command-line tools, such as Postman or cURL, query the API directly and include the bearer token in the headers.
For example, {"Authorization": "Bearer <TOKEN>"}
You can also use the interactive documentation to explore the API endpoints, view documentation for the API, and experiment with API calls. You can make API calls from an interactive user interface, custom applications, or from command-line tools. Learn more about this interactive documentation in Using the API interactive documentation.
Authenticate using a client credentials flow
This API also supports the client credentials flow, which is designed for machine-to-machine (M2M) interactions, where an application needs to access resources without involving a user.
| This type of flow can only be used if your PingOne environment is connected to your PingOne Advanced Services environment and both are correctly configured. Learn more about setting up this connection in Using the PingOne platform. |
To set this up, you’ll need to:
-
Create an OIDC application.
-
Generate a token.
To ensure that only administrators can generate access tokens, restrict access to the application that you created. Learn more about this process in Restricting access to the application.
Creating an OIDC application
Start by creating an OpenID Connect (OIDC) application in PingOne.
Steps
-
Go to Applications > Resources.
-
Click the icon.
-
Create the resource by completing these fields:
-
Resource name: A unique identifier for the resource.
-
Description (optional): A brief characterization of the resource that helps identify it.
-
-
Click Next.
-
On the Attributes page, click Add to add a new attribute.
-
Create an attribute labeled
name.Click the Gear icon to open the expression builder and enter a hardcoded name, such as
OrchestrationTool. This is the name that will display with the tokens in the application logs. Learn more in Using the expression builder in the PingOne documentation. -
Create an attribute labeled
groups.Click the Gear icon to open the expression builder and enter the appropriate user access control roles. Set the values to a hardcoded list of valid roles. For example, {“dev-tls-admin”, “prod-tls-audit”}. Learn more about these roles and permissions in User access control roles.
The PingOne Advanced Services attributes must be set up for them to display in the list. Learn more about adding this attribute in Creating custom user attributes. -
Click Next.
-
On the Scopes page, add a new scope to map the role to the new application. Click Add Scope and complete the following fields:
-
Scope name: A unique identifier for the scope.
-
Description (optional): A brief description of the scope that helps identify it.
-
-
Click Save.
-
Now, add the OIDC application. Go to Applications > Applications.
-
Click the icon.
-
Complete the following fields:
-
Application name: A unique identifier for the application.
-
Description (optional): A brief characterization of the application that helps identify it.
-
Icon (optional): A graphic representation of the application. Use a file up to 1 MB in JPG, JPEG, GIF, or PNG format.
-
-
In the list of available application types, select OIDC Web App. Click Save.
-
On the Configuration tab, click the Pencil icon to edit the configuration.
-
Change the Response Type to none by clearing all the options.
-
Change the Grant Type to Client Credentials.
-
-
Click Save.
-
On the Resources tab, click the Pencil icon to add the scope you added in step 8 to the application.
-
Click Save and click the toggle at the top of the details panel to enable the application.
Generating a token
Access the new application in the PingOne admin console to generate an access token.
Steps
-
Follow the steps outlined in Getting an access token in the PingOne documentation.
-
Include the bearer token in the headers.
For example,
{"Authorization": "Bearer <TOKEN>"}
You can also use the interactive documentation to explore the API endpoints, view documentation for the API, and experiment with API calls. You can make API calls from an interactive user interface, custom applications, or from command-line tools. Learn more about this interactive documentation in Using the API interactive documentation.
Using the API interactive documentation
The API includes interactive documentation for both developers and non-developers to explore the API endpoints, view documentation for the API, and experiment with API calls. Built on Swagger UI, this interactive tool makes it easy for you to visualize, interact with, and test the APIs within a browser.
You can make API calls from an interactive user interface, custom applications, or from command line tools such as cURL.
Before you begin
Ensure you have access to the administrative API. Learn more in Accessing the admin console and administrative API.
To access the administrative API documentation:
Steps
-
Start a web browser.
-
Go to the URL:
https://self-service-api.<environment>-<customer>.<region>.ping.cloud/docs
The API is also documented in the OpenAPI Specification, previously known as the Swagger Specification. Go to: https://self-service-api.<environment>-<customer>.<region>.ping.cloud/api/v1/openapi.json.
To test an administrative API:
Steps
-
Select a section of the administrative API you would like to explore. For example, /hostnames.
-
Expand the method you want to use. For example, GET /hostnames.
-
Enter required parameters, if any. For more information, see Schema Models under the selected API endpoint.
-
Click Try it out.
You will be prompted to sign on using an access token for OAuth authentication. The role assigned to the respective administrative accounts affects the access to the requested API. If the request completes successfully, the administrative API returns the Request URL, the Response Body, the Response Code, and the Response Headers.