PingOne Protect Connector
This connector lets you use PingOne Protect in a PingOne DaVinci flow to improve the user experience, reduce multi-factor authentication (MFA) fatigue, lower the probability of unintentional push approvals, and issue challenges or deny access in high-risk situations.
PingOne Protect is a cloud-based service that applies machine learning and configurable, intelligent security policies to analyze user identity and detect potential threats. PingOne Protect combines multiple risk factors to calculate an overall risk score.
When you add a PingOne Protect connector in a flow, you can define different paths based on the recommended action (when available), the risk level, or the risk score calculated by PingOne Protect in a risk evaluation. For example:
-
Skip the MFA challenge for low risk.
-
Use a specific authentication method if user behavior data suggests medium or high risk.
-
Block access completely for high risk, such as when the recommended action is bot mitigation or if impossible user travel is detected.
Learn more in the PingOne Protect documentation.
Setup
Resources
Learn more in the following documentation:
-
PingOne Protect documentation:
-
PingOne DaVinci documentation:
Requirements
To use the connector, you’ll need:
-
A PingOne Protect license
-
A PingOne environment with PingOne Protect added. Learn more in Adding an environment.
-
A worker application configured in your PingOne environment. Learn more in Choosing a PingOne worker app.
-
A PingOne Protect risk policy. You can use the default risk policy or create a custom risk policy. Learn more in Risk policies.
Choosing a PingOne worker app
Most environments include a preconfigured worker app that you can use with DaVinci connectors.
To add a worker app:
-
Decide whether to connect to the host PingOne tenant or a different PingOne tenant.
-
In the PingOne admin console, go to Applications > Applications.
-
Select the preconfigured PingOne DaVinci Connection worker app.
|
A small number of older environments might not have the preconfigured worker app. If that applies to your environment, you can:
|
Setting up the connector
-
Follow the instructions in Getting started with PingOne Protect.
-
In PingOne DaVinci, add a PingOne Protect connector.
Connector configuration
Environment ID
The Environment ID from the Environment Properties page of the relevant environment in PingOne.
Client ID
The Client ID of the worker application you identified in Choosing a PingOne worker app.
Client Secret
The Client Secret from the Configuration tab of the PingOne worker application you identified in Choosing a PingOne worker app.
Using the connector in a flow
Use the PingOne Protect connector to add risk evaluations to different types of flows, such as sign-on with MFA or passwordless sign-on. You can use the PingOne Protect connector in template flows available in the Ping Identity Marketplace, such as:
Learn more about risk evaluations and how the response result affects the user flow in Reviewing risk evaluations.
The PingOne Protect connector provides these capabilities:
-
Create Risk Evaluation: Add in the flow where you want to base the next action on the risk score or level calculated. For example, show an MFA prompt for medium or high risk but automatically grant access for low risk.
-
Update Risk Evaluation: Add in the flow after authentication has been completed. This capability represents the system’s ability to learn over time to improve results and is essential for risk evaluation precision.
The following diagram shows an example user transaction flow with the two different PingOne Protect connector capabilities:

Create Risk Evaluation
Evaluate risk for a specific transaction based on predictors, such user location anomaly, IP reputation, and bot detection. Learn more in Predictors.
Steps
-
In your flow, add a PingOne Protect connector and select the Create Risk Evaluation capability.
-
On the General tab, enter the following information:
-
User Name
-
User ID
-
IP
-
Risk Policy ID (optional): If you’ve created custom risk policies beyond the default risk policy, you can enter the ID of the risk policy you want to use in the flow.
You can find the ID for a risk policy on the Risk Policies page in your environment in PingOne. If you don’t provide a risk policy ID, the connector uses the default risk policy.
-
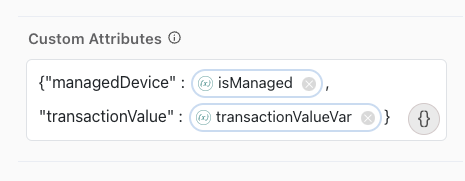
Custom Attributes (optional): If you’re using a policy that includes one or more custom predictors that require external data, use the Custom Attributes field to enter the names of the custom attributes and their values.
For example:
{"managedDevice" : isManaged, "transactionValue" : transactionValueVar}The attribute names must match the attribute names you used in the custom predictors that you created and included in the risk policy. Learn more in Adding custom predictors and Using third-party risk scores with PingOne Protect.
-
-
Click Apply.
-
To improve risk analysis, include the data for additional risk-related variables provided by the Signals (Protect) SDK.
Risk evaluation can be performed without the Signals (Protect) SDK payload if there’s no way to provide the payload. However, some predictors require the SDK payload and won’t return a risk level if the payload is missing. Learn more in Predictors.
-
Manual deployment
-
skriskcomponent -
PingOne Forms connector
You can manually deploy the Signals (Protect) SDK when integrating using the PingOne DaVinci APIs. For mobile applications or integrating your webpage with PingOne DaVinci using APIs instead of redirecting, you’ll:
-
Deploy the Signals (Protect) SDK.
-
Send the SDK payload and the rest of the required data, such as username, user ID, IP address, and any custom attributes to PingOne DaVinci using the API.
-
Include a variable in your flow that represents the data obtained.
To manually deploy the SDK:
-
Follow the PingOne Protect Native SDKs documentation to implement the SDK in your mobile app or webpage.
-
Set global variables using the SDK to pass risk-related information from the SDK and map the information into the risk evaluation in PingOne DaVinci.
-
In PingOne DaVinci, click the applicable PingOne Protect connector with the Create Risk Evaluation capability in your flow to open its settings.
-
On the Device Configurations tab, for Risk input from device, enter the name of the variable that represents the data obtained from the SDK in your manual implementation.
-
In the User Agent field, enter the user agent string for the browser, if available.
User Agent is included in the SDK payload by default.
-
To improve risk analysis, use the Cookie field to provide the value of a persistent cookie, if available.
-
If you want to maintain your own device IDs, you can assign external device IDs that are not managed by the SDK, such as device serial number or mobile application installation ID. External IDs can be sent to PingOne DaVinci using the API.
For example, in a workforce user flow, you can use the Google Chrome Device Trust connector to map the user device serial number when using the Chrome browser.
-
To pass the risk information from the SDK to PingOne DaVinci, map the global variables that you set with the SDK into PingOne DaVinci:
-
On the Log Fields Mapping tab, click + Field.
-
Select and enter the global variables you set with the SDK.
-
-
You can include the
skriskcomponent in your flow to collect device and user behavioral data from user interactions with custom HTML templates in HTTP connectors, such as an HTTP sign-on or password reset flow. Learn more aboutskriskin SK-Components.With this approach, the information from the Signals Web SDK is obtained automatically. However, for the Signals Mobile SDK, you must implement the steps in the SDK documentation manually.
The
skriskcomponent must be added to the following:-
The first HTTP connector with a Custom HTML Template in your flow that requires user interaction.
-
Any subsequent HTTP connectors with a Custom HTML Template in the flow, including subflows called by a parent flow.
For example, you can create a subflow that performs the risk evaluation within a parent flow. In this case, add the
skriskcomponent to relevant HTTP connectors in the parent flow that call this subflow.You can find subflow templates in the Integration Directory, such as Login with Self-Service Journey, PingOne Sign On and Password Reset, and User Registration Journey. Learn more in Using PingOne DaVinci flow templates.
Adding the
skriskcomponent to multiple connectors in a flow allows the SDK to collect additional data throughout the flow and improves bot detection.-
Add an HTTP connector with the Custom HTML Template capability to your flow.
-
On the General tab, in the HTML Template field, click {}, click SK-Component, and then select skrisk in the list.
The skrisk component should always be at the beginning of the HTML template. Make sure that all HTML tags you add appear below the skrisk component in the HTML Template field.
-
Double-click the skrisk component that you added to open its properties.
-
Enter the Environment ID for your PingOne environment.
-
The Collect behavior data setting collects device and user behavioral data. By default, Collect behavioral data is set to
True.Set Collect behavior data to
Falseif this connector doesn’t require interaction from the user. -
(Optional) Change the default Risk Property Name as needed.
-
If you want the device data in the SDK payload to be provided as a signed JSON Web Token (JWT), set Enable Universal Device Identification to
True. -
Click Save.
-
On the General tab of the HTTP connector, scroll down to the Output Fields List and add a field to represent the output provided by the
skriskcomponent.-
For Property Name, enter the same name that you used for Risk Property Name. In the PingOne Protect connector, you’ll select this property name as one of the inputs.
-
Add a Display Name.
-
Click Apply.
-
-
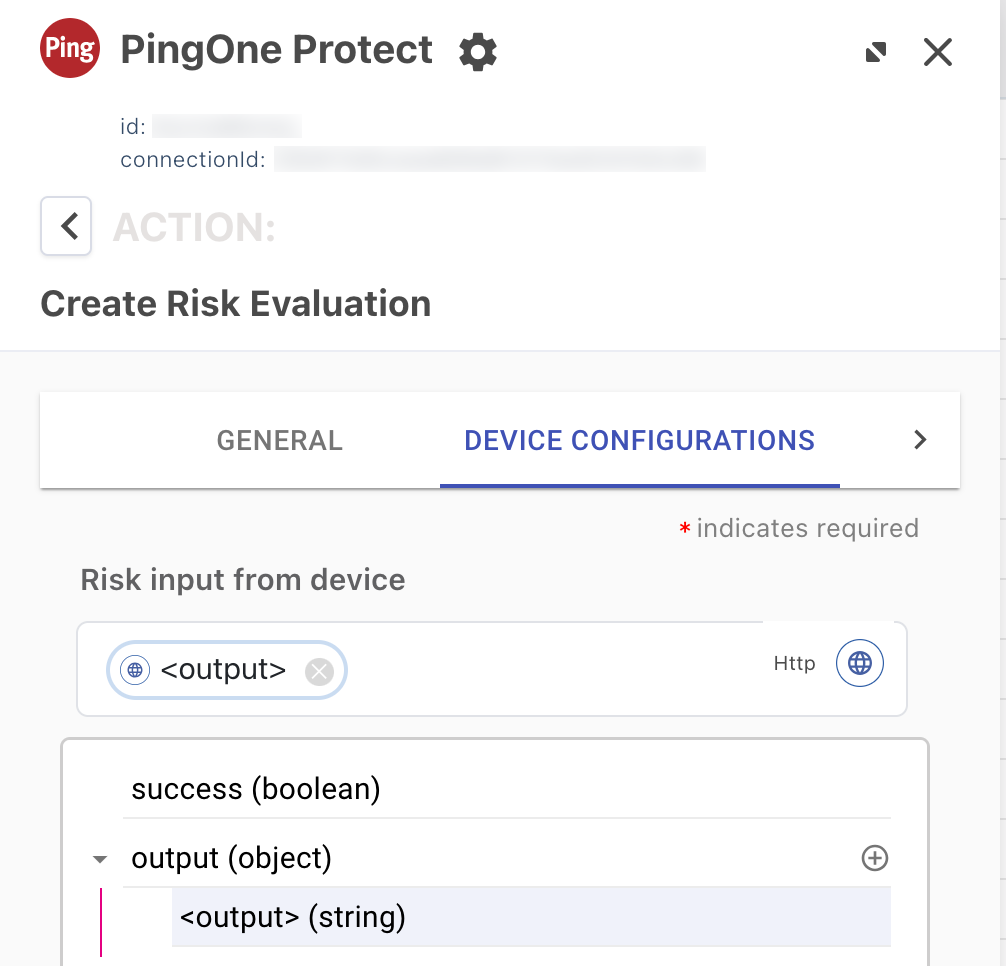
Click the PingOne Protect connector with the Create Risk Evaluation capability in your flow.
-
On the Device Configurations tab, configure Risk input from device as follows:
-
Click {}.
-
Click to enable the Show all nodes toggle.
-
Select the HTTP connector in the list.
-
Under output, select the name that you provided previously for the output of the
skriskcomponent.In the following image, <output> represents the output from step 9.
-
You can enable device profiling to collect device information and user data from user interactions with PingOne Forms connectors in your flow. Learn more in Forms.
Enable device profiling in any user-facing forms as follows:
-
The first PingOne Forms connector in your flow
-
Any subsequent PingOne Forms connectors in the flow, including any in a subflow or parent flow
To enable device profiling in a PingOne Forms connector:
-
Add a PingOne Forms connector to your flow.
-
On the General tab, click the Enable Device Profiling toggle to enable the SDK to collect device information from user interactions with the form.
-
(Optional) Click the Include Behavioral Data toggle to identify non-human activity through behavioral data collection.
To enable Include Behavioral Data, you must first turn on Enable Device Profiling.
-
If you want the device data in the SDK payload to be provided as a signed JWT, set Enable Universal Device Identification to
True. -
Click Apply.
-
Update Risk Evaluation
Update an existing risk evaluation to include the flow completion status for the risk evaluation. Updating the completion status allows PingOne Protect to refine and improve the accuracy of future risk evaluations. Always include a PingOne Protect connector with the Update Risk Evaluation capability in your flows to allow PingOne Protect to learn over time. The Update Risk Evaluation event includes one of the following flow completion statuses for the risk evaluation:
-
SUCCESSwhen the user was granted access or passed the MFA challengeOnly events with
completionStatus=SUCCESSallow the predictors to learn. -
FAILEDwhen the user was denied access or failed the MFA challengeIf a user is unable to successfully complete an event, such as if their authentication failed, the risk evaluation for the event is updated as
completionStatus=FAILED.
|
If |
Steps
-
Add a PingOne Protect connector with the Update Risk Evaluation capability in your flow at the end of each possible path.
-
Update the risk evaluation completion status for
SUCCESSandFAILEDevents.Learn more in Updating completion status for risk evaluations.
Capabilities
Create Risk Evaluation
Evaluate risk for a specific transaction. Risk results are based on predictors like user behavior anomalies, IP reputation analysis, Geo velocity and other risk models.
Show details
-
Properties
-
Input Schema
-
Output Schema
- User ID textField
-
The ID of the user whose risk is being evaluated.
- User Name textField
-
The username of the user whose risk is being evaluated.
- User Type dropDown
-
Indicates whether the user exists in the PingOne directory or in an external directory.
-
EXTERNAL (Default)
-
PING_ONE
-
- User Groups textField
-
User groups names.
- Password textField
-
The password entered by the user.
- Password Hash Algorithm dropDown
-
Password hashing method.
-
SHA_256 (Default)
-
SHA_384
-
- IP textField
-
The IP address of the user who initiated the flow.
- Application ID textField
-
The ID for the application or resource the user wants to access.
- Application Name textField
-
The name of the application or resource the user wants to access.
- Flow Type textField
-
The type of flow in which risk is evaluated.
Default:
AUTHENTICATION - Flow Subtype textField
-
The subtype of the flow.
- Session ID textField
-
The unique session ID associated with the event.
- Risk input from device textField
- User Agent textField
-
The user agent of the browser/device that triggered the flow.
- Cookie textField
-
The cookie of the browser/device that triggered the flow.
- External ID textField
-
A unique device identifier generated and managed independently of the Signals SDK (SKrisk).
- Risk Policy ID textField
-
The risk policy set used during risk evaluation.
- Custom Attributes textField
-
Your Custom Atributes defined at Ping.
-
default object
-
properties object
-
clientId string required minLength: 0 maxLength: 100
Client ID
-
clientSecret string required minLength: 0 maxLength: 100
Client Secret
-
envId string required
-
userId string minLength: 0 maxLength: 100
User ID
-
userName string minLength: 0 maxLength: 100
User Name
-
userType string minLength: 0 maxLength: 100
User Type
-
userGroups string minLength: 0 maxLength: 100
User Groups
-
password string
Password
-
passwordAlgorithm string
Password Hash Algorithm
-
ipAddress string minLength: 0 maxLength: 100
IP Address
-
completionStatus string minLength: 0 maxLength: 50
Completion Status
-
targetResourceId string minLength: 0 maxLength: 100
Target Resource ID
-
targetResourceName string minLength: 0 maxLength: 100
Target Resource Name
-
flowType string minLength: 0 maxLength: 50
Flow Type
-
subtype string minLength: 0 maxLength: 50
Flow Subtype
-
sessionId string
-
sharingType string minLength: 0 maxLength: 100
Sharing Type
-
userAgent string minLength: 0 maxLength: 8190
User Agent
-
targetedPolicy boolean
Targeted Policies Evaluation
-
riskPolicySetId string
-
customAttributes string
-
skRiskFP string
-
cookie string
-
externalId string
-
-
-
output object
-
rawResponse object
-
id string
-
environment object
-
id string
-
-
createdAt string
-
updatedAt string
-
event object
-
completionStatus string
-
targetResource object
-
id string
-
name string
-
-
ip string
-
flow object
-
type string
-
subtype string
-
-
session object
-
id string
-
-
user object
-
id string
-
name string
-
type string
-
groups array
-
-
sharingType string
-
browser object
-
userAgent string
-
cookie string
-
-
origin string
-
device object
-
externalId string
-
-
-
riskPolicySet object
-
id string
-
name string
-
-
result object
-
level string
-
type string
-
score number
-
source string
-
recommendedAction string
-
mitigations array
-
-
details object
-
anonymousNetworkDetected boolean
-
country string
-
impossibleTravel boolean
-
ipAddressReputation object
-
level string
-
score integer
-
type string
-
domain object
-
asn integer
-
sld string
-
tld string
-
organization string
-
isp string
-
-
-
ipRisk object
-
level string
-
reason string
-
type string
-
-
ipVelocityByUser object
-
level string
-
reason string
-
type string
-
threshold object
-
high integer
-
medium integer
-
source string
-
calculatedAt string
-
expiresAt string
-
-
velocity object
-
distinctCount integer
-
during integer
-
-
-
userVelocityByIp object
-
level string
-
reason string
-
type string
-
threshold object
-
high integer
-
medium integer
-
source string
-
calculatedAt string
-
expiresAt string
-
-
velocity object
-
distinctCount integer
-
during integer
-
-
-
estimatedSpeed number
-
estimatedDistance number
-
state string
-
city string
-
longitude number
-
latitude number
-
device object
-
browser object
-
name string
-
-
os object
-
name string
-
-
id string
-
externalId string
-
estimatedDistance number
-
lastSeen string
-
externalLastSeen string
-
agent object
-
name string
-
locale string
-
version string
-
macAddress array
-
loggedInUser object
-
domainName string
-
objectSid string
-
name string
-
-
customScript object
-
exitCode integer
-
output string
-
-
os object
-
name string
-
version string
-
-
-
-
previousSuccessfulTransaction object
-
anonymousNetworkDetected boolean
-
country string
-
state string
-
city string
-
ip string
-
timestamp string
-
-
userBasedRiskBehavior object
-
level string
-
reason string
-
type string
-
-
userRiskBehavior object
-
level string
-
reason string
-
type string
-
-
geoVelocity object
-
level string
-
reason string
-
type string
-
-
anonymousNetwork object
-
level string
-
reason string
-
type string
-
-
userLocationAnomaly object
-
level string
-
reason string
-
type string
-
status string
-
-
botDetection object
-
level string
-
reason string
-
type string
-
detected object
-
rule object
-
id integer
-
-
-
-
suspiciousDevice object
-
level string
-
reason string
-
type string
-
detected object
-
rule object
-
id integer
-
-
-
-
newDevice object
-
level string
-
reason string
-
status string
-
type string
-
-
trustedDevice object
-
level string
-
reason string
-
type string
-
status string
-
-
trafficAnomaly object
-
reason string
-
level string
-
type string
-
detected object
-
rule object
-
id integer
-
-
threshold object
-
high integer
-
medium integer
-
-
velocity object
-
distinctCount integer
-
during integer
-
-
-
-
-
-
Output Example
{
  "rawResponse": {
    "id": "57f879e5-752e-47f2-a230-0afb07ad95ef",
    "environment": {
      "id": "9ad15e9e-3ac6-43f7-a053-d46b87d6c4a7"
    },
    "createdAt": "2020-10-21T17:48:35.474Z",
    "updatedAt": "2020-10-21T17:48:35.474Z",
    "event": {
      "completionStatus": "SUCCESS",
      "targetResource": {
        "id": "969e4a59-5cf9-44c3-a1ba-9f392bf7f622",
        "name": "Jira"
      },
      "ip": "47.153.27.192",
      "flow": {
        "type": "AUTHENTICATION",
        "subtype": null
      },
      "session": {
        "id": "31618b01-08cd-4bee-b0d3-90b895671bb4"
      },
      "user": {
        "id": "john",
        "name": "John DeMock",
        "type": "EXTERNAL",
        "groups": [
          {
            "name": "dev"
          },
          {
            "name": "sre"
          }
        ]
      },
      "sharingType": "SHARED",
      "browser": {
        "userAgent": "Mozilla/5.0 (Macintosh; Intel Mac OS X 10_14_6) AppleWebKit/537.36 (KHTML, like Gecko) Chrome/80.0.3987.122 Safari/537.36",
        "cookie": "f5c107c5-7c42-4937-807d-589b6a77a630"
      },
      "device": {
        "externalId": "Id-5dfb66d3-f6cb-4156-b330-bdebe1337h9d"
      },
      "origin": "P1_ORCHESTRATION"
    },
    "riskPolicySet": {
      "id": "9d369d4a-f1d5-0f31-12ac-62d9e01ac852",
      "name": "Default Risk Policy Set"
    },
    "result": {
      "level": "LOW",
      "type": "VALUE",
      "score": 50,
      "source": "OVERRIDE",
      "recommendedAction": "BOT_MITIGATION",
      "mitigations": [
        {
          "action": "APPROVE"
        },
        {
          "action": "DENY"
        },
        {
          "action": "DENY_AND_SUSPEND"
        },
        {
          "action": "MFA",
          "mfaAuthenticationPolicyId": "4d13ad92-60c0-4654-bed2-4c5a8a200181",
          "mfaRegistrationPolicyId": "3cdd5ac2-3ec1-0e7b-0be9-4d266e0f63d7"
        },
        {
          "action": "VERIFY",
          "verifyPolicyId": "97ecbc7f-9803-4a8e-8a35-38eaced41fa0"
        },
        {
          "action": "CUSTOM",
          "customAction": "STEP-UP REQUIRED"
        }
      ]
    },
    "details": {
      "ipAddressReputation": {
        "score": 0,
        "domain": {
          "asn": 5650,
          "sld": "",
          "tld": "",
          "organization": "frontier communications",
          "isp": "frontier communications of america  inc."
        },
        "level": "LOW"
      },
      "estimatedSpeed": 0,
      "anonymousNetworkDetected": false,
      "country": "united states",
      "previousSuccessfulTransaction": {
        "ip": "47.153.27.192",
        "timestamp": "2023-02-26T15:42:16.711Z",
        "anonymousNetworkDetected": false,
        "country": "united states",
        "state": "california",
        "city": "torrance"
      },
      "device": {
        "id": "Id-5dfb66d3-f6cb-4156-b330-bdebe1448f8c",
        "externalId": "Id-5dfb66d3-f6cb-4156-b330-bdebe1337h9d",
        "estimatedDistance": 0,
        "os": {
          "name": "Windows"
        },
        "browser": {
          "name": "Chrome"
        },
        "lastSeen": "2024-01-30T-13:58:24.650Z",
        "externalLastSeen": "2024-01-30T-13:58:24.650Z",
        "agent": {
          "customScript": {
            "exitCode": 5,
            "output": "this is the output of the script"
          },
          "loggedInUser": {
            "name": "username",
            "objectSid": "objectSid",
            "domainName": "domainName"
          },
          "macAddress": [
            "0a-23-3b-fa-34-bb",
            "3d-21-fb-12-8b-h5",
            "ak-le-12-07-88-25"
          ],
          "os": {
            "name": "macOS",
            "version": "14.6.1"
          },
          "name": "mac-ABCD",
          "id": "94970C21-D879-6ACD-E208-99C6ECF9D7EA",
          "locale": "en_US",
          "version": "1.0.0"
        }
      },
      "state": "california",
      "city": "torrance",
      "estimatedDistance": 0,
      "impossibleTravel": false,
      "ipVelocityByUser": {
        "level": "LOW",
        "threshold": {
          "source": "MIN_NOT_REACHED"
        },
        "velocity": {
          "distinctCount": 1,
          "during": 3600
        },
        "type": "VELOCITY"
      },
      "userLocationAnomaly": {
        "level": "LOW",
        "status": "KNOWN_LOCATION",
        "type": "USER_LOCATION_ANOMALY"
      },
      "userVelocityByIp": {
        "level": "LOW",
        "threshold": {
          "source": "MIN_NOT_REACHED"
        },
        "velocity": {
          "distinctCount": 1,
          "during": 3600
        },
        "type": "VELOCITY"
      },
      "geoVelocity": {
        "level": "LOW",
        "type": "GEO_VELOCITY"
      },
      "newDevice": {
        "level": "LOW",
        "reason": "This device has been used recently",
        "status": "KNOWN_DEVICE",
        "type": "DEVICE"
      },
      "trustedDevice": {
        "reason": "{pingid} Device trust verified successfully",
        "level": "LOW",
        "type": "DEVICE",
        "status": "TRUST_VERIFIED"
      },
      "botDetection": {
        "level": "MEDIUM",
        "type": "BOT",
        "reason": "Automation framework detected",
        "detected": {
          "rule": {
            "id": 620
          }
        }
      },
      "suspiciousDevice": {
        "level": "MEDIUM",
        "type": "DEVICE",
        "reason": "Timezone offset mismatch",
        "detected": {
          "rule": {
            "id": 557
          }
        }
      },
      "ipRisk": {
        "level": "LOW",
        "type": "IP_REPUTATION"
      },
      "userBasedRiskBehavior": {
        "level": "LOW",
        "reason": "NA",
        "type": "USER_RISK_BEHAVIOR"
      },
      "anonymousNetwork": {
        "level": "LOW",
        "type": "ANONYMOUS_NETWORK"
      },
      "trafficAnomaly": {
        "reason": "Number of unique users per device is above High threshold",
        "level": "HIGH",
        "type": "TRAFFIC_ANOMALY",
        "detected": {
          "rule": {
            "id": 803
          },
          "threshold": {
            "high": 4,
            "medium": 3
          },
          "velocity": {
            "distinctCount": 5,
            "during": 3600
          }
        }
      }
    }
  }
}
Update Risk Evaluation
Update an existing risk evaluation to refine future results.
Show details
-
Properties
-
Input Schema
-
Output Schema
- Risk Evaluation ID textField
-
ID of the Risk Evaluation
- Risk Evaluation status textField
-
status of the Risk Evaluation
-
default object
-
properties object
-
clientId string required minLength: 0 maxLength: 100
Client ID
-
clientSecret string required minLength: 0 maxLength: 100
Client Secret
-
envId string required
-
completionStatus string minLength: 0 maxLength: 50
Completion Status
-
riskId string required minLength: 0 maxLength: 100
Risk Evaluation ID
-
-
-
output object
-
rawResponse object
-
completionStatus string
-
ip string
-
flow object
-
type string
-
subtype string
-
-
session object
-
id string
-
-
user object
-
id string
-
name string
-
type string
-
groups array
-
-
sharingType string
-
origin string
-
-
Output Example
{
  "rawResponse": {
    "completionStatus": "SUCCESS",
    "targetResource": {
      "id": "969e4a59-5cf9-44c3-a1ba-9f392bf7f622",
      "name": "Jira"
    },
    "ip": "47.153.27.192",
    "flow": {
      "type": "AUTHENTICATION",
      "subtype": null
    },
    "session": {
      "id": "31618b01-08cd-4bee-b0d3-90b895671bb4"
    },
    "user": {
      "id": "john",
      "name": "John DeMock",
      "type": "EXTERNAL",
      "groups": [
        {
          "name": "dev"
        },
        {
          "name": "sre"
        }
      ]
    },
    "sharingType": "SHARED",
    "origin": "P1_ORCHESTRATION"
  }
}
Send Risk Evaluation Feedback
Submit feedback to help refine risk classification or clear a user’s risk status.
Show details
-
Properties
-
Input Schema
-
Output Schema
- Risk Evaluation ID textField required
-
The ID of the risk evaluation you are providing feedback on.
- Feedback Category dropDown required
-
The type of feedback to submit for the risk evaluation.
-
FALSE_HIGH_RISK
-
FRIENDLY_BOT
-
NEW_ACCOUNT_FRAUD
-
COMPROMISED_ACCOUNT
-
AUTOMATED_ATTACK
-
- Reason dropDown
-
Reason for FALSE_HIGH_RISK
-
OFFICE_NETWORK
-
COMPANY_VPN
-
WRONG_LOCATION
-
ORG_NETWORK
-
SUCCESSFUL_MFA
-
OTHER
-
- Reason dropDown
-
Reason for FRIENDLY_BOT
-
KNOWN_CRAWLER
-
KNOWN_AGGREGATOR
-
INTERNAL_AUTOMATION
-
OTHER
-
- Reason dropDown
-
Reason for NEW_ACCOUNT_FRAUD
-
SUSPICIOUS_EMAIL_ADDRESS
-
USERNAME_GUESSING
-
OTHER
-
- Reason dropDown
-
Reason for COMPROMISED_ACCOUNT
-
USER_CLAIMS_IT_IS_NOT_THEM
-
UNSUCCESSFUL_MFA
-
OTHER
-
- Reason dropDown
-
Reason for AUTOMATED_ATTACK
-
CREDENTIAL_STUFFING
-
PASSWORD_SPRAY
-
OTHER
-
-
default object
-
properties object
-
clientId string required minLength: 0 maxLength: 100
Client ID
-
riskEvaluationId string required
Risk Evaluation ID
-
feedbackCategory string required minLength: 0 maxLength: 100
Feedback Category
-
reason string minLength: 0 maxLength: 100
Reason for Feedback (optional)
-
-
-
output object
-
rawResponse object
-
status string
-
message string
-
-
Output Example
{
  "rawResponse": {
    "status": "SUCCESS",
    "message": "Feedback submitted successfully"
  }
}
Troubleshooting
To start troubleshooting issues with the PingOne Protect connector, try the following:
-
Test your implementation. Learn more in the PingOne Protect Integration Testing knowledgebase article.
-
For each connector in the flow, make sure you provided all required inputs.
-
For mobile applications, if you’re using the
skriskcomponent to include the data provided by the Signals (Protect) SDK, make sure that you followed the steps in the PingOne Protect Native SDKs documentation. -
To use the PingOne DaVinci Analytics feature to find where the flow stopped, open your flow and click Analytics in the lower-left corner of the flow editor. Learn more in Debugging and analytics.
-
Open your flow, click the More Options (⋮) icon, and click the Show Node ID toggle. This makes it easier to identify the source of inputs and outputs.